This peach pie with canned peaches is the easy dessert to make when you want all the cozy flavor of homemade peach pie without the extra work. The filling is sweet, perfectly spiced, and full of peach flavor, and the crust bakes up flaky, crisp, and golden. Best of all, you can make it any time of year, no fresh peaches needed.
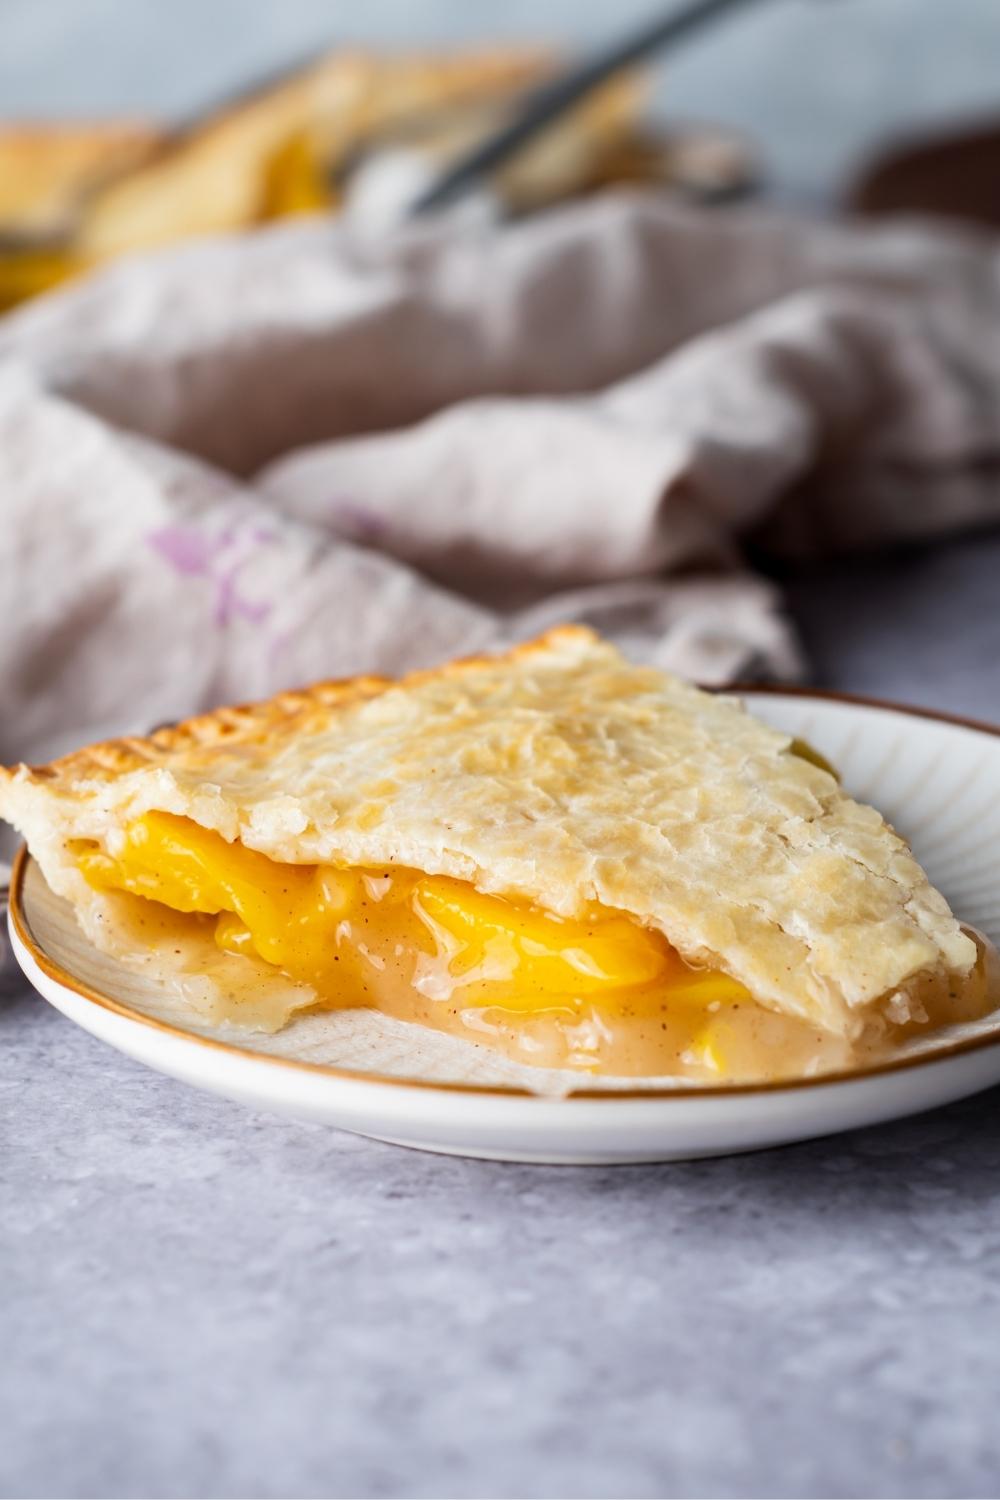
Table of Contents
Why This is The Best Canned Peach Pie
This easy recipe is a quick way to make a classic peach pie in half the time. You'll use canned peaches and warm spices to make a delicious peach pie filling on top of a simple pre-made pie crust that flakes to perfection.
Honestly, it's one of the most delicious peach recipes you'll ever make! I'd put it right up there with my peach cobbler with canned peaches.
This recipe is ideal if you're looking for a switch-up from classic pies or just want an easy dessert to make with canned peaches during hectic hosting times.
Honestly, I think this easy peach pie recipe is perfect for Thanksgiving, the holiday season, or even during the summer when you're throwing a get-together. It's just great to make it any time of the year. It's a quick and easy dessert recipe that's bound to impress any guests who try it.
By the way, if you need another pie to serve alongside it for the ultimate dessert platter, this fudge pie is a great chocolatey balance to the fruity peach pie.

Ingredients
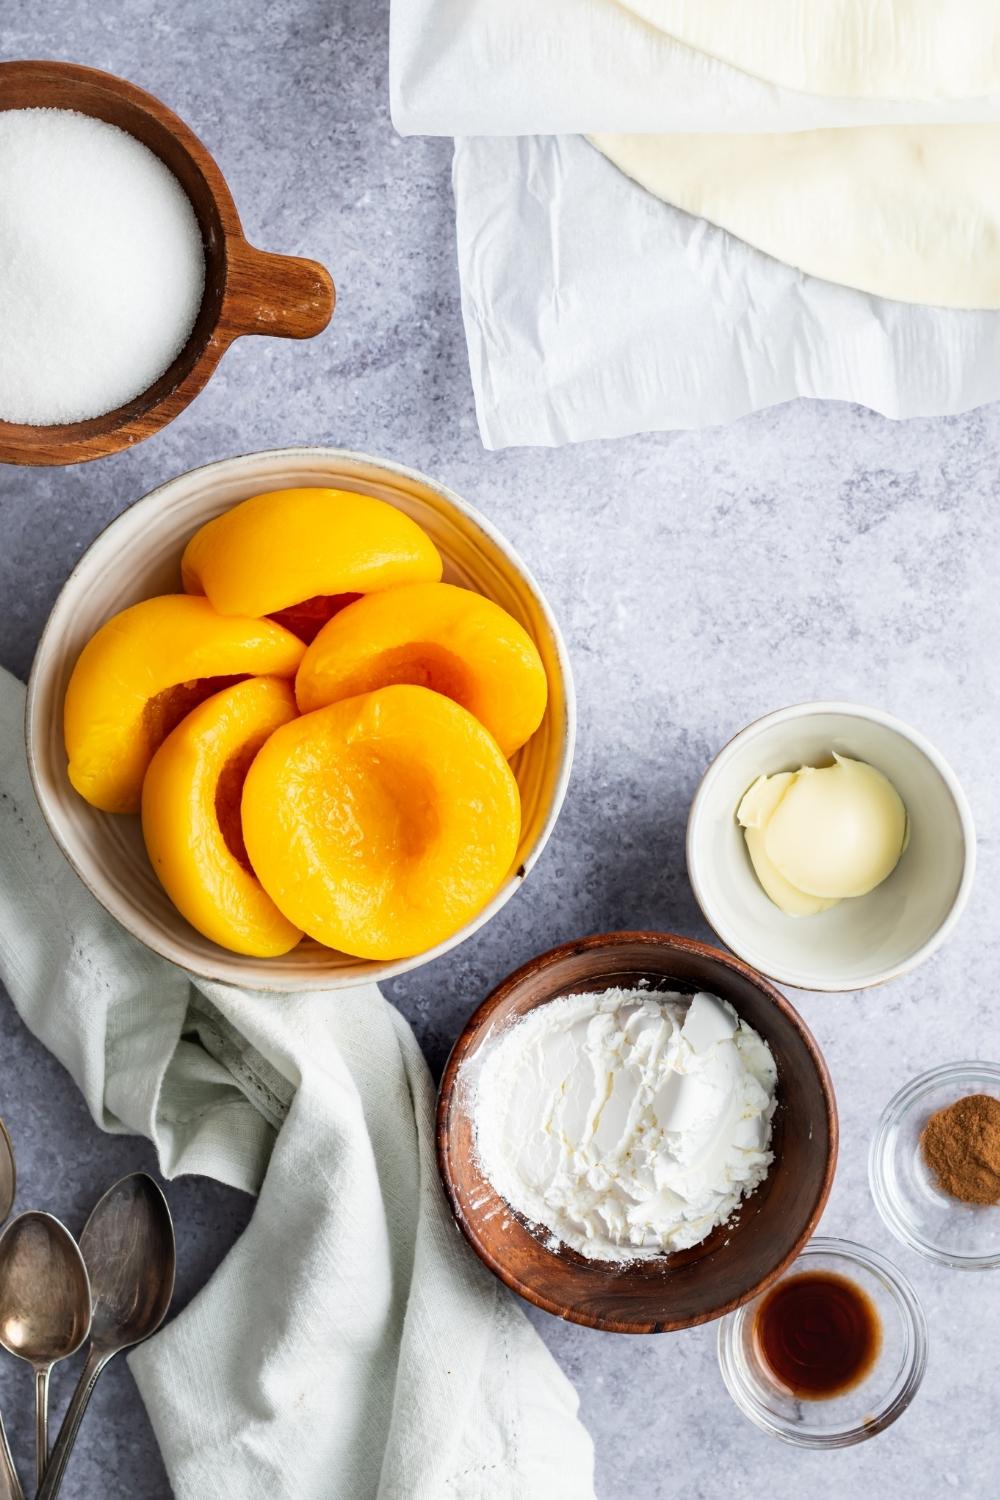
- 2 cans Peaches (15 oz. cans), sliced
- ¼ cup Sugar
- ⅓ cup Cornstarch
- 1 tsp. Vanilla Extract
- ¼ tsp. Ground Cinnamon
- 2 tbsp. Butter, melted
- 2 Pie Crusts
- 1 Egg, beaten
Oh, and if you love peach recipes, you have to pick up some extra peaches from the store so you can make this peach cobbler pound cake next! Or, if you want to get canned peaches, you can make this peach cobbler with cake mix.
How To Make Peach Pie with Canned Peaches

Step 1: Cook The Pie Filling
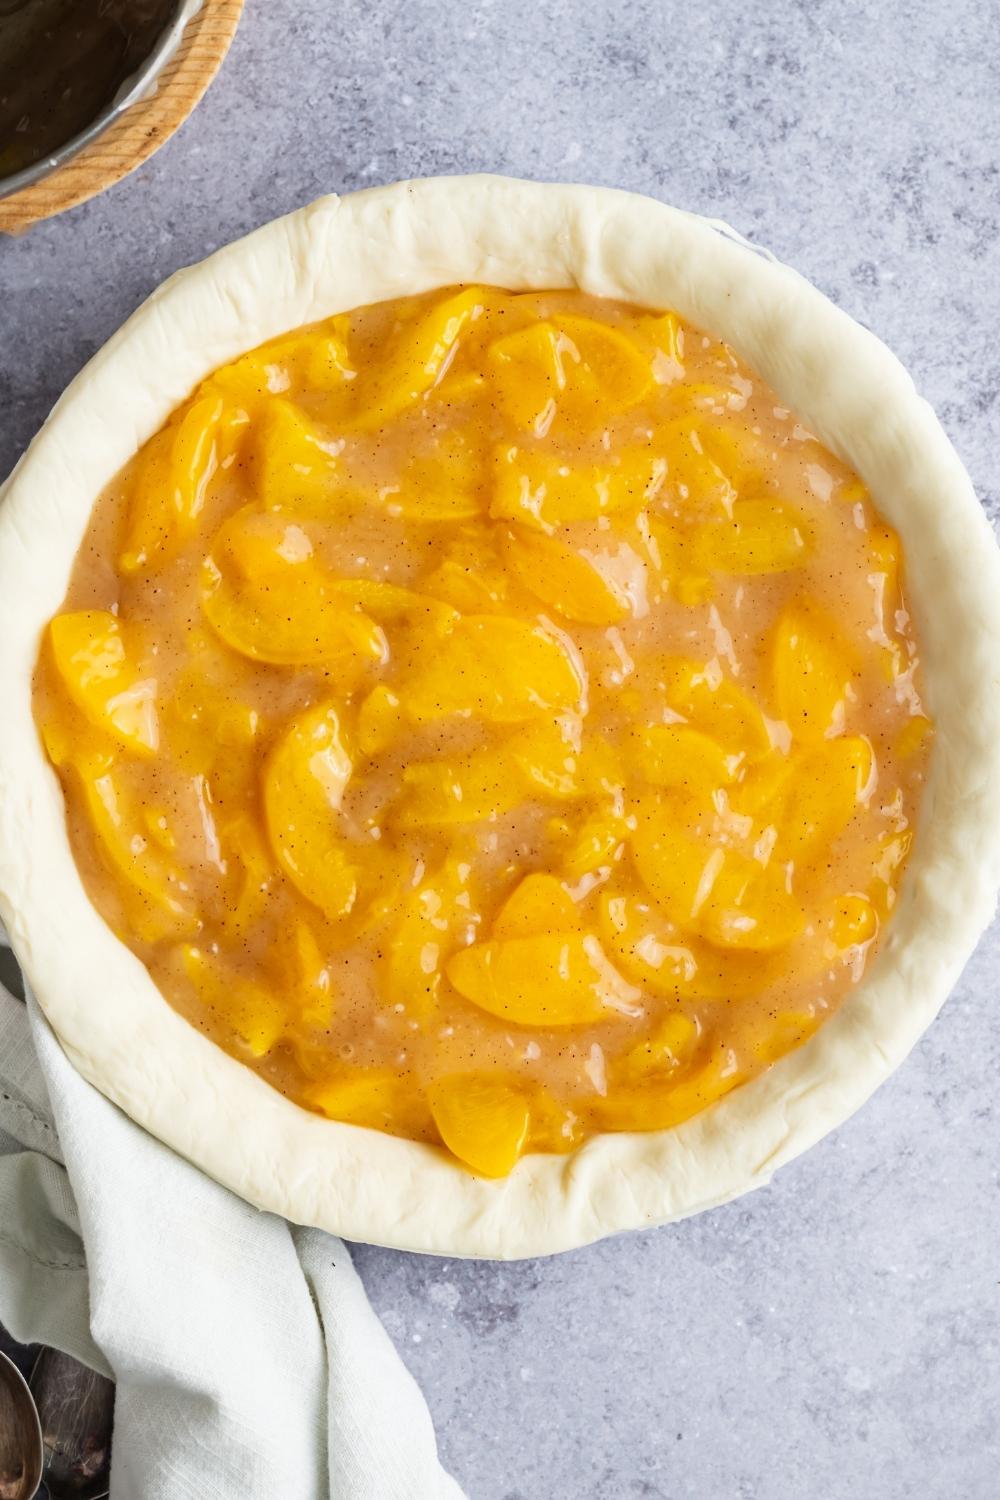
Preheat the oven to 350ºF (180°C). Drain the liquid of the peach cans - not the peaches - into a large pot and add the sugar, cornstarch, vanilla extract, ground cinnamon, and butter. Cook at low heat, stirring constantly. The peach mixture will form bumps at first, but keep stirring and cooking until it softens. Once the mixture is smooth, add the peaches to the pot and completely combine them with the rest of the mixture.
Step 2: Add The Filling
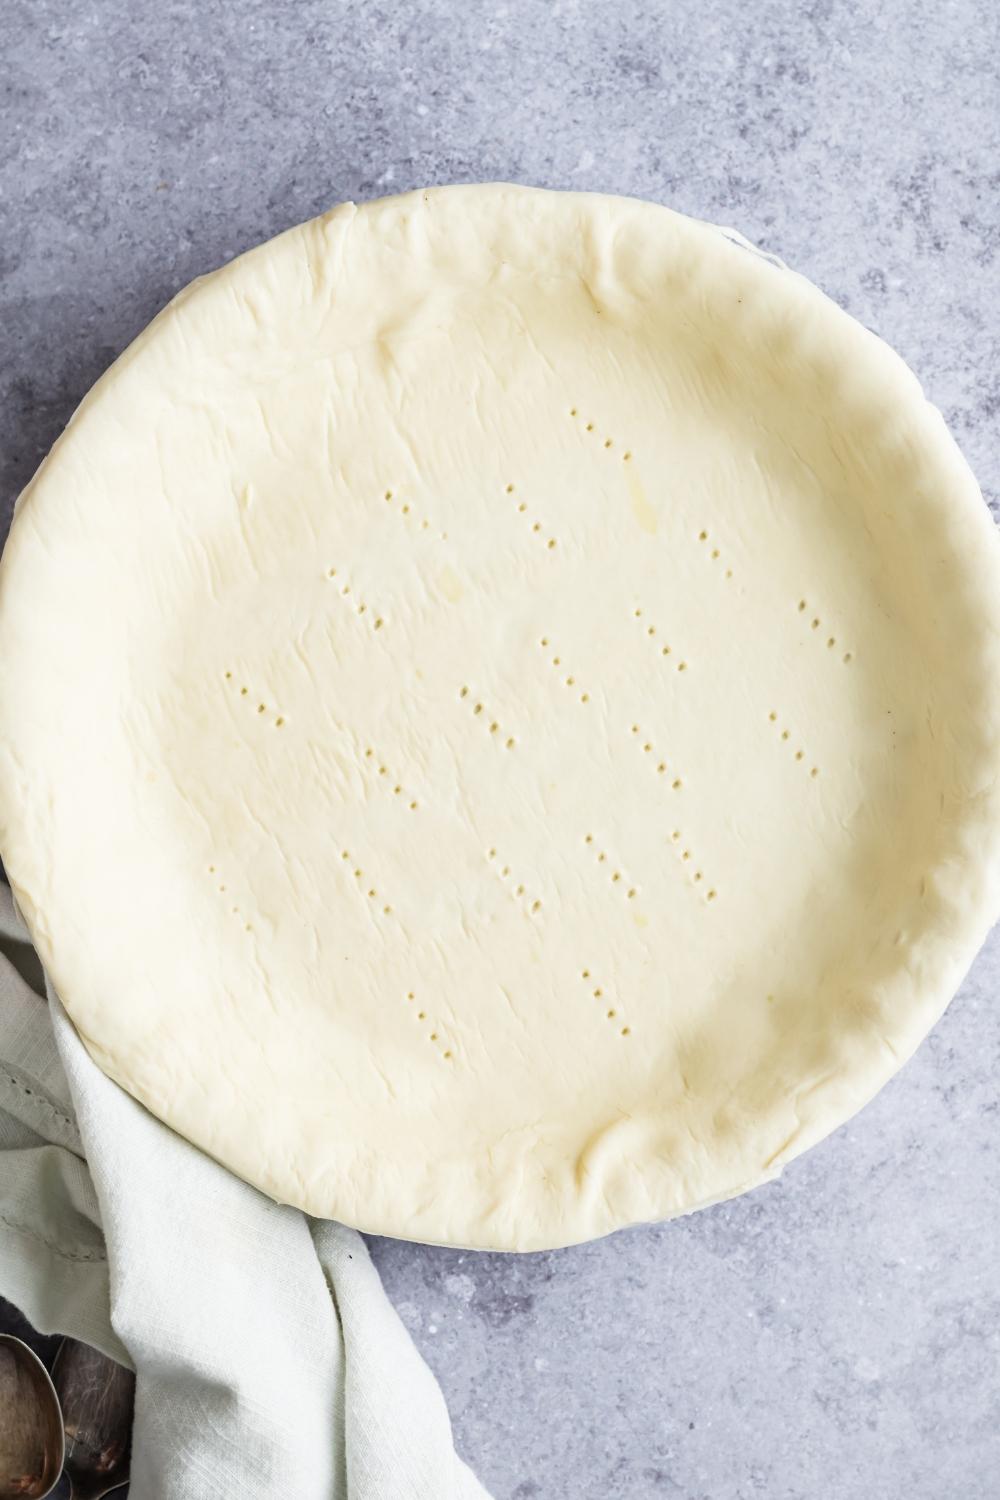
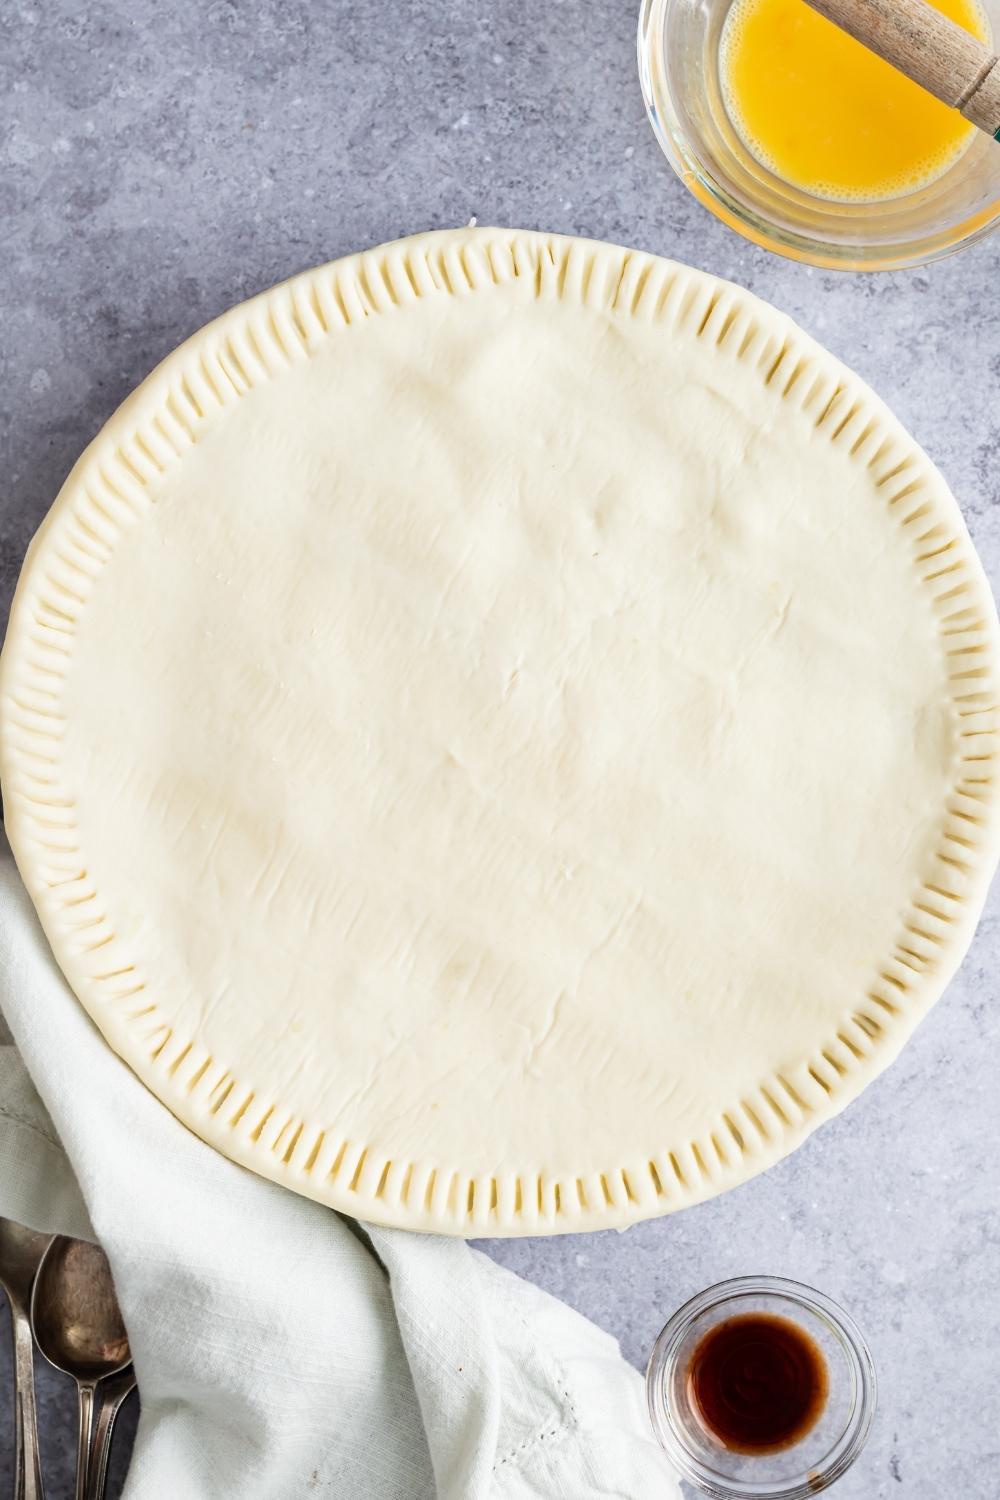
Grease a pie dish and spread one pie dough over the top of the pie dish. Pinch the crust around the rim with a fork. Add the fresh peach filling on top of the pie crust and lay the other pie dough sheet on top. Pinch the top pie dough around the rim with a fork and make a few holes on the top of the pie crust. This will allow the steam to escape when the pie is baking, and it'll keep your crust crisp.
Step 3: Bake The Pie
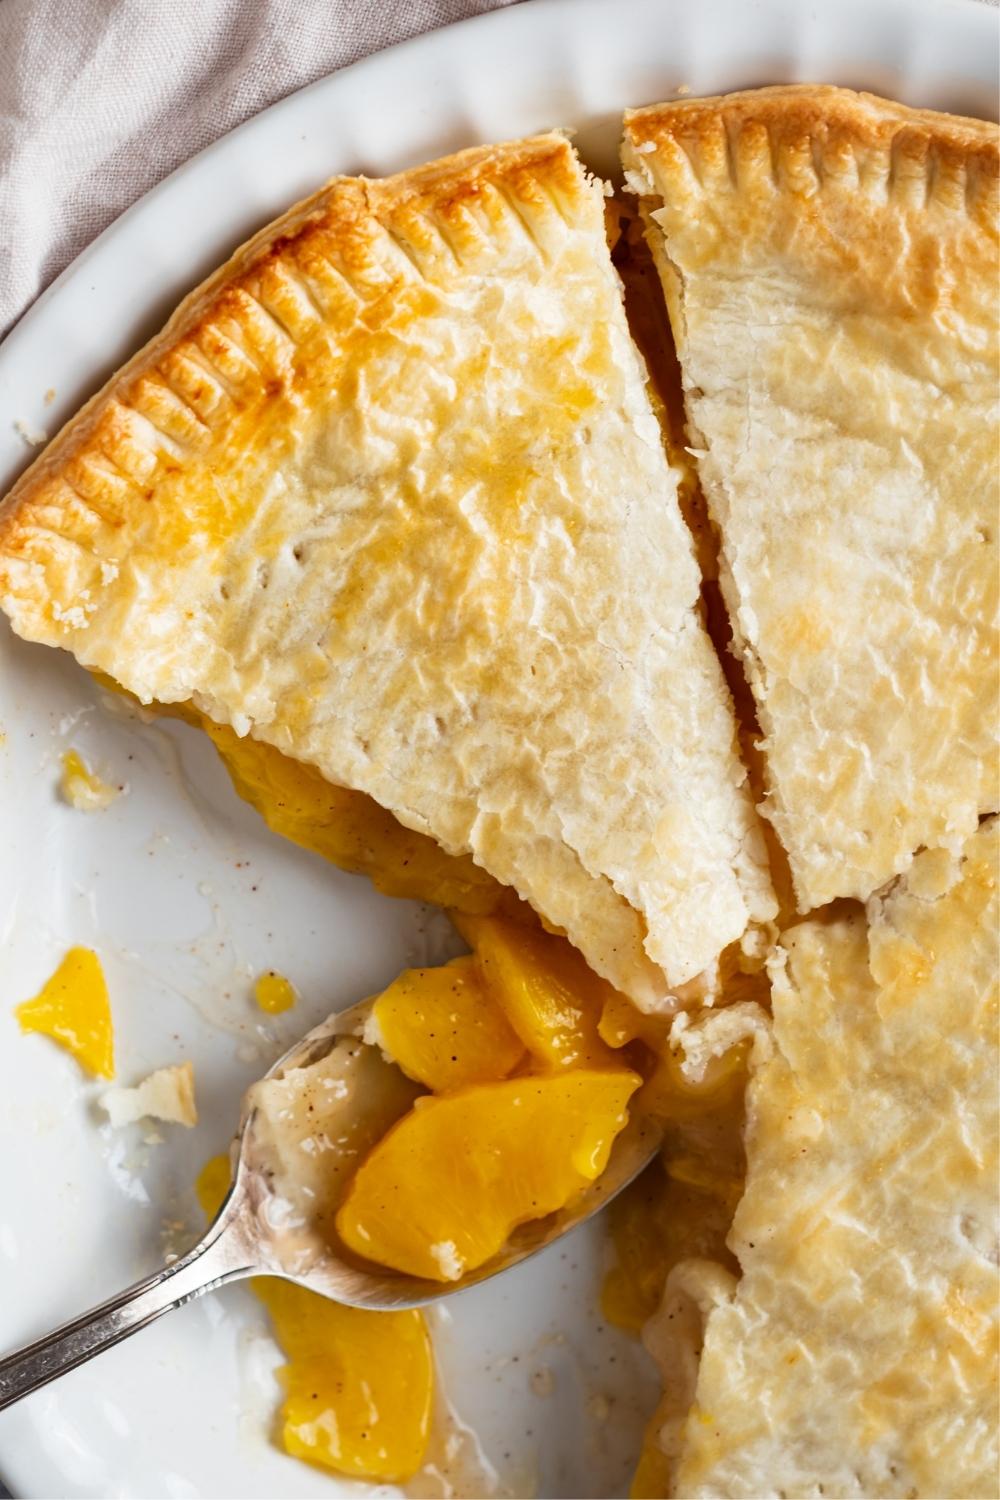
Brush the top pie crust with the beaten egg. Bake for 40-50 minutes or until the crust looks golden brown. Once it's golden, take the pie out and put it on a wire rack to let the pie cool completely. Slice and serve with vanilla ice cream or whipped cream and enjoy!
Expert Tips For Perfect Peach Pie with Canned Peaches
- Use canned peaches in juice or light syrup for the best flavor and texture, and make sure to drain them well before adding them to the filling.
- Keep stirring the sauce even if it looks lumpy at first, because it will smooth out as it heats.
- Don’t skip cutting a few vents in the top crust, or the steam can build up and make the pie soggy.
- If the crust starts browning too quickly in the oven, loosely cover the top with foil for the rest of the bake time
- Let the pie cool before slicing so the filling has time to set and doesn’t run all over the plate.
Storage Instructions
So, as I mentioned, this recipe will make about 8 slices. And if you're serving it to a group of people, you probably won't have any pie left over. But if you do, the pie actually stores really well! You can put the slices in an airtight container or wrap the entire pie dish in plastic wrap and store it in the fridge for about 4-5 days. If you want to keep it for longer, you can transfer the pie to the freezer, and it will last for up to 6 months.
Canned Peach Pie FAQS
Can I use canned peaches for peach pie?
Yes, canned peaches work really well for peach pie and make the recipe a lot easier. Since the peaches are already soft and sweet, you can make a delicious peach pie any time of year without waiting for fresh peaches.
Do I need to drain the canned peaches first?
Yes, you’ll want to drain the peaches first, but save the liquid because that gets cooked with the sugar, cornstarch, vanilla, cinnamon, and butter to make the filling.
How do I know when the peach pie is done?
The pie is ready when the crust is golden brown, and the filling is bubbling slightly through the vents on top. That usually takes about 40 to 50 minutes.
Should I let peach pie cool before slicing?
Yes, it’s best to let the pie cool before slicing so the filling can set. If you cut into it too soon, the filling will be much runnier.
Can I make this peach pie ahead of time?
Yes, you can make it ahead of time and let it cool completely before covering it. It’s great served later the same day or the next day.
More Pie Recipes To Try Next
- No bake Oreo pie
- Coconut pie
- Sweet potato pie
- Reese's peanut butter pie
- Million dollar pie
- Mississippi mud pie
- Pumpkin custard pie
For more delicious recipes just like this one, be sure to check out our Instagram, TikTok, and Youtube.
Peach Pie with Canned Peaches

This peach pie with canned peaches is the easy dessert to make when you want all the cozy flavor of homemade peach pie without the extra work. The filling is sweet, perfectly spiced, and full of peach flavor, and the crust bakes up flaky, crisp, and golden. Best of all, you can make it any time of year, no fresh peaches needed.
Ingredients
- 2 cans Peaches (15 oz. cans), sliced
- ¼ cup Sugar
- ⅓ cup Cornstarch
- 1 tsp. Vanilla Extract
- ¼ tsp. Ground Cinnamon
- 2 tbsp. Butter, melted
- 2 Pie Crusts
- 1 Egg, beaten
Instructions
- Preheat the oven to 350°F (180ºC).
- Drain the liquid of the peach cans (not the peaches) into a pot and add sugar, cornstarch, vanilla extract, cinnamon, and butter.
- Cook at low heat, stirring constantly - it will form bumps at first, but keep stirring, and it will soften.
- Add the peaches from the can and combine them with the rest of the ingredients.
- Grease a pie mold, spread one crust over it, and press the edges with a fork.
- Add the filling and top, followed by the other pie crust, pinching it with a fork around the rim and making a few holes on the top, so the steam comes out.
- Brush the top of the crust with the egg and bake for 40-50 minutes, or until golden brown.
Nutrition Information:
Serving Size:
1 sliceAmount Per Serving: Calories: 331Total Fat: 19.1gSaturated Fat: 5.9gTrans Fat: 0gUnsaturated Fat: 0gCholesterol: 0mgSodium: 0mgCarbohydrates: 36.2gFiber: 1.5gSugar: 9.9gProtein: 4g
Margaret
I love peaches and this was wonderful.
Tina
🔥
Joan
Terrific is an understatement. My family loved this!!
Stormy
I haven’t made this yet but you’re the only person who has EXPLAINED EVERYTHING in detail!!! Thank you so much! I can’t wait to try this! 😁
Brendan Cunningham
Of course! We hope you like it!!
May T
This was super easy to make. Wanted to make pie & had 2 cans of peaches in the pantry—voila! I did add about 1/4 teaspoon salt to the mixture to offset the sugariness and it was perfect! Next time I’m adding blueberries! 🙂
Liz marcoot
Thank you for the simple instructions. My pie was beautiful. I did use a 28 oz can of peaches and an additional 15oz. Perfect !❤️❤️❤️
Brendan Cunningham
You're welcome! We're so glad you liked the pie 🙂
Sally
Quick, easy, and scrumptious!!