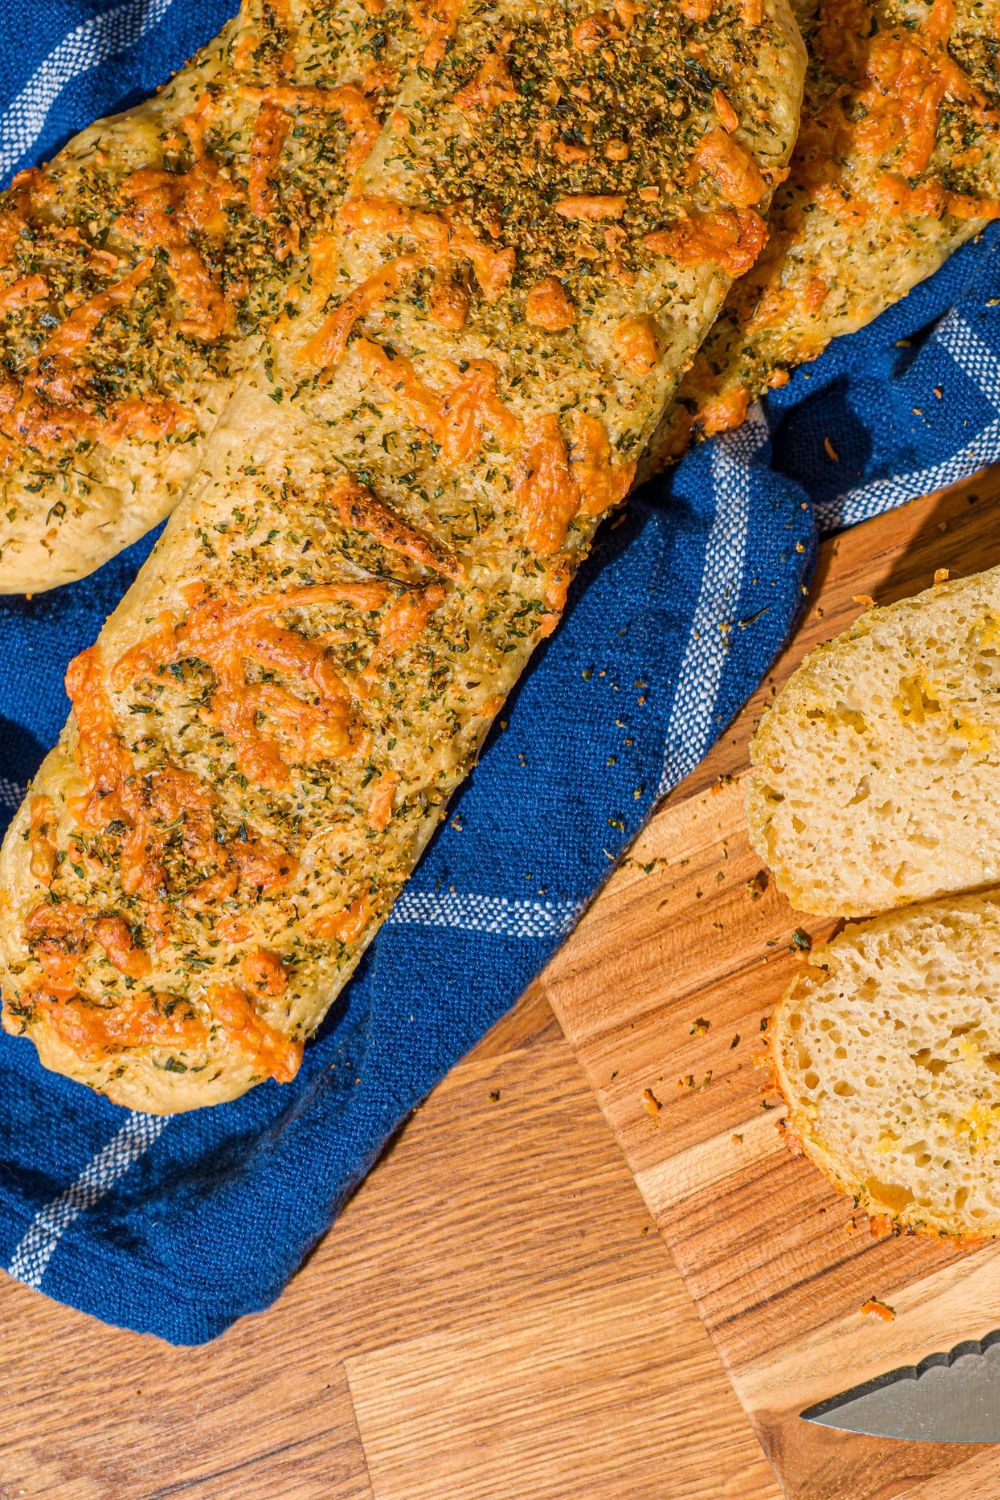
Subway's Italian herbs and cheese bread has always been my go-to order and after years of eating it I finally decided to figure out how to make it at home. Turns out it wasn't as complicated as I expected. This copycat is soft, chewy, and golden with garlic, oregano, parsley, parmesan, and cheddar baked right into the crust. Pull a loaf out of the oven and the smell alone is worth the effort. I'll be honest... it's better than Subway's.
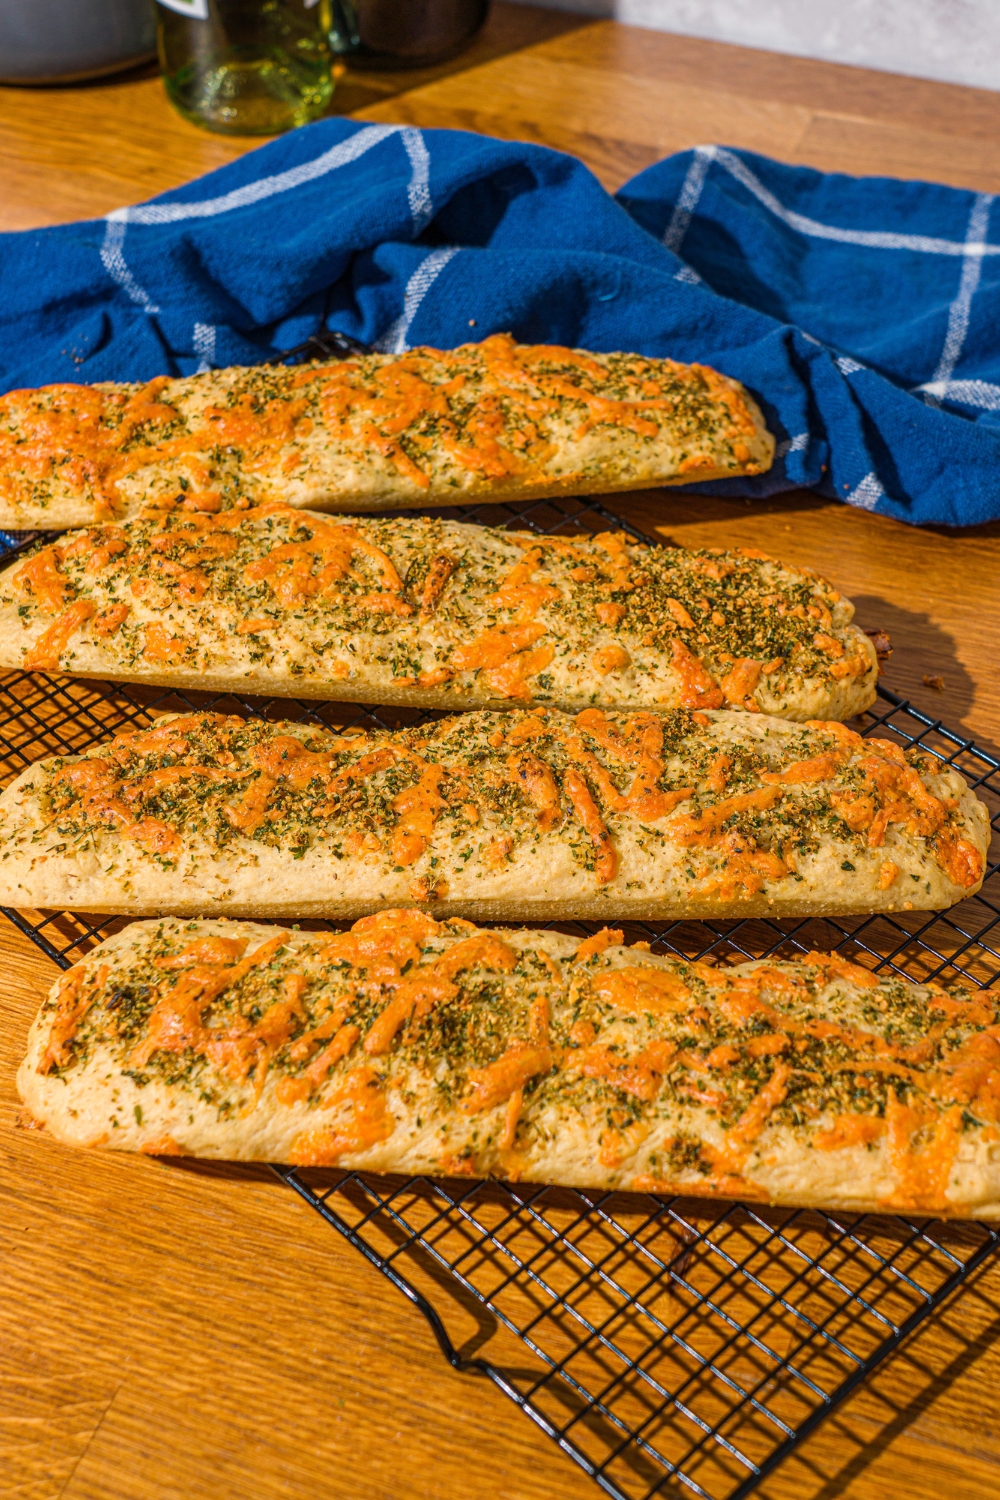
Table of Contents
Why This Subway Bread Copycat Actually Works
The stretch and fold method is what makes this recipe different from most homemade bread recipes and it's easier than it sounds. Instead of intensive kneading you fold the dough over itself several times during the first rise which builds the same gluten structure without the effort. The result is that soft, slightly chewy interior that holds up to any filling without getting soggy. Pretty much exactly what Subway's bread does well and what most homemade sandwich breads fail at.
Folding part of the herb and cheese mixture directly into the dough rather than just sprinkling it on top is the other thing that sets this recipe apart. The garlic, oregano, parsley, and parmesan work their way through the entire loaf so every single bite has that flavor, not just the bites where you hit the crust. The cheddar and parmesan blend baked onto the outside gets golden and slightly crispy in the oven in a way that's addictive.
Use these loaves for my viral chopped Italian sandwich or Subway tuna salad sandwich and you have a homemade sandwich spread that rivals any sandwich shop.

Ingredients
For the Dough:
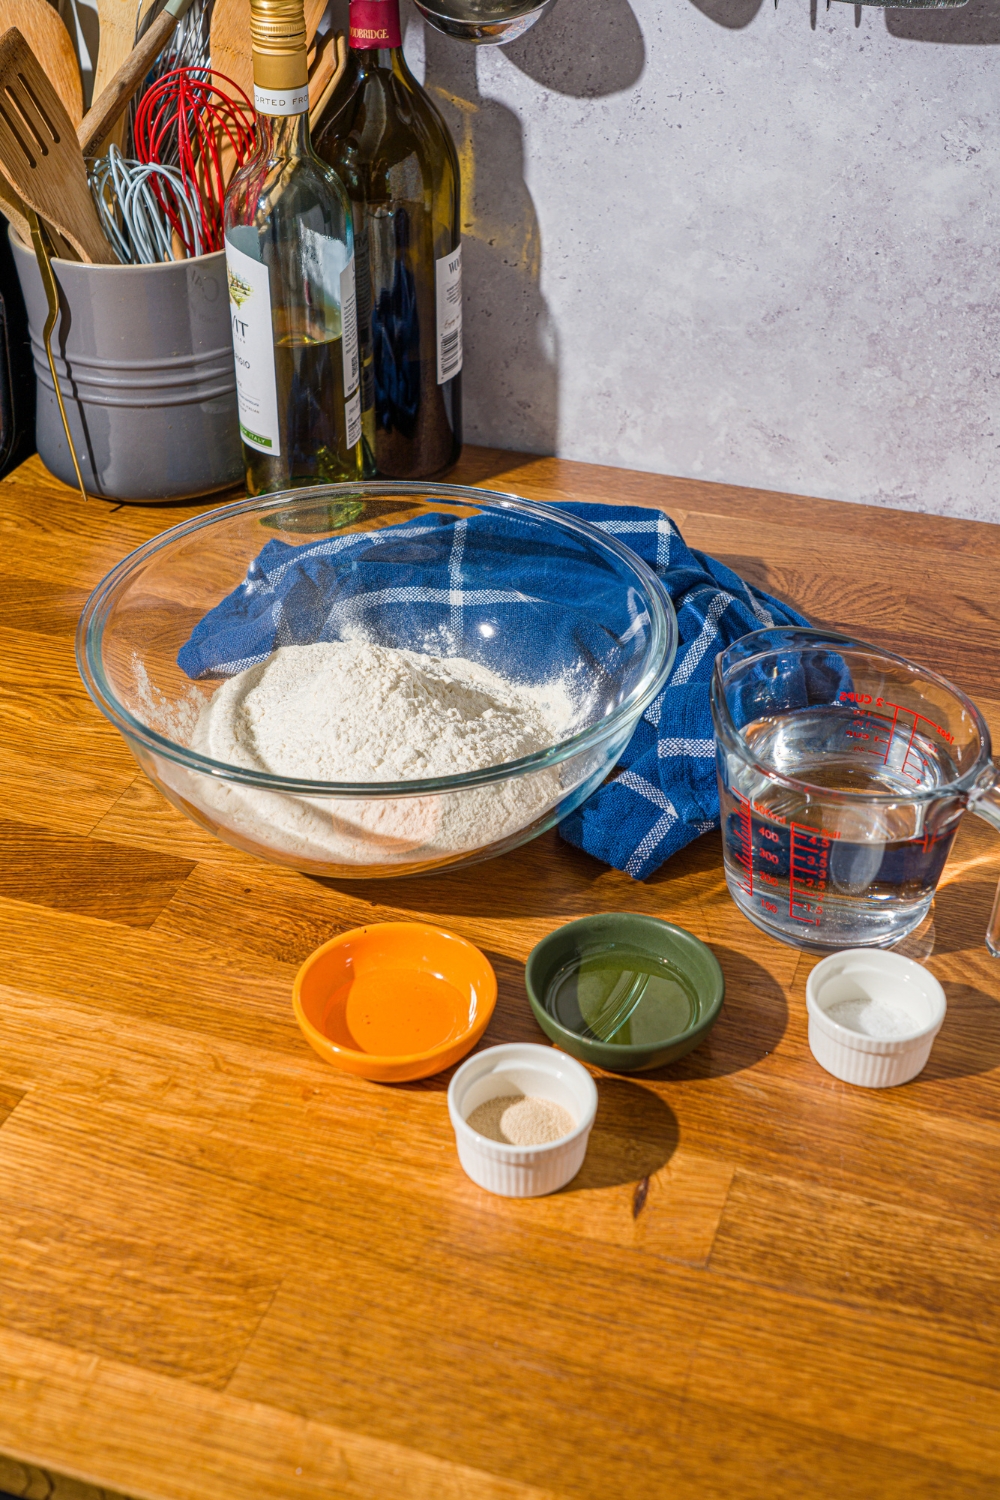
- 500g bread flour
- 400g warm water
- 1 tablespoon olive oil
- 6g instant yeast
- 1 teaspoon honey
- 10g salt
For the Herb and Cheese Mix:
- 1 tablespoon dry oregano
- 1 tablespoon dry parsley
- 1½ tablespoons granulated garlic
- ¼ cup parmesan cheese, grated
- ½ cup shredded cheddar cheese
How to Make Italian Herbs and Cheese Bread
Step 1: Mix the Dough
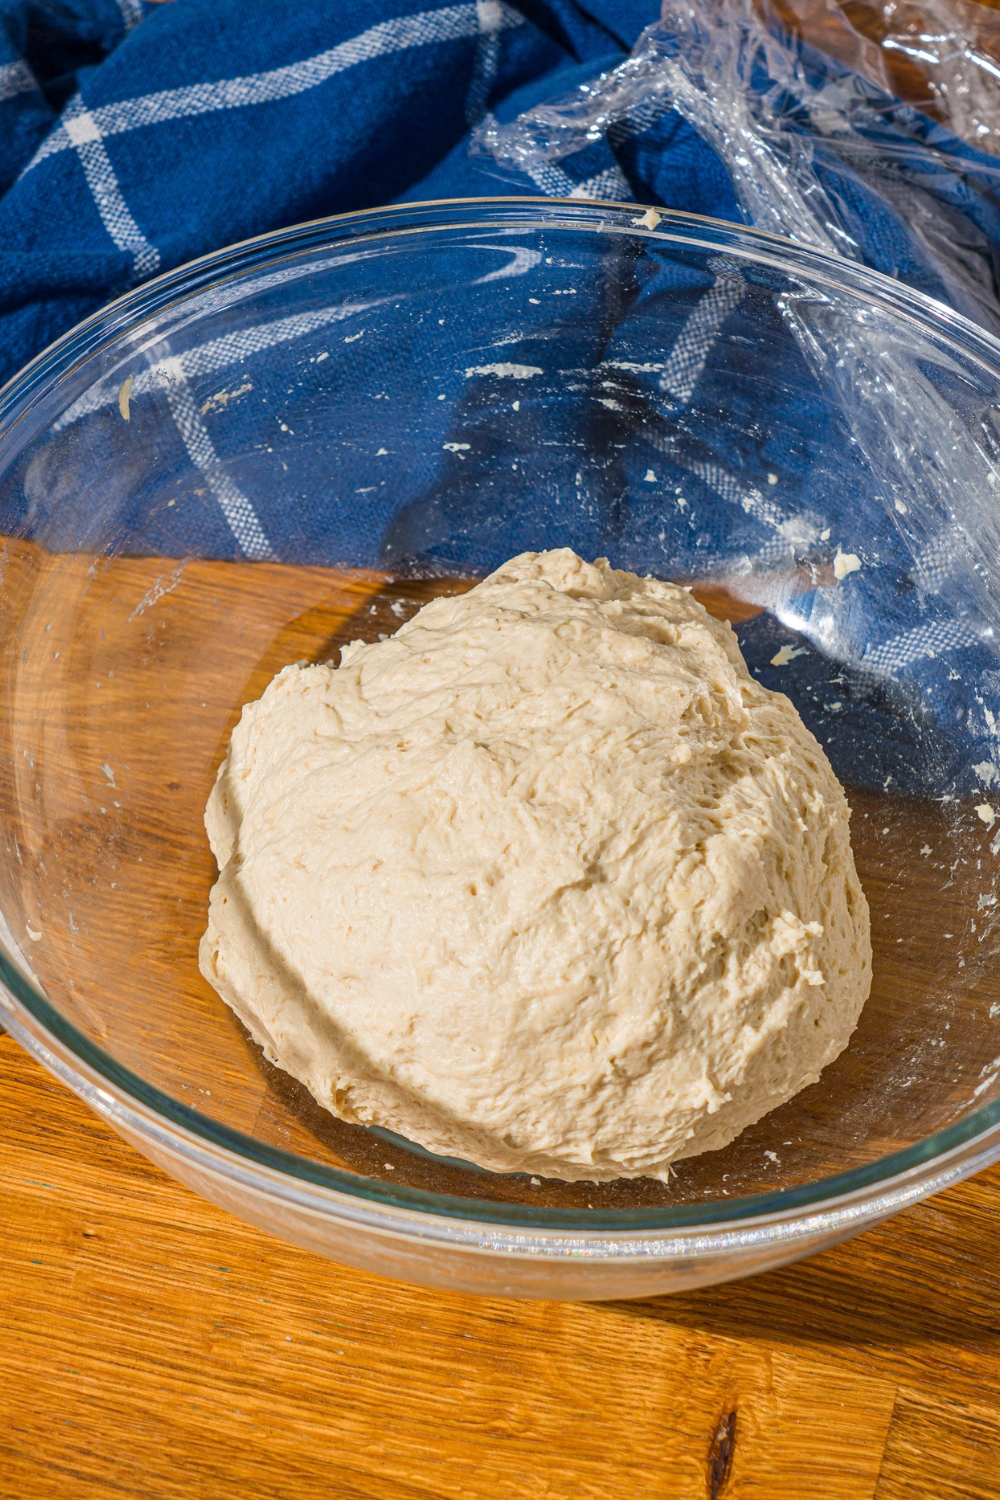
In a large bowl, whisk together the warm water, olive oil, honey, and instant yeast until combined. Add the bread flour and salt and stir together until just mixed. No dry flour should remain but don't overwork it at this stage. The dough will look shaggy and rough, which is exactly right.
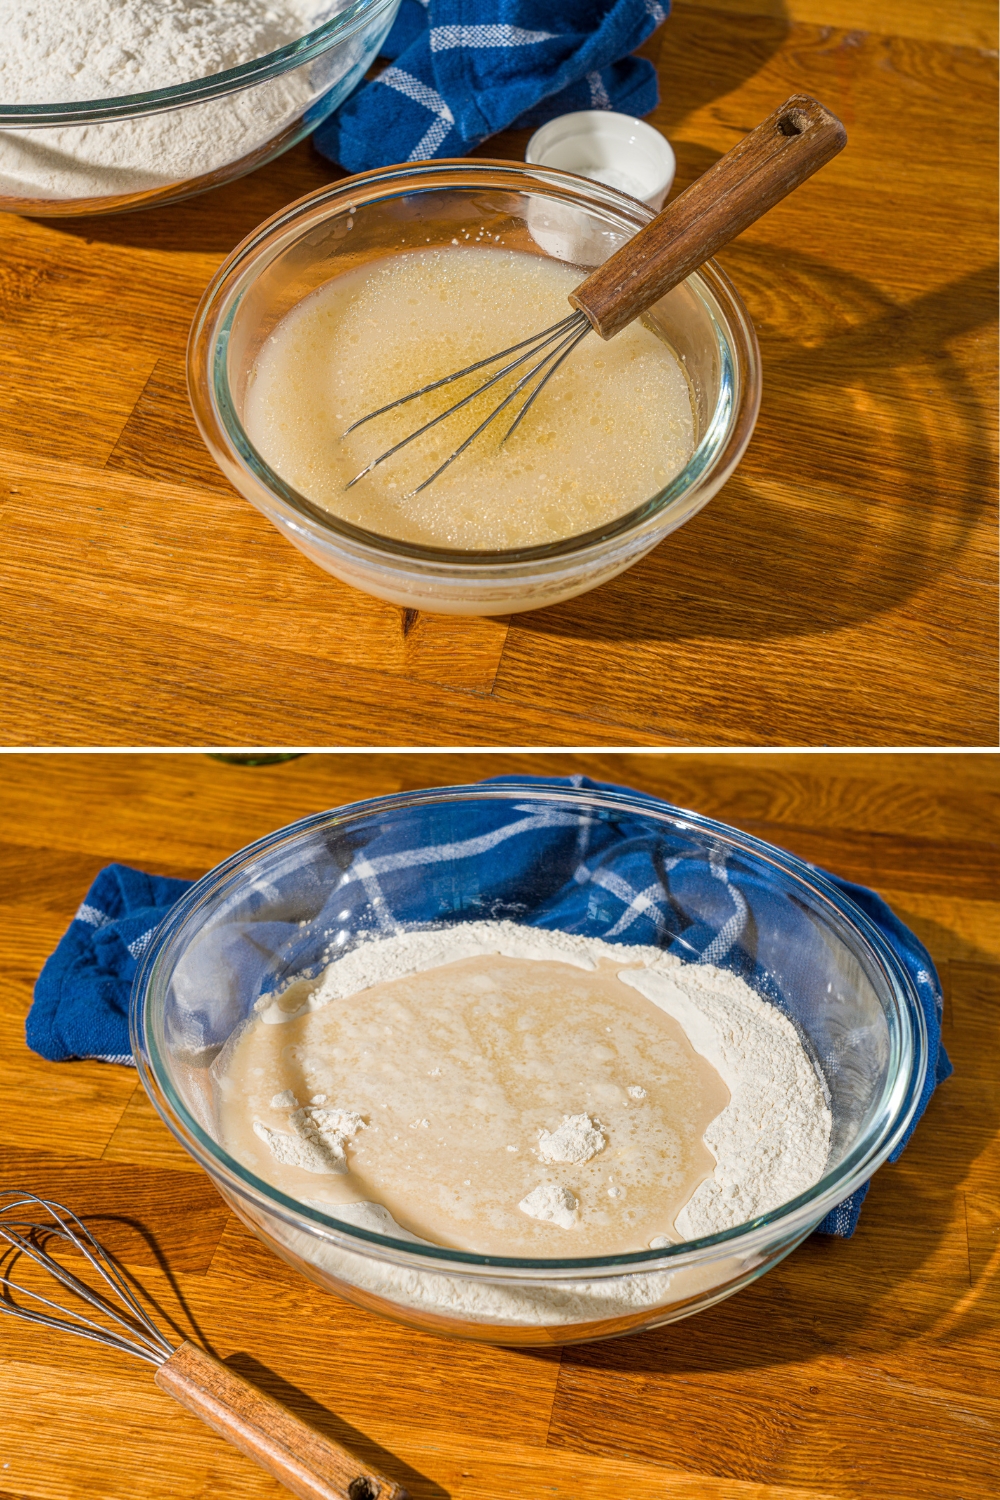
Cover the bowl with plastic wrap or a damp towel and let it rest for 15 minutes. This rest period allows the flour to fully hydrate and starts gluten development before you ever touch the dough.
Step 2: Stretch and Fold
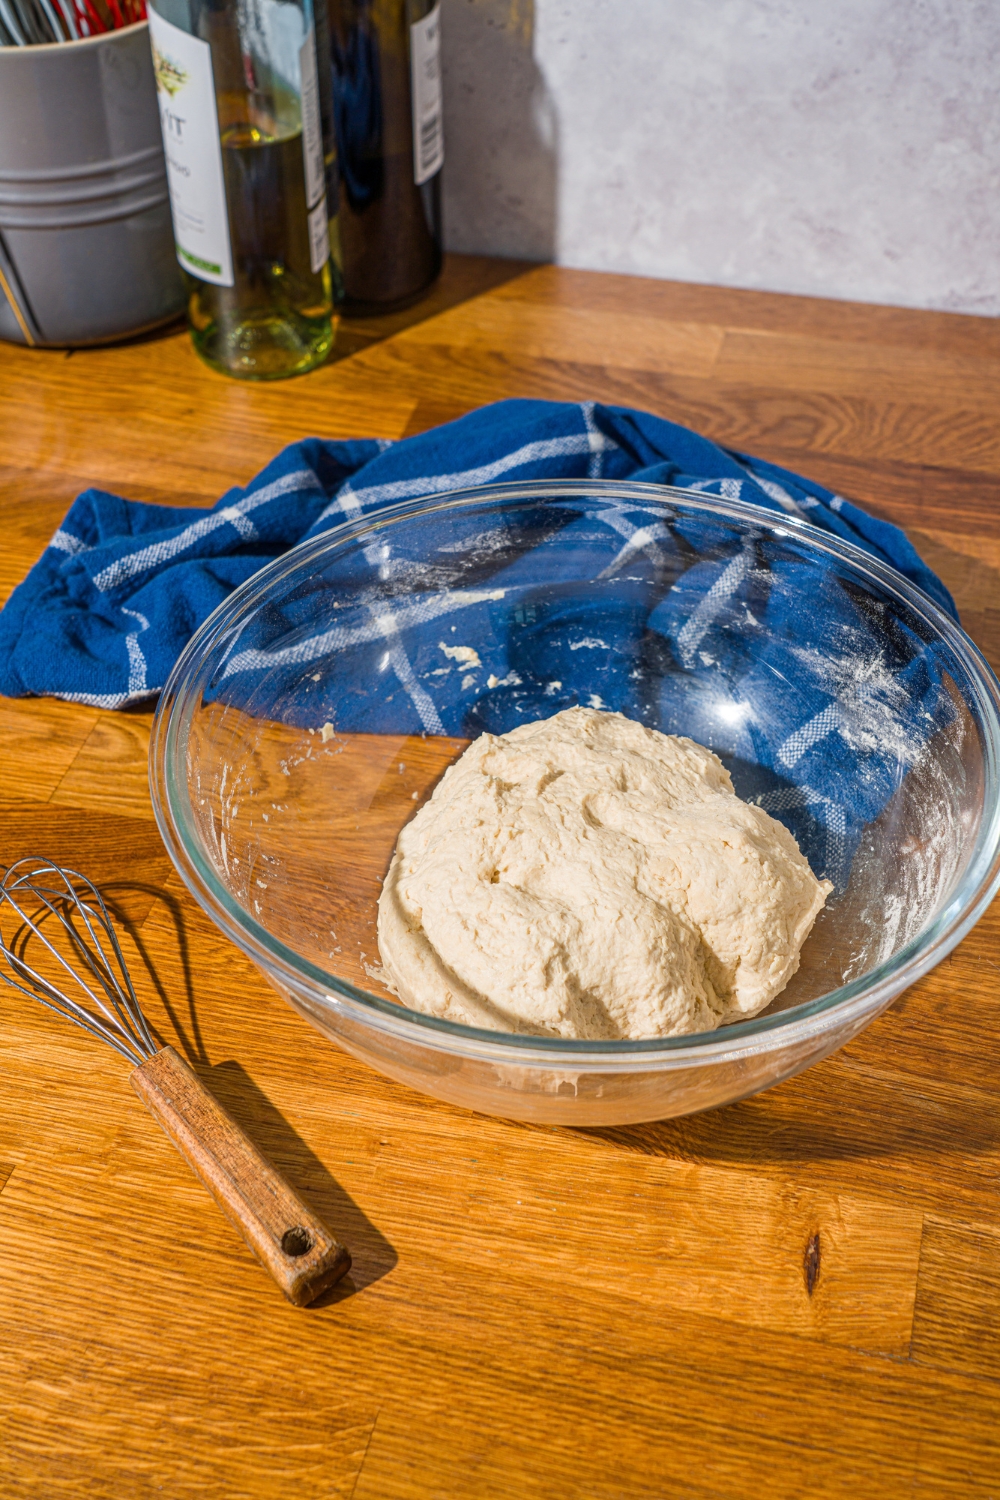
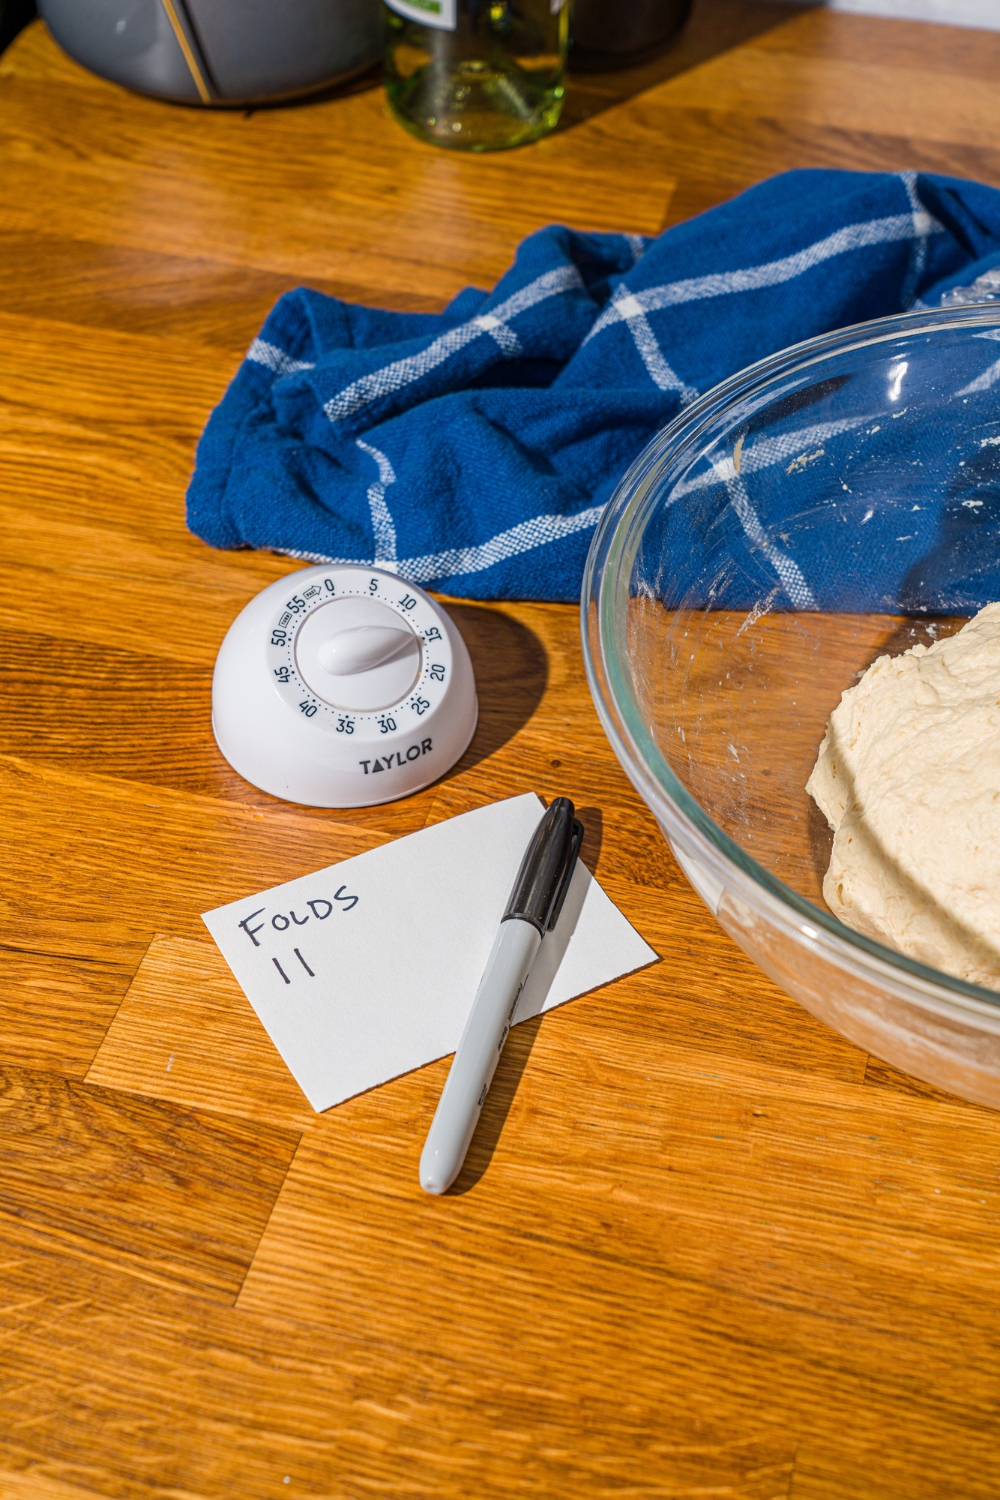
After 15 minutes, wet your hands (this prevents sticking without adding extra flour) and perform the first stretch and fold. Reach under the dough on one side, stretch it up and fold it over to the opposite side. Rotate the bowl 90 degrees and repeat. Do this 8 times around the bowl until the dough feels tighter and smoother. Cover and rest for another 15 minutes.
Step 3: Continue the Stretch and Fold Process
Repeat the stretch and fold process (8 folds, 15 minutes covered rest) for a total of 6 rounds. Each round builds strength and structure into the dough without any kneading. By the third or fourth round you'll notice the dough becoming noticeably smoother, more elastic, and easier to work with. This is the gluten network developing and it's what gives the finished bread its incredible chew.
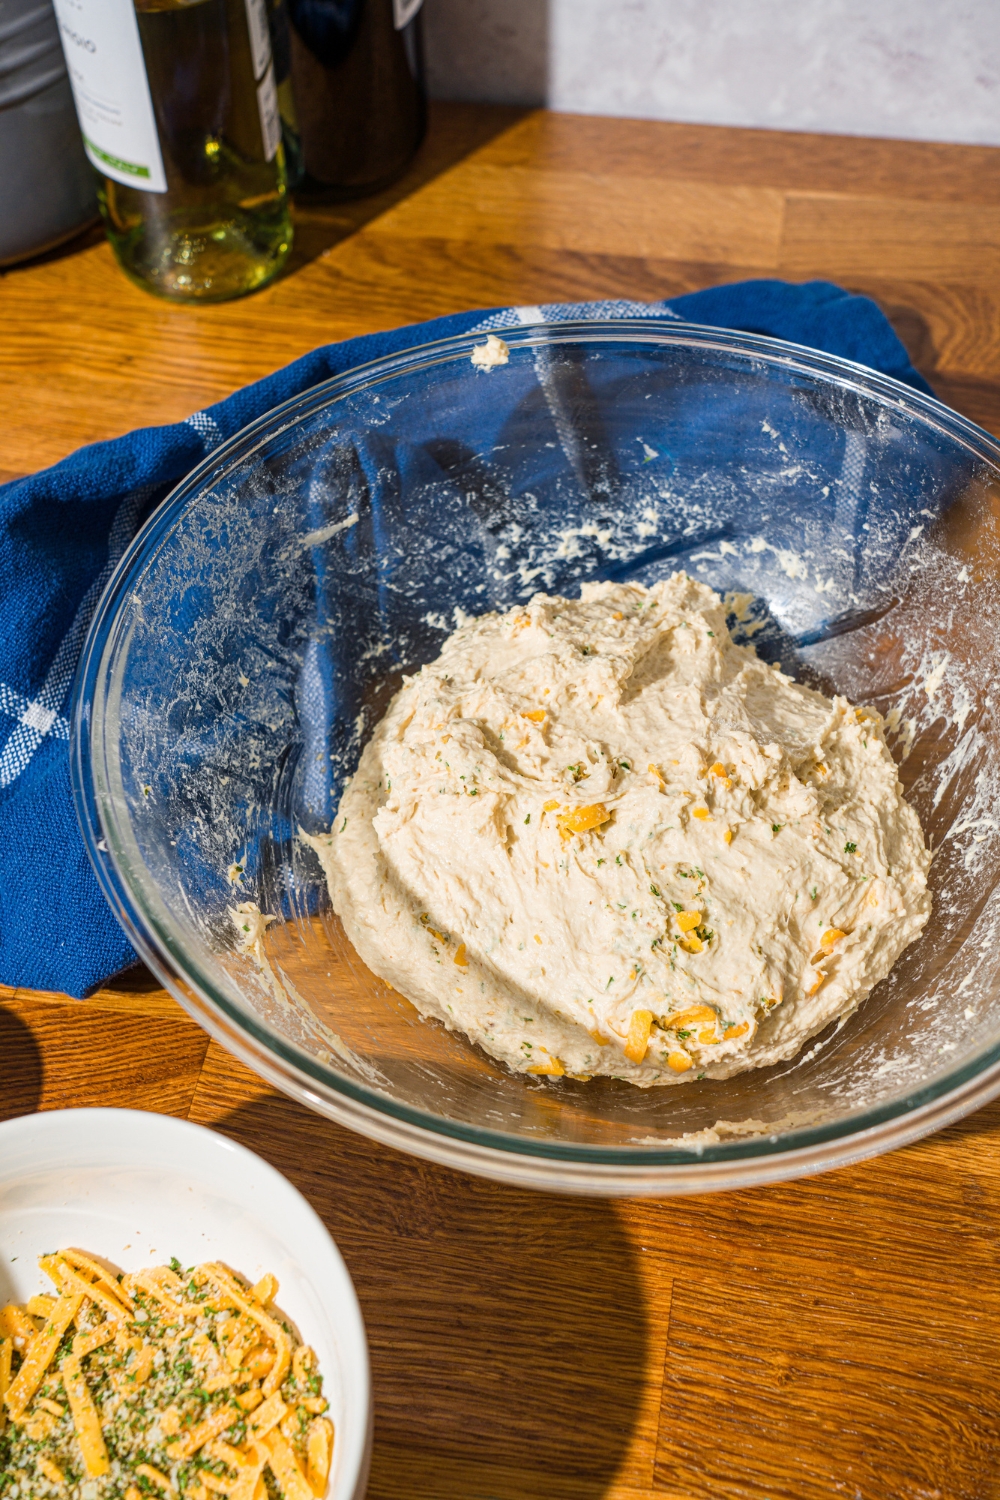
Step 4: Fold in the Cheese
On the sixth and final stretch and fold, add 3 tablespoons of the herb and cheese mixture directly into the dough as you fold. Work it in gently but thoroughly so it's distributed throughout.
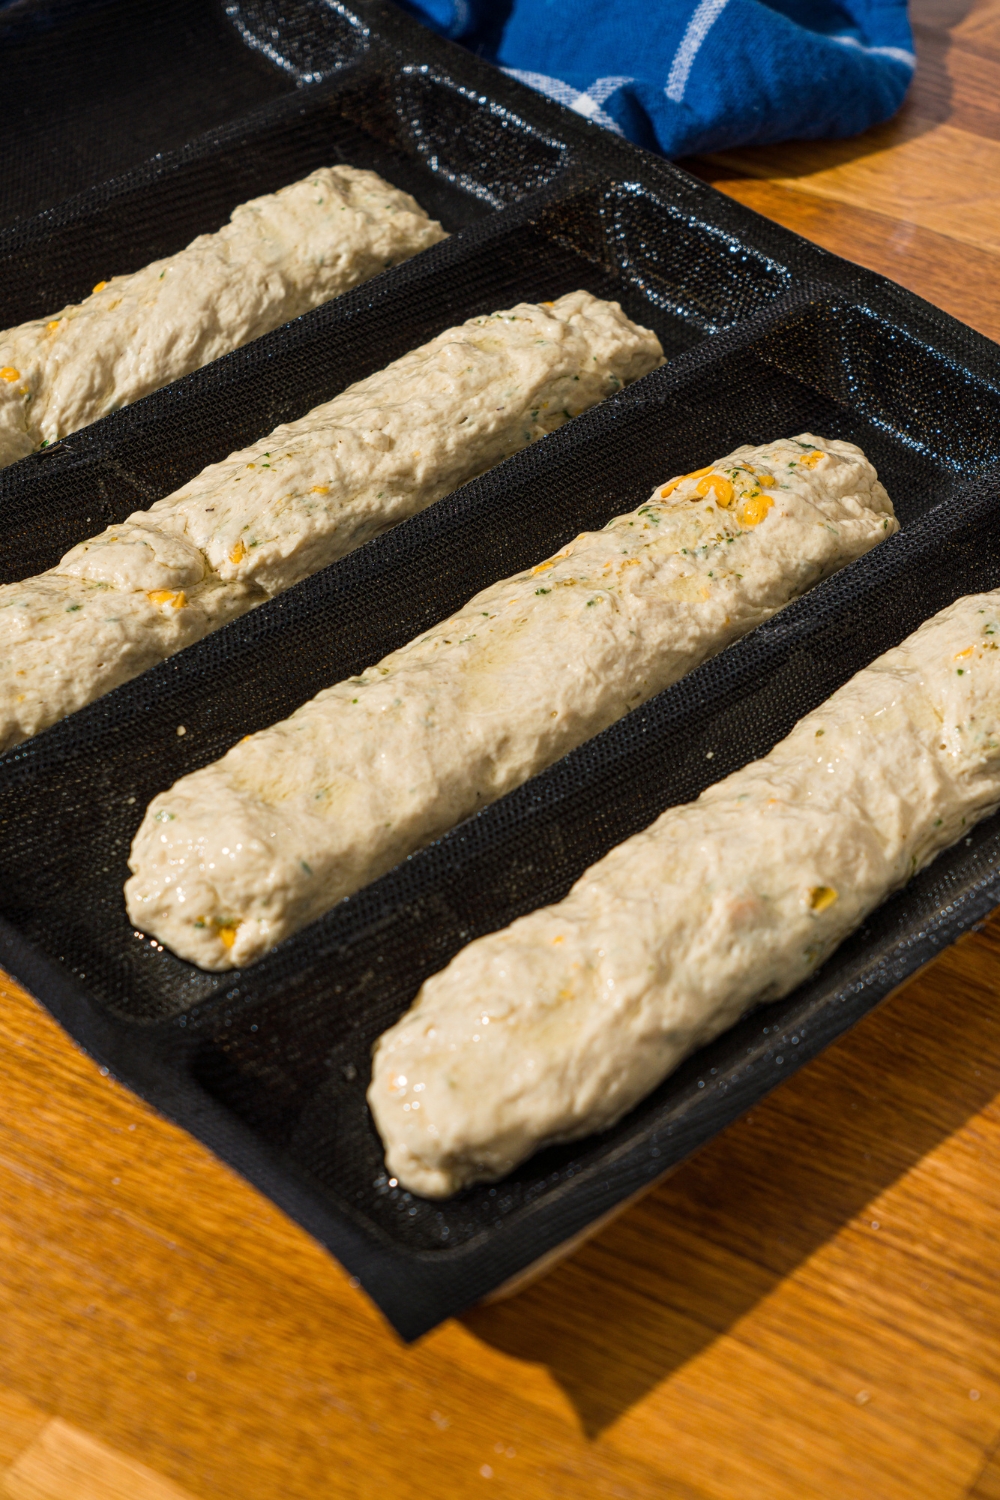
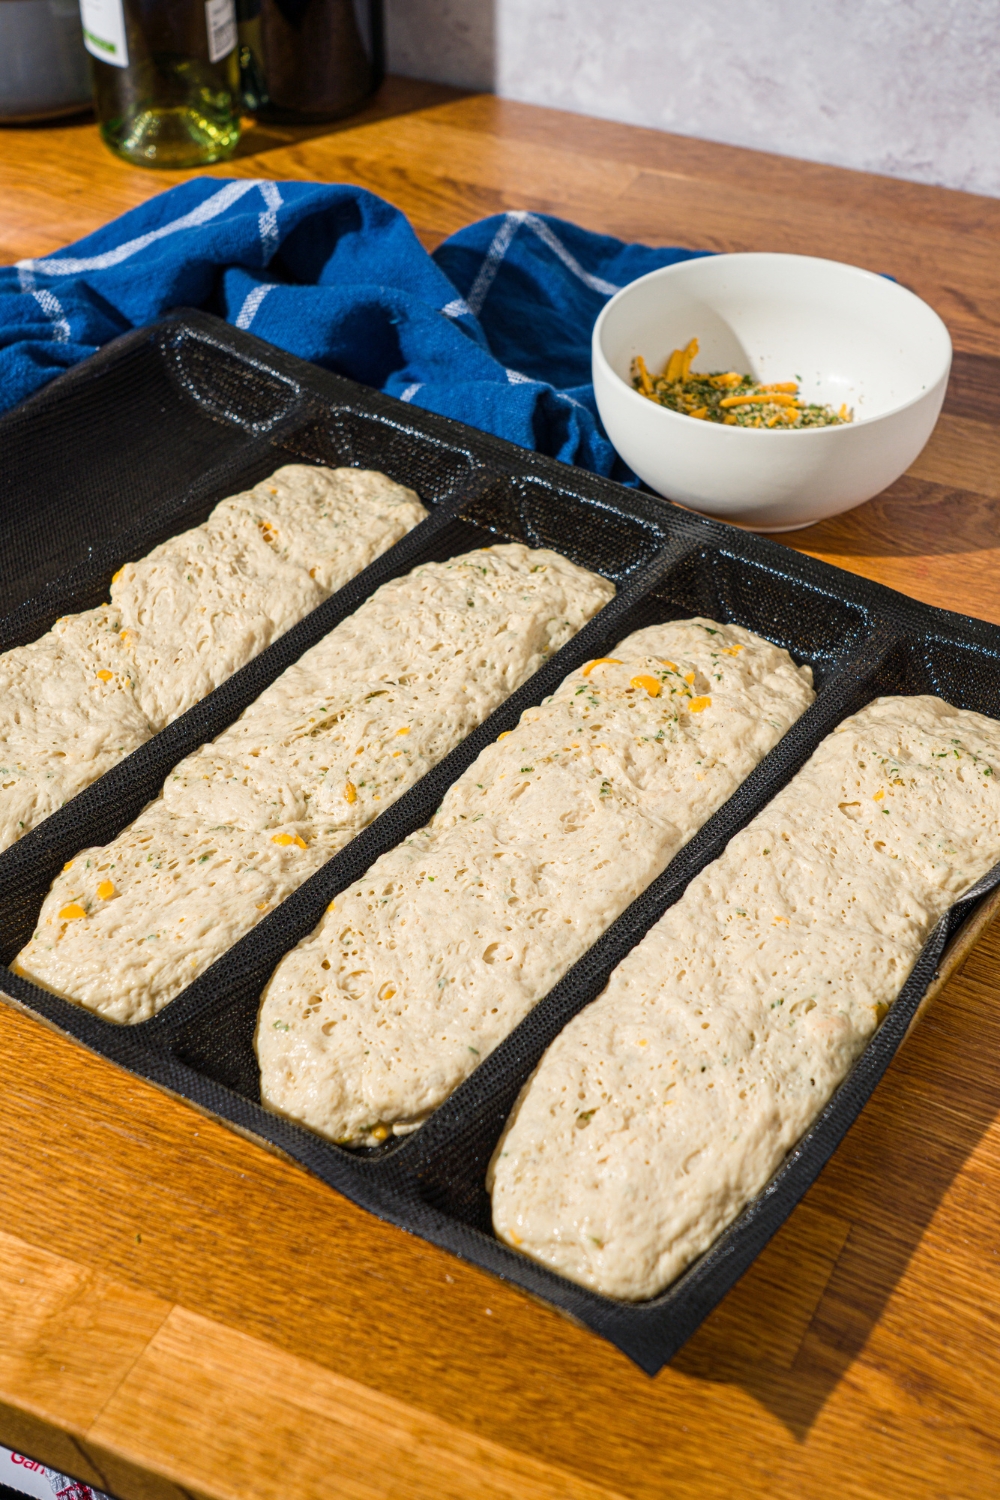
Step 5: Portion and Shape
Divide the dough into 2 equal portions. Place each one into a well-oiled loaf pan and press it out gently to fill the pan evenly. The dough will be soft and slightly sticky and that's normal. Oil your hands if needed to make shaping easier.
Step 6: Proof
Cover the pans loosely and allow the dough to proof in a warm place for 1 to 1½ hours until it has almost doubled in size and looks puffy and airy. Don't rush this step, the proper proofing is what gives the bread its light, open crumb. The dough is ready when it looks significantly puffed and jiggles gently when you move the pan. Towards the end of proofing, preheat your oven to 425°F.
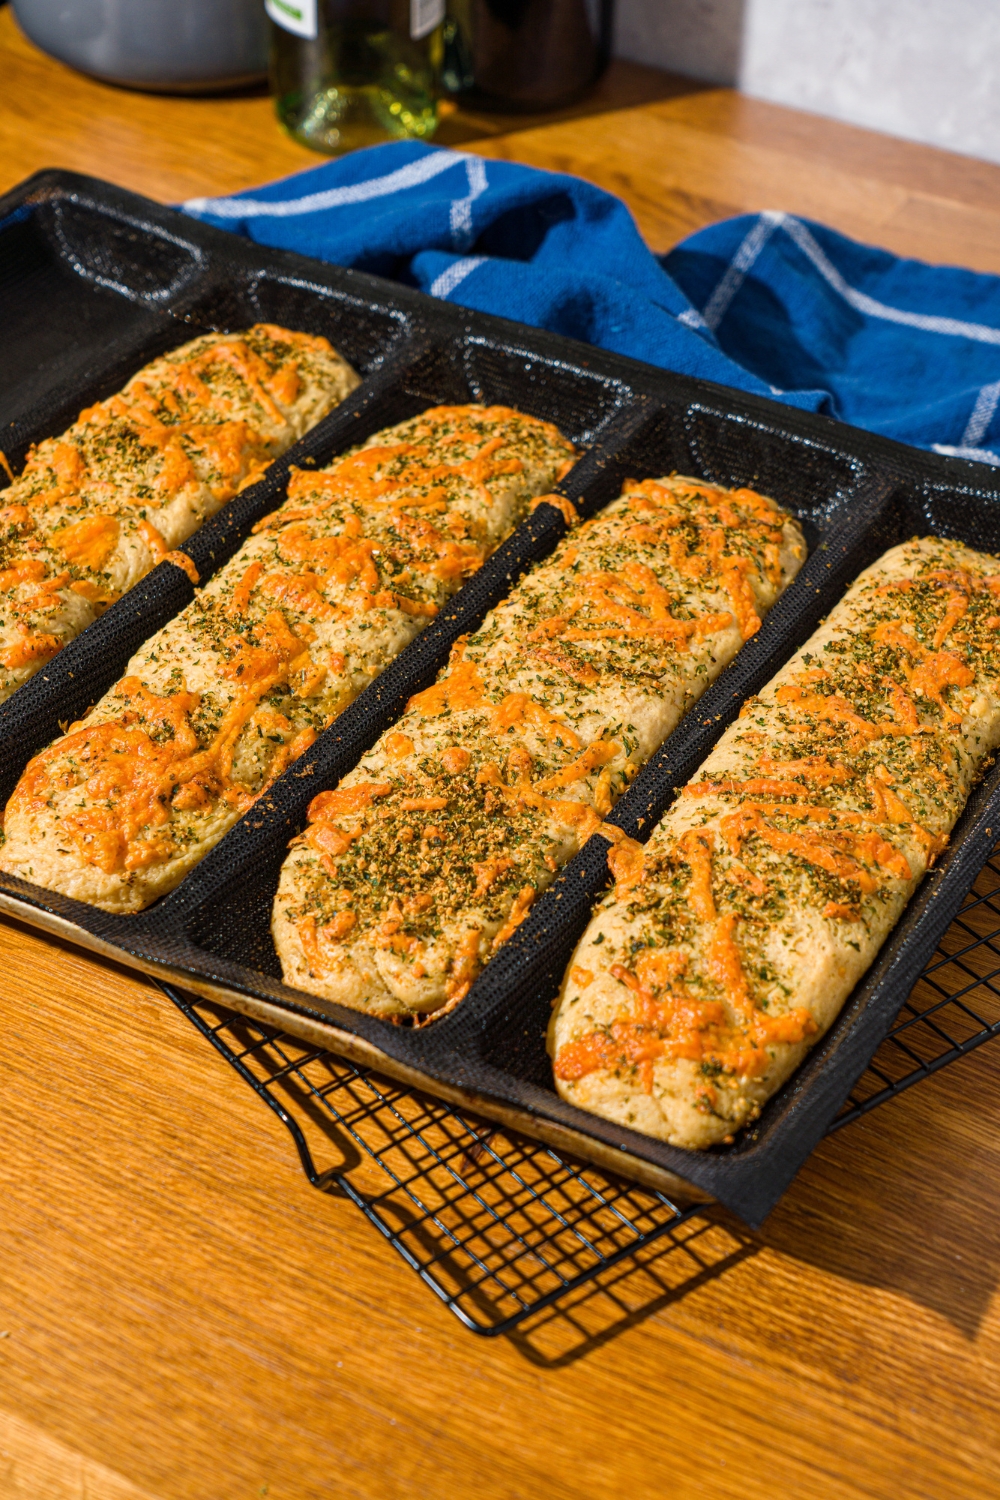
Step 7: Top and Bake
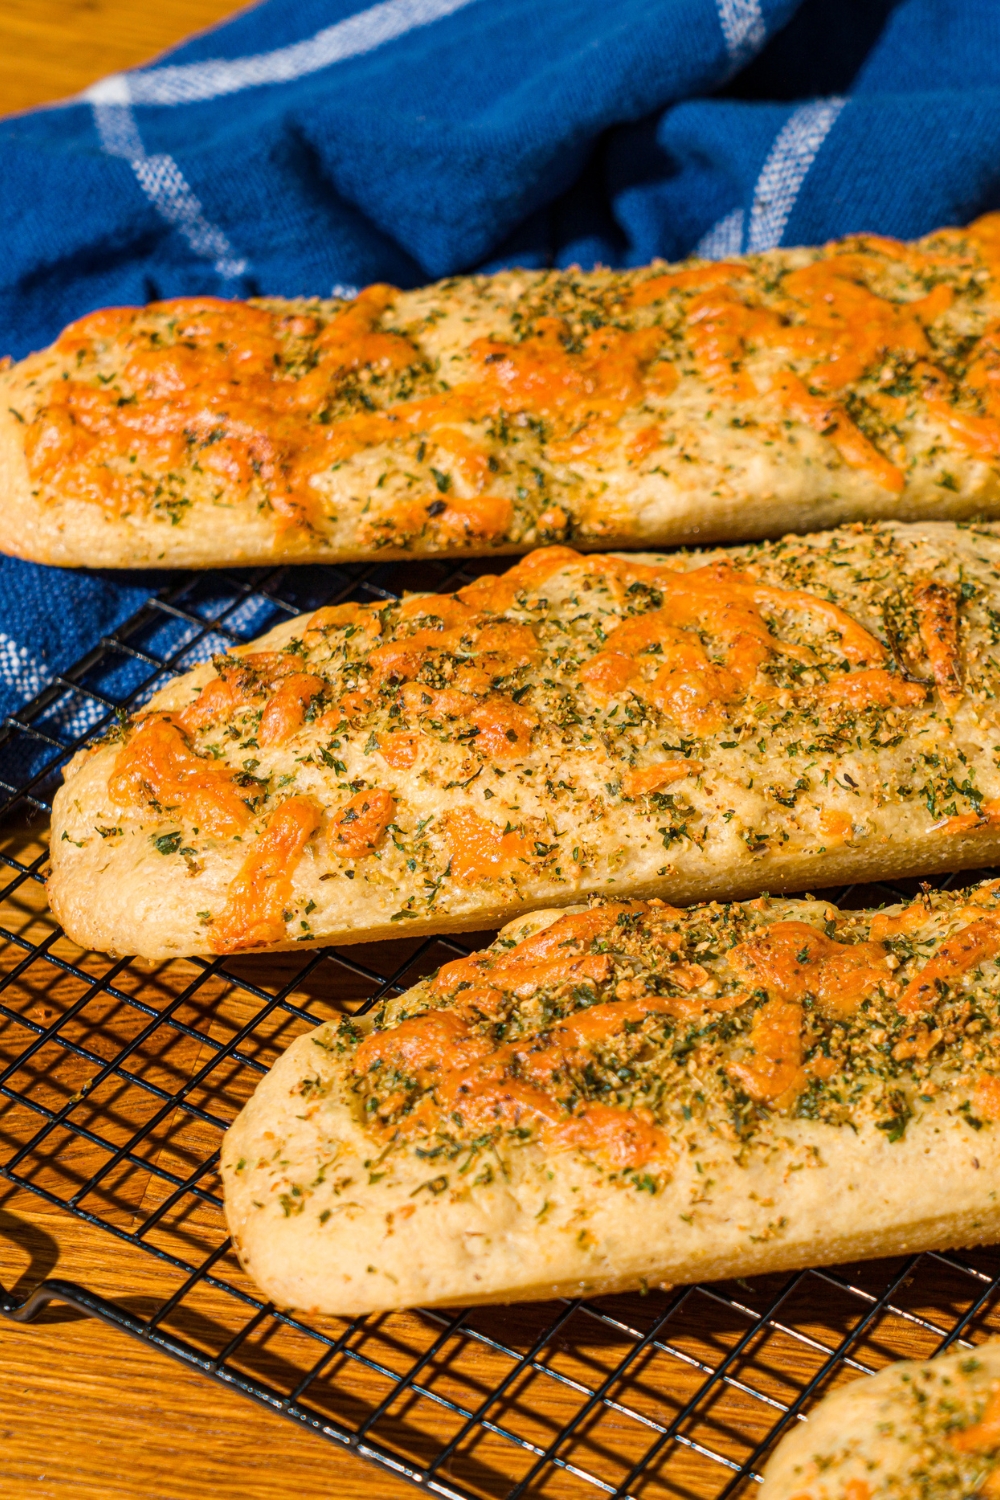
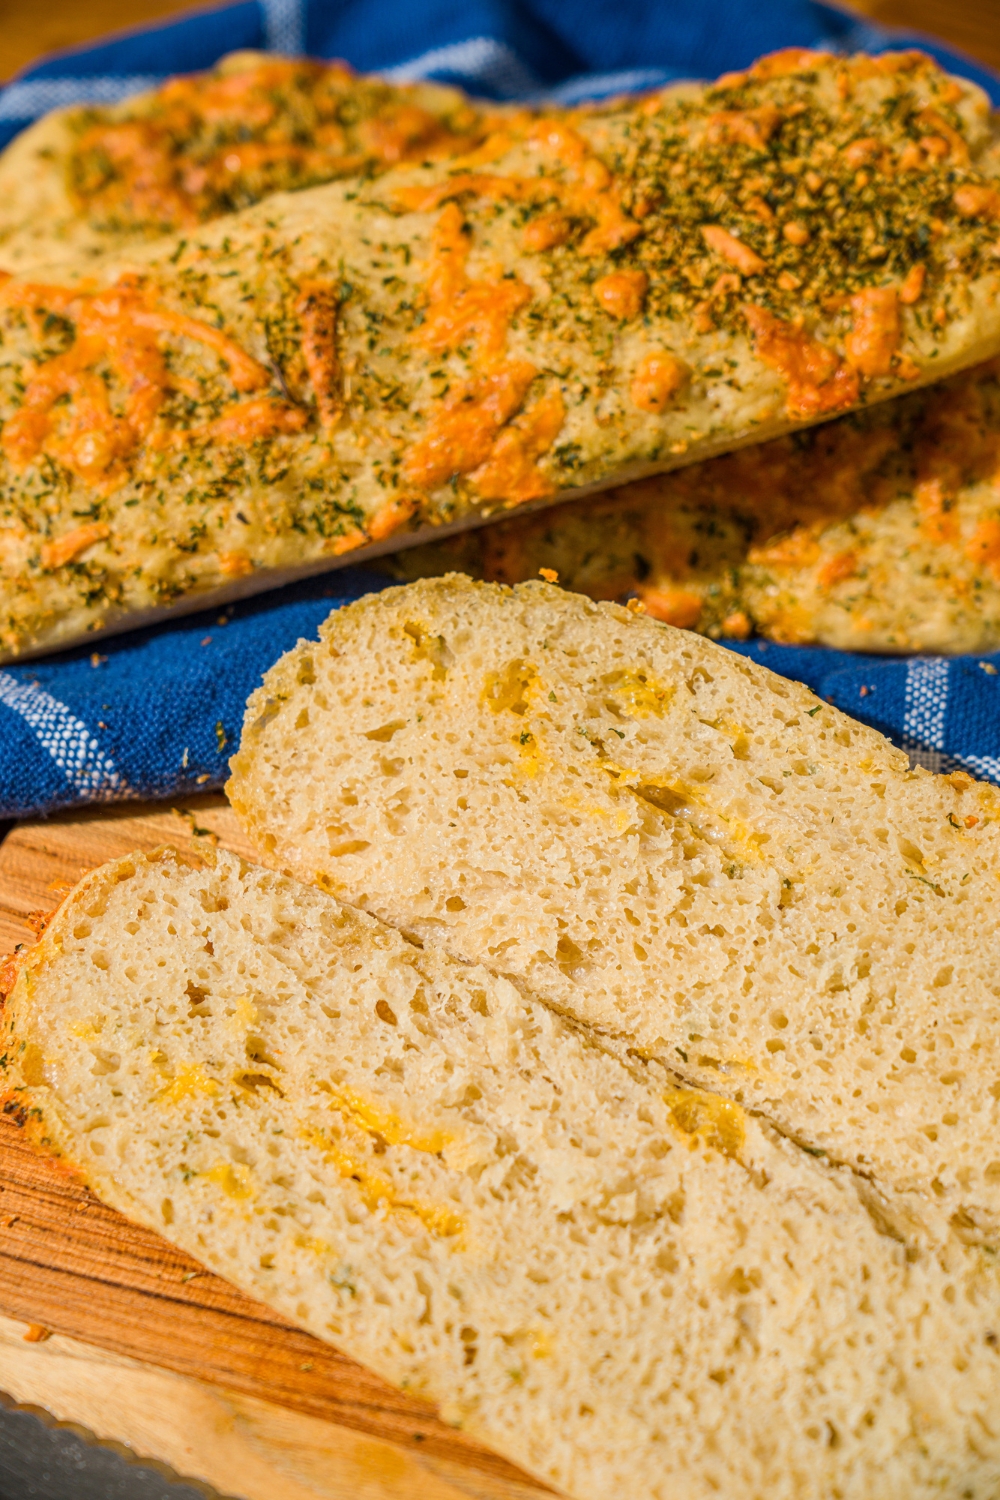
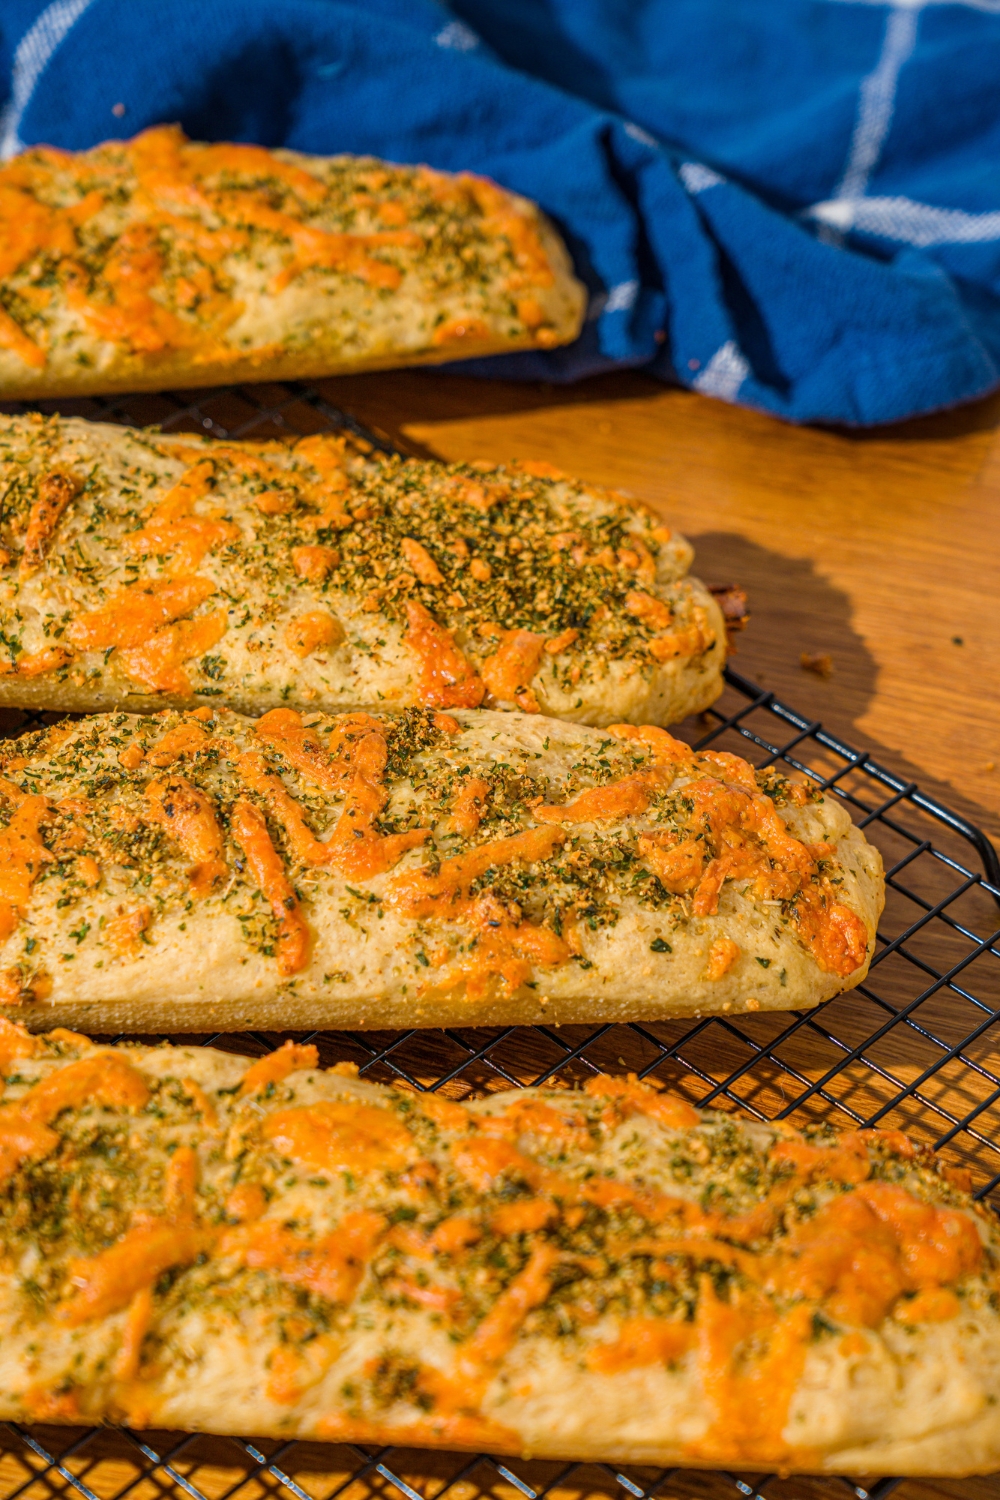
Drizzle a little olive oil over the top of each loaf, then generously cover with the remaining herb and cheese mixture all over the top. Bake at 425°F for 18-20 minutes until the loaves are deeply golden and the cheese on top is melted, bubbling, and starting to caramelize at the edges. Transfer to a wire rack and cool for at least 15 minutes before slicing.
Tips for the Best Italian Herbs and Cheese Bread
Use a kitchen scale. This recipe uses weight measurements for the flour and water rather than volume, which is much more accurate for bread baking. A kitchen scale is the best tool you can own for bread because it removes all the guesswork and gives you consistent results every time.
Use warm water, not hot. Water that's too hot will kill the yeast. Aim for around 100 to 110°F. It should be warm to the touch but not uncomfortable. If you don't have a thermometer, run the water over your wrist and it should feel like a warm bath.
Keep your hands damp during stretch and fold. Wet hands prevent the dough from sticking without adding extra flour, which can tighten the dough and affect the final texture. Keep a small bowl of water nearby and re-wet your hands between rounds.
Don't skip any stretch and fold rounds. Each round builds more strength into the dough. Skipping rounds means less gluten development, which produces a flatter, less chewy loaf. Six rounds takes about 90 minutes total but most of that is hands-off resting time. It's very low effort for the result you get.
Be generous with the topping. The herb and cheese crust is the star of this bread. Don't hold back and pile it on. The cheddar should nearly cover the entire surface and the granulated garlic should be visible in every bite. This is what makes it look and taste like the real thing.
Cool before slicing. The interior of the bread is still setting as it cools. Slicing too early produces a gummy, dense crumb. Give it at least 15 minutes on a wire rack so the crust will stay crisp and the interior will be perfectly soft inside.
What to Make with Italian Herbs and Cheese Bread
This bread was made for sandwiches but it goes way beyond that. Here are the best ways to use it:
Classic Italian sub. Salami, ham, provolone, lettuce, tomato, red onion, oil, and red wine vinegar. The herby, cheesy crust adds a layer of flavor that a plain hoagie roll simply can't compete with. It's perfect with this Subway sweet onion sauce.
Meatball sub. Homemade meatballs in marinara with melted mozzarella piled into this bread is one of the best things you can make in your kitchen. The sturdy interior holds up to the sauce without falling apart which is exactly what you need for a proper meatball sub.
Chicken parmesan sub. Breaded chicken, marinara, and melted mozzarella in this bread tastes like something from a serious Italian sandwich shop. The garlic and herb crust ties everything together perfectly.
Garlic bread. Slice it, butter it generously, and run it under the broiler for a few minutes. The existing herb and cheese crust means this is the most flavorful garlic bread you'll ever make with almost zero extra effort.
Soup dipper. Tear off chunks and use it to soak up a bowl of tomato soup, minestrone, or Italian wedding soup. The bread is sturdy enough to hold up to dipping without falling apart immediately.
How to Store and Freeze Italian Herbs and Cheese Bread
At room temperature: Wrap the loaf tightly in plastic wrap or store in an airtight bag for up to 2 days. The crust softens slightly as it sits but the flavor stays. If you want to refresh the crust run it under the broiler for a minute or two before serving.
In the freezer: This bread freezes great and it's worth making in double batches specifically because of how well it freezes. Let the loaves cool completely then wrap each one tightly in plastic wrap followed by a layer of foil. Freeze for up to 2 months. Thaw at room temperature for a couple of hours or warm directly from frozen in a 325°F oven for 15-20 minutes. It comes out tasting freshly baked every time.
Sliced vs whole: If you know you're going to use it for sandwiches throughout the week slice the loaf before freezing and pull out individual slices as needed. They thaw in minutes at room temperature or in the toaster straight from frozen which makes weekday lunches incredibly easy.
Frequently Asked Questions
What herbs are in Subway's Italian herbs and cheese bread?
Subway's Italian herbs and cheese bread uses a blend of oregano, parsley, and garlic with a parmesan and cheddar mixture baked into the crust. This copycat uses the same combination for that signature savory depth, and a parmesan and cheddar blend that gets golden and slightly crispy on the outside during baking. Getting the herb blend right is what makes this taste like the real thing.
What is the stretch and fold method?
Stretch and fold is a bread baking technique that develops gluten structure through a series of gentle stretches and folds during the first rise rather than traditional kneading. It's easier on your hands, requires no special equipment, and produces an incredibly chewy, open crumb that holds up to heavy sandwich fillings without getting soggy. Each fold builds strength into the dough gradually over time.
Can I make this bread without a stand mixer?
Yes and the stretch and fold method makes this one of the most hand-friendly bread recipes you can make. No stand mixer required at any point. A large mixing bowl, a bench scraper or spatula for the folds, and your hands for shaping is all you need. The technique was designed to build gluten structure without any mechanical mixing.
Can I use all-purpose flour instead of bread flour?
Bread flour is strongly recommended. Its higher protein content develops more gluten during the stretch and fold process which gives the loaves their signature chew and structure. All-purpose flour works but produces a softer less chewy loaf that doesn't hold up as well to heavy sub fillings. If bread flour is all you have it's worth seeking out for this specific recipe.
Why does the recipe use grams instead of cups?
Bread baking is significantly more consistent when ingredients are measured by weight rather than volume. A cup of flour can vary by 20 to 30 percent depending on how it's scooped but 500 grams is always 500 grams. A kitchen scale is inexpensive and makes a real difference in bread baking results, especially for a recipe where the dough hydration matters as much as it does here.
Can I use active dry yeast instead of instant?
Yes. Dissolve the active dry yeast in the warm water with the honey and let it sit for 10 minutes until foamy before proceeding with the recipe. The rise times may be slightly longer than with instant yeast but the final result is the same. If your yeast doesn't foam after 10 minutes it's likely expired and needs to be replaced before baking.
What is the best pan size for this recipe?
A standard 9x5 inch loaf pan works perfectly. An 8x4 inch pan gives you a slightly taller loaf. For longer Subway-style sandwich loaves shape them freeform on a parchment-lined baking sheet instead. This gives you that classic long sub shape that's easier to slice for sandwiches.
Why did my cheese burn before the bread was done?
Your oven likely runs hot. If the cheese is browning too quickly tent the loaves loosely with aluminum foil and continue baking until the bread is fully cooked through. This recipe is written for a 425°F oven. If yours tends to run hot drop it to 400°F and add a few extra minutes to the bake time. An oven thermometer is worth having for any bread recipe.
Final Thoughts on This Subway Bread Copycat
Subway's Italian herbs and cheese bread has been my go-to for years and making it at home has completely ruined the sandwich shop version for me... in the best way. The stretch and fold method is easier than it sounds, the herb and cheese crust is everything you want it to be, and the finished loaves make every sandwich better. Make a batch, load it with your favorite fillings, and you'll never look at a Subway the same way again. If you love this recipe, please leave me a five star review and comment below.
More Bread Recipes to Try Next
- Homemade Hoagie Rolls
- Ezekiel Bread
- Outback Bread
- Blender Rice Bread
- Garbage Bread
- Cottage Cheese Breadsticks
Italian Herbs and Cheese Bread Subway Copycat

Subway's Italian herbs and cheese bread has always been my go-to order and after years of eating it I finally decided to figure out how to make it at home. Turns out it wasn't as complicated as I expected. This copycat is soft, chewy, and golden with garlic, oregano, parsley, parmesan, and cheddar baked right into the crust. Pull a loaf out of the oven and the smell alone is worth the effort. I'll be honest... it's better than Subway's.
Ingredients
Dough:
- 500g bread flour
- 400g warm water
- 1 tablespoon olive oil
- 6g instant yeast
- 1 teaspoon honey
- 10g salt
Herb and Cheese Mix:
- 1 tablespoon dry oregano
- 1 tablespoon dry parsley
- 1½ tablespoons granulated garlic
- ¼ cup parmesan cheese, grated
- ½ cup shredded cheddar cheese
Instructions
1. In a large bowl whisk together the water, olive oil, honey, and yeast. Stir in flour and salt until just mixed together. Cover and rest for 15 Minutes.
2. Using damp hands, stretch and fold 8 times around the bowl. Cover and rest again for 15 minutes. Repeat the stretch and fold process 6 times allowing to rest 15 minutes of covered rest between each stretch and fold.
3. On the last stretch and fold add 3 tablespoons of the cheese mixture into the dough.
4. Portion the dough into 2 equal loaves. Place each loaf into an oiled pan. Cover and allow to proof for 1 to 1 ½ hours until it has almost doubled in size.
5. Top with a bit more oil and the remaining spice and cheese blend.
6. Bake at 425 for 18-20 minutes until it is golden brown.
Notes
- Use a kitchen scale for accurate measurements since bread baking requires precision.
- Keep hands damp during stretch and fold to prevent sticking without adding flour.
- Don't skip any stretch and fold rounds; each one builds essential gluten structure.
- Be generous with the herb and cheese topping.
- Cool at least 15 minutes before slicing for the best crumb texture.
- Freeze wrapped loaves for up to 2 months; reheat from frozen at 325°F for 15–20 minutes.
Nutrition Information:
Yield:
2Serving Size:
1Amount Per Serving: Calories: 1401Total Fat: 42gSaturated Fat: 19gUnsaturated Fat: 23gCholesterol: 90mgSodium: 2923mgCarbohydrates: 201gFiber: 10gSugar: 4gProtein: 55g
Leave a Reply