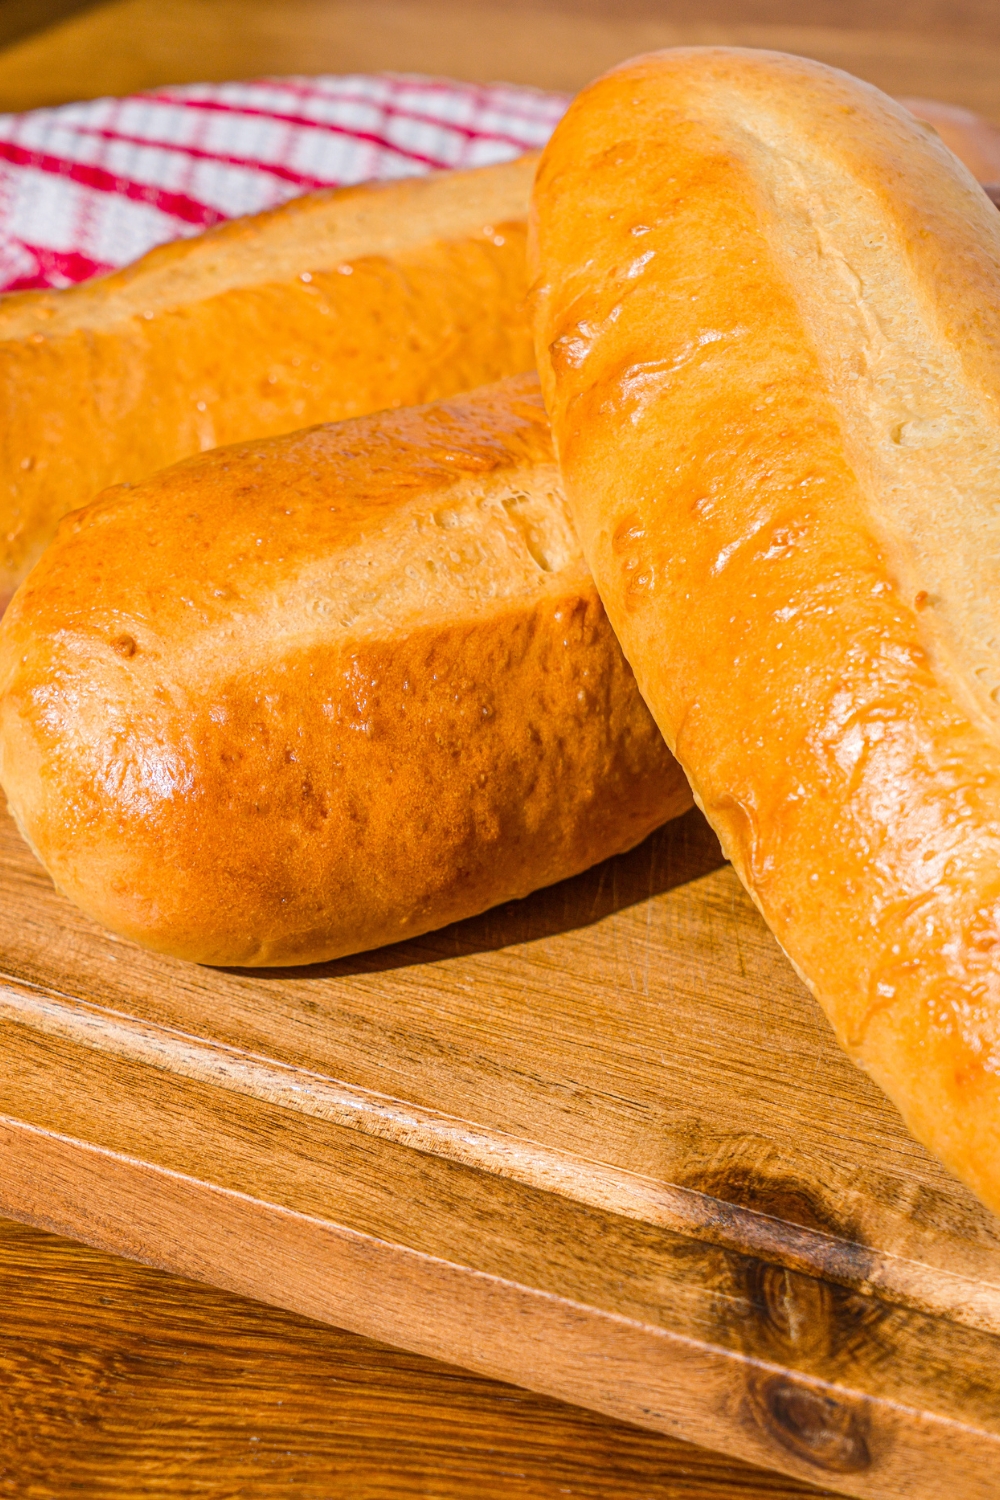
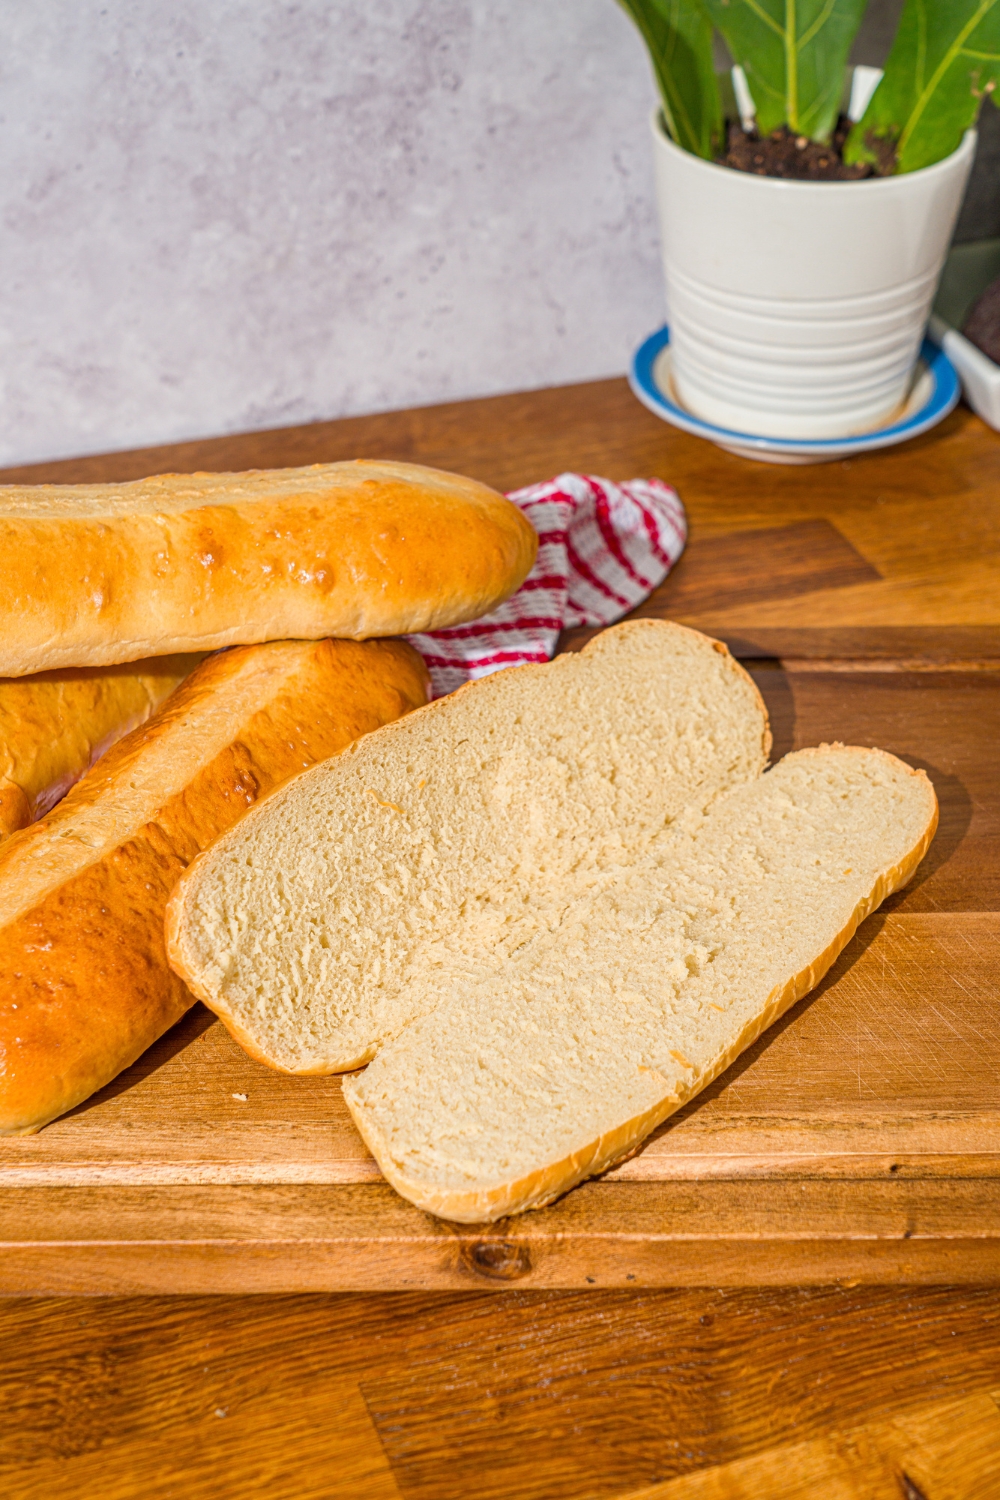
These homemade sub rolls are soft, chewy, golden on the outside, and pillowy on the inside. Basically everything a great hoagie roll should be and everything store-bought rolls consistently fail to deliver. There's a real difference between a sandwich made with these and a sandwich made with whatever was on the shelf. Once you taste it, you'll understand exactly why.
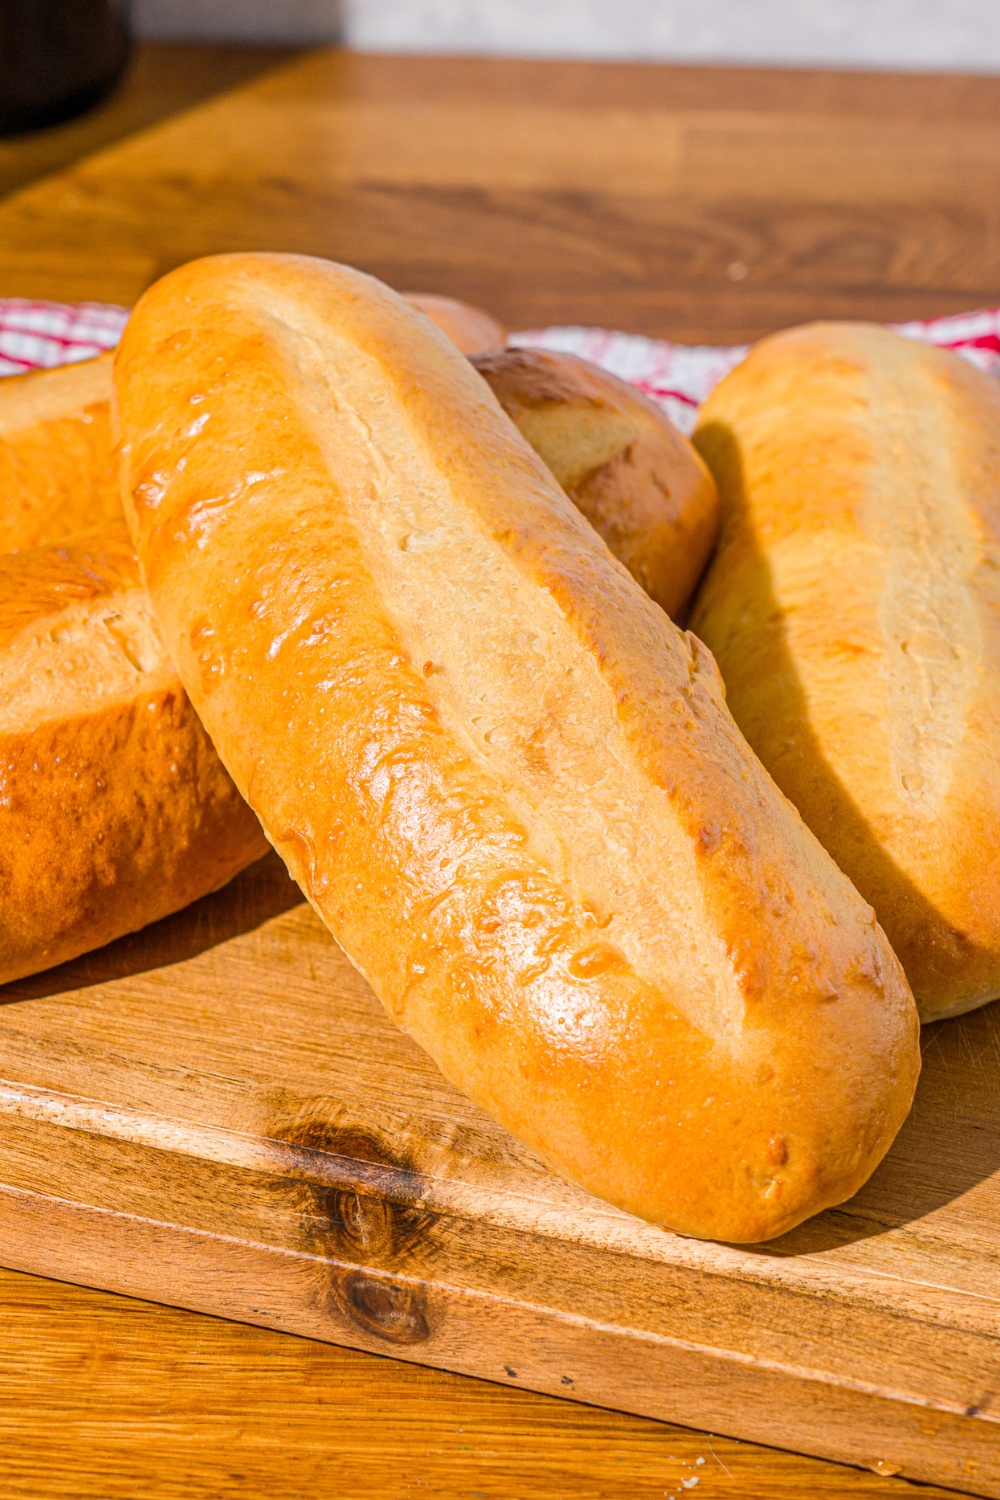
Table of Contents
The Secret to Bakery Style Hoagie Rolls at Home
I got tired of store-bought sub rolls. They're either too soft and fall apart under the fillings, too dense and chewy in all the wrong ways, or just completely flavorless. When you're putting together a great homemade sub, the roll is half the sandwich. So I decided to make my own, and after landing on this recipe I haven't gone back.
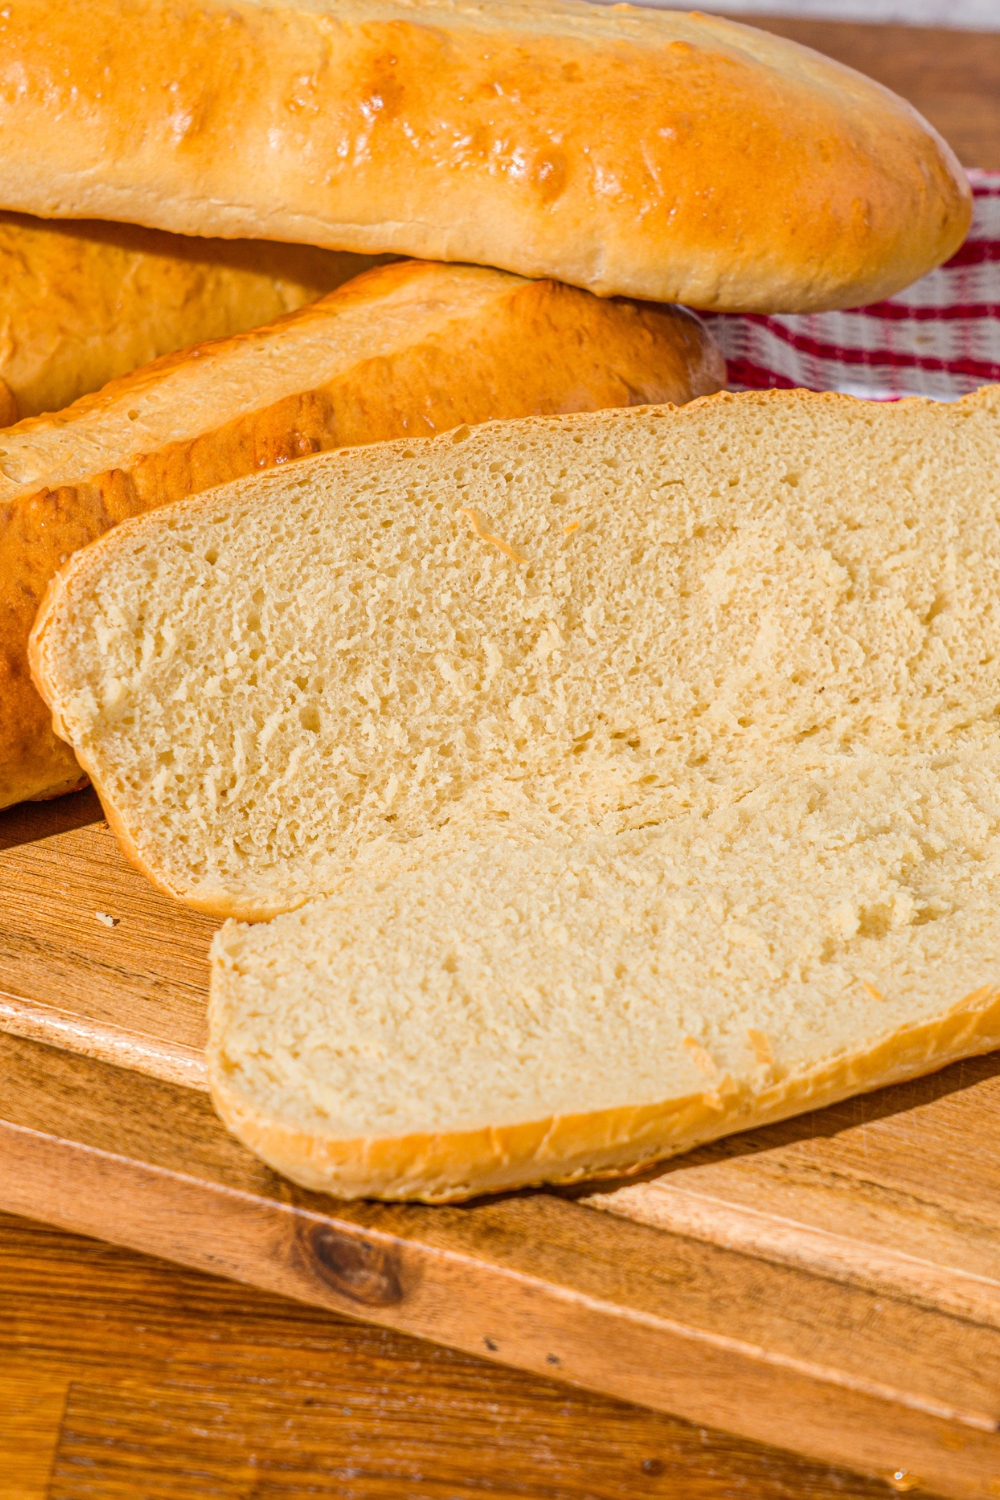
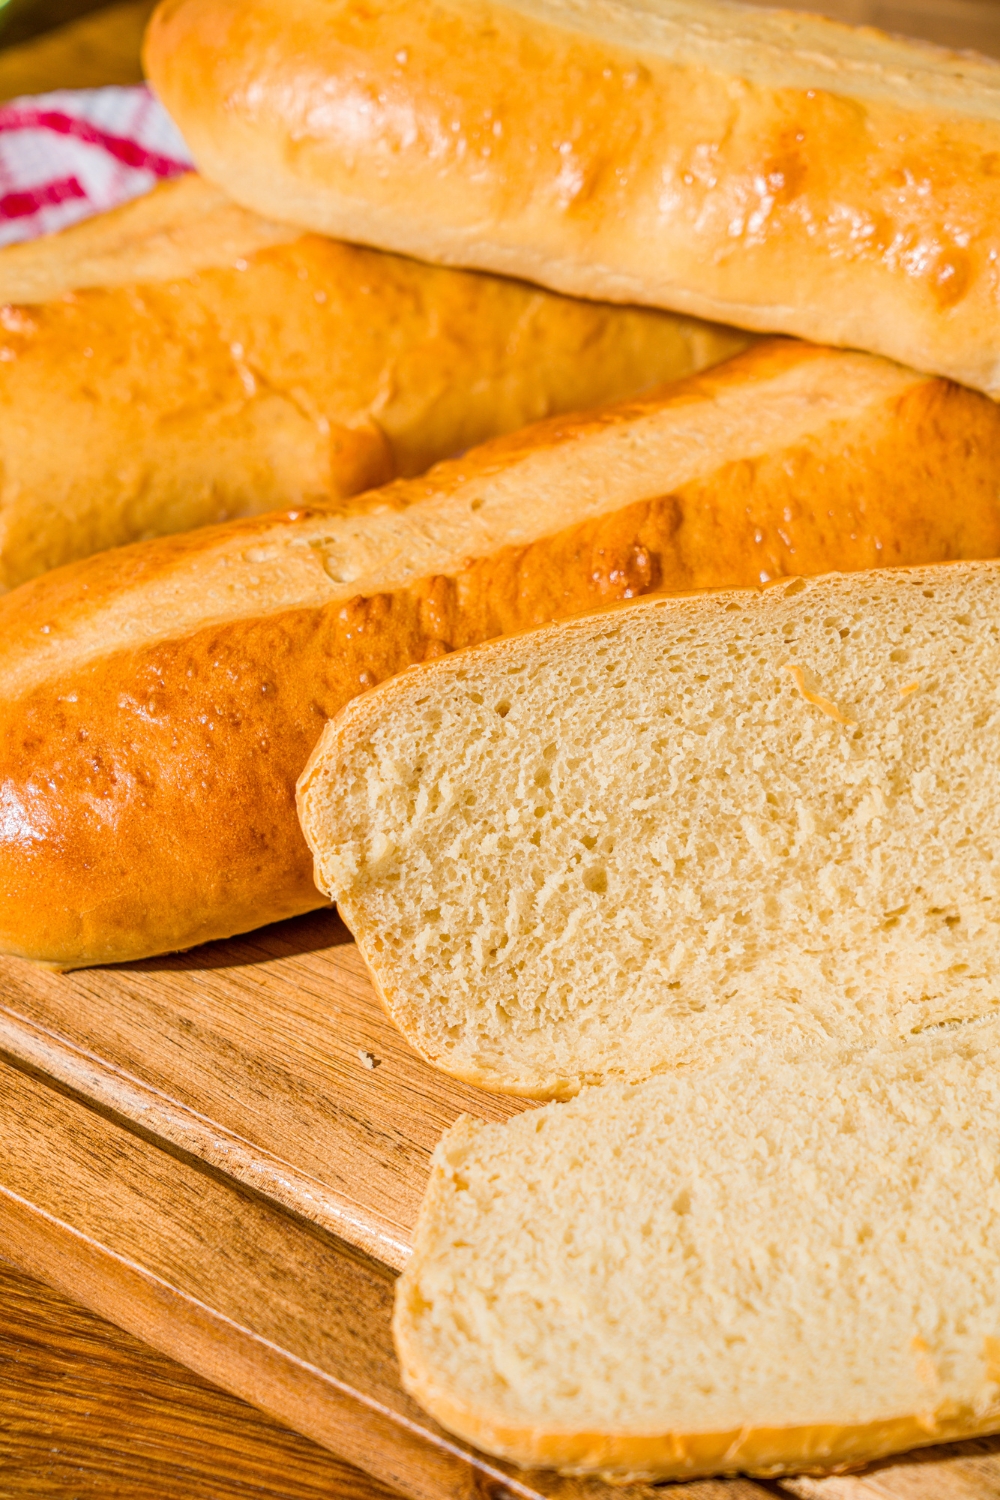
These rolls have the perfect structure: a slightly crisp, golden crust that holds everything together, and a soft, airy interior with just enough chew to stand up to saucy fillings without getting soggy. The milk powder is the secret ingredient that most people don't think to add. It enriches the dough and gives the crumb a tenderness that bread flour alone can't produce. The honey adds a subtle sweetness that balances the salt, and the butter makes every bite richer than any store-bought roll you've ever had.
Whether you're making my chopped Italian sandwich, a cheesesteak, or a meatball sub, these sub sandwich rolls make every one of them taste like you picked it up from a real deli. Once you have a batch of these in the house, you'll start finding excuses to make sandwiches for every meal.
Ingredients
- 3–3½ cups bread flour
- 1 cup lukewarm water
- ½ cup lukewarm milk
- 2 tablespoons honey
- 3 tablespoons butter, melted and cooled
- 1 tablespoon instant yeast
- 1 tablespoon milk powder
- 1½ teaspoons salt
- 1 egg, beaten (for egg wash)
How to Make Sub Rolls
Step 1: Activate the Yeast
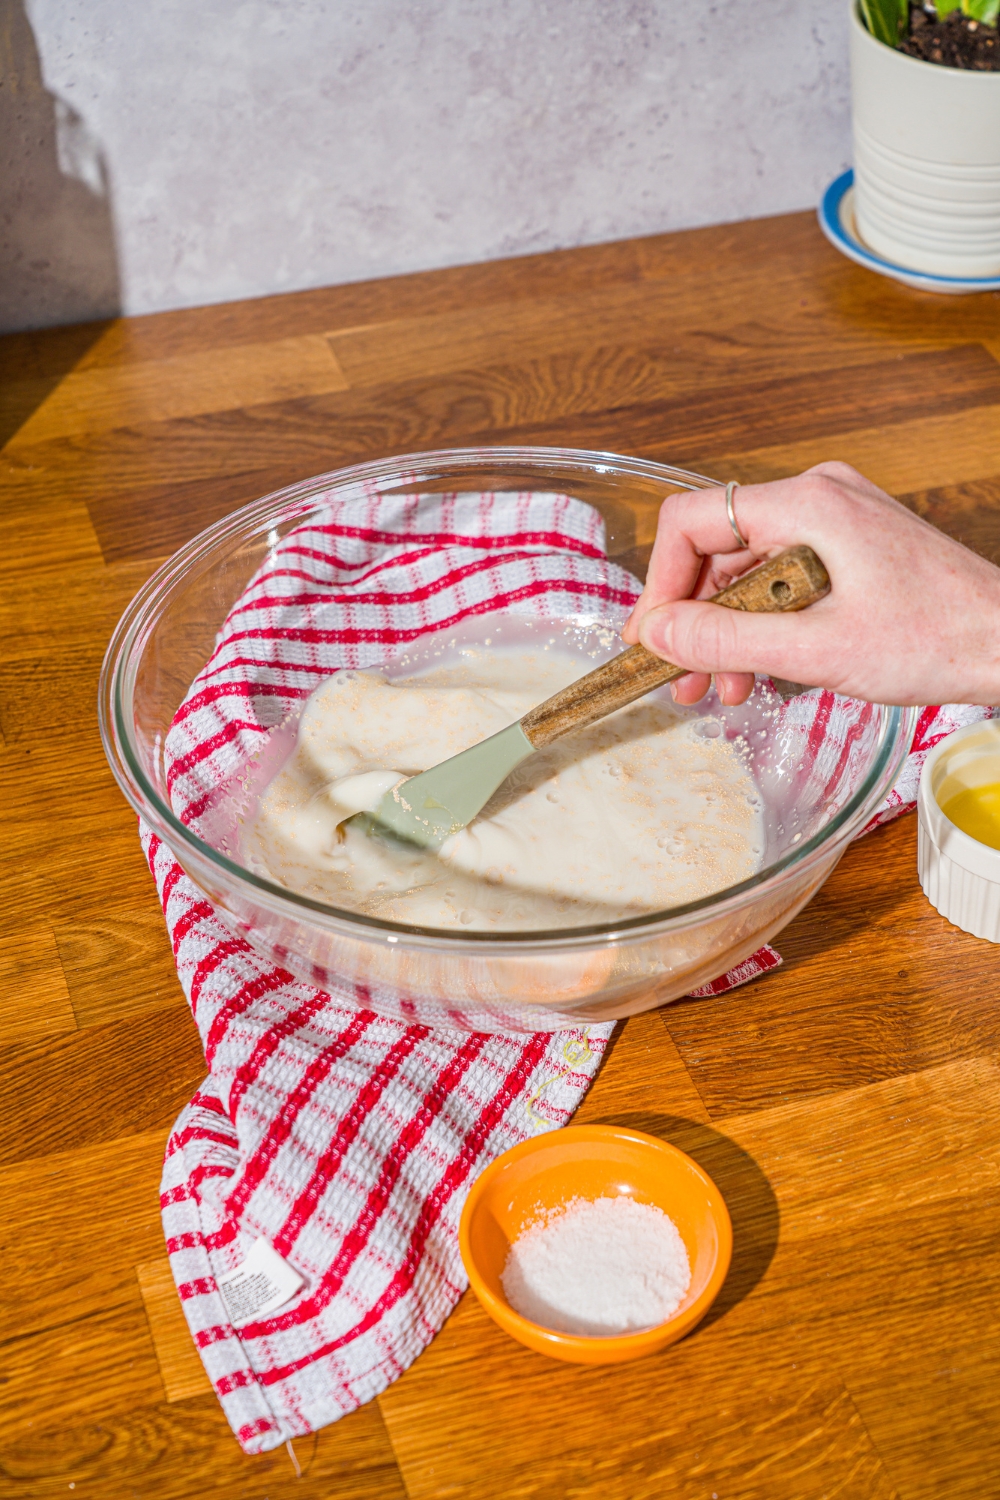
In a large bowl, combine the lukewarm water, lukewarm milk, honey, and instant yeast. Stir together gently and let it sit for about 10 minutes until the mixture is frothy and foamy on top. This tells you the yeast is alive and active. If nothing happens after 10 minutes, your yeast may be expired or your liquid was too hot. Start over with fresh yeast and liquids that are warm to the touch but not hot.
Step 2: Mix the Dough
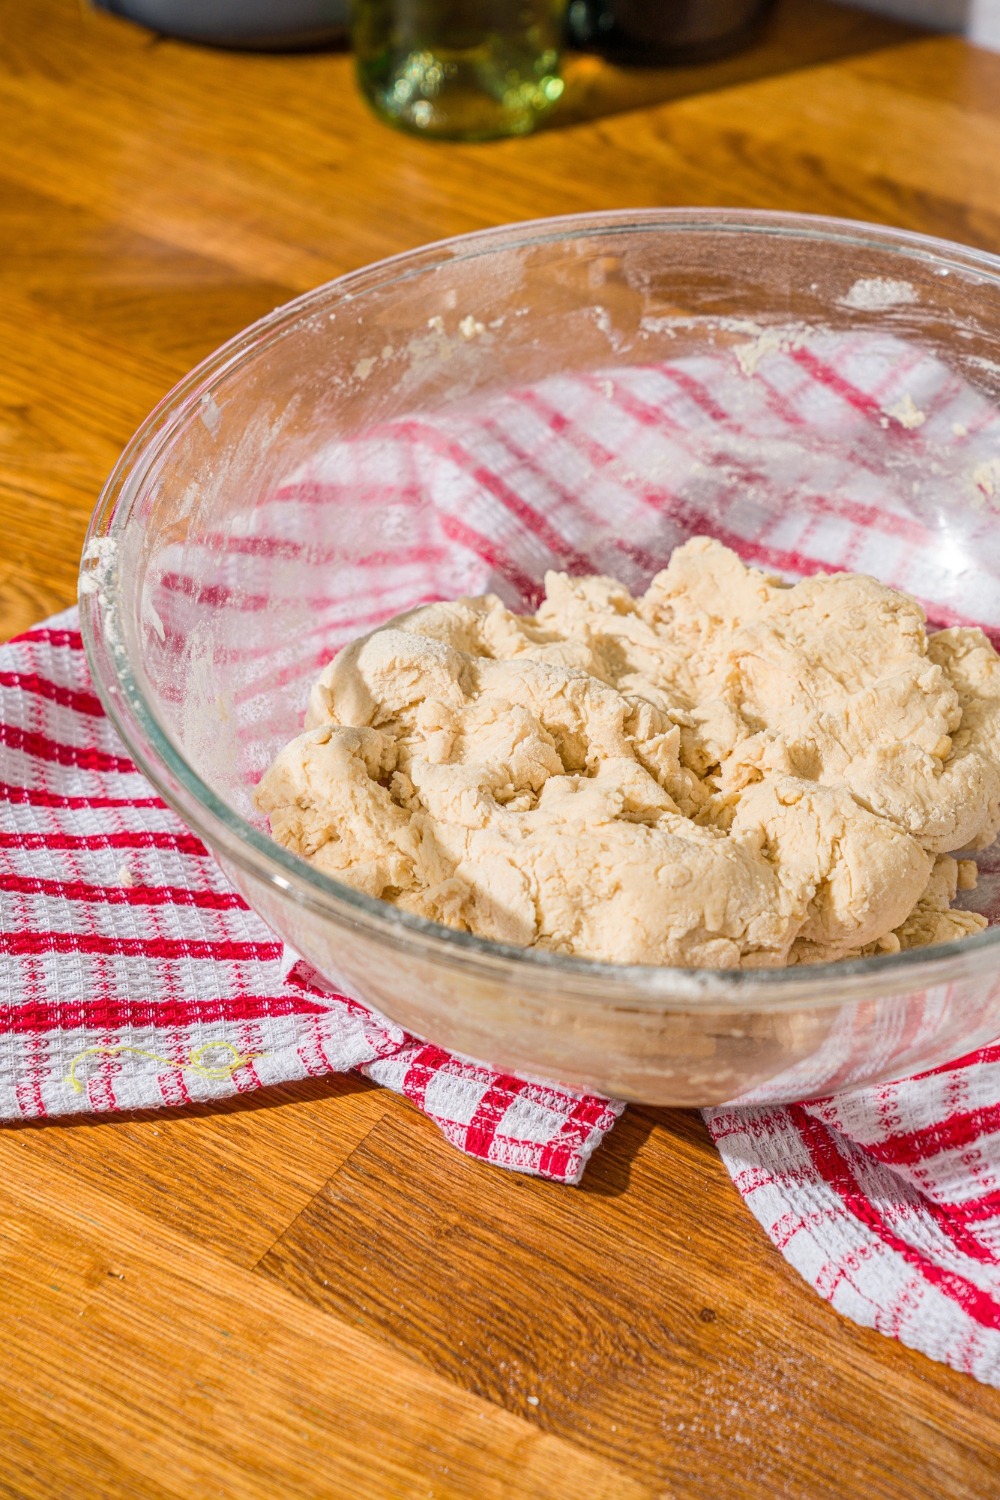
Add 3 cups of the bread flour, the milk powder, melted and cooled butter, and salt to the yeast mixture. Stir together until a shaggy dough forms.

Turn it out onto a lightly floured surface and knead, incorporating the remaining flour as needed, for 5-7 minutes until the dough is smooth, elastic, and slightly tacky but not sticky. You may not need all 3½ cups of flour, so add it gradually and stop when the dough feels right. A smooth, supple dough that springs back when poked is what you're after.
Step 3: Bulk Ferment
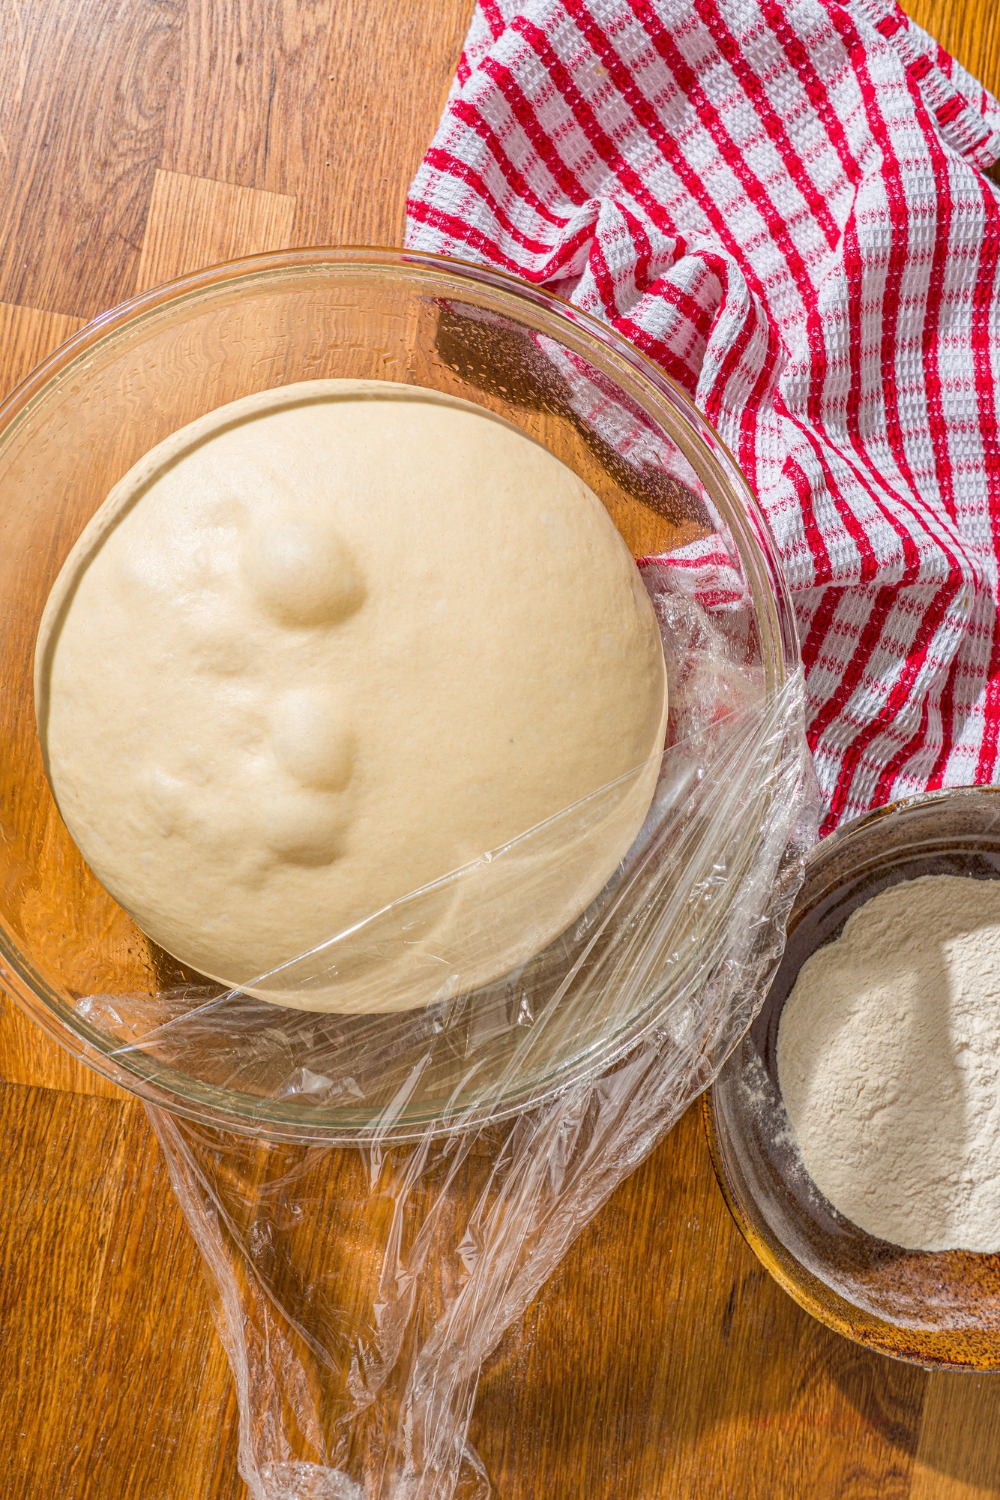
Shape the dough into a ball and place it into a lightly oiled bowl. Cover with plastic wrap and set in a warm place to rise for about 1 hour, or until it's doubled in size. A warm oven with just the light on, or a spot near a warm stove, works great. Don't rush this step since the bulk ferment is where the flavor develops and the gluten structure that gives the rolls their chew is built.
Step 4: Portion and Shape
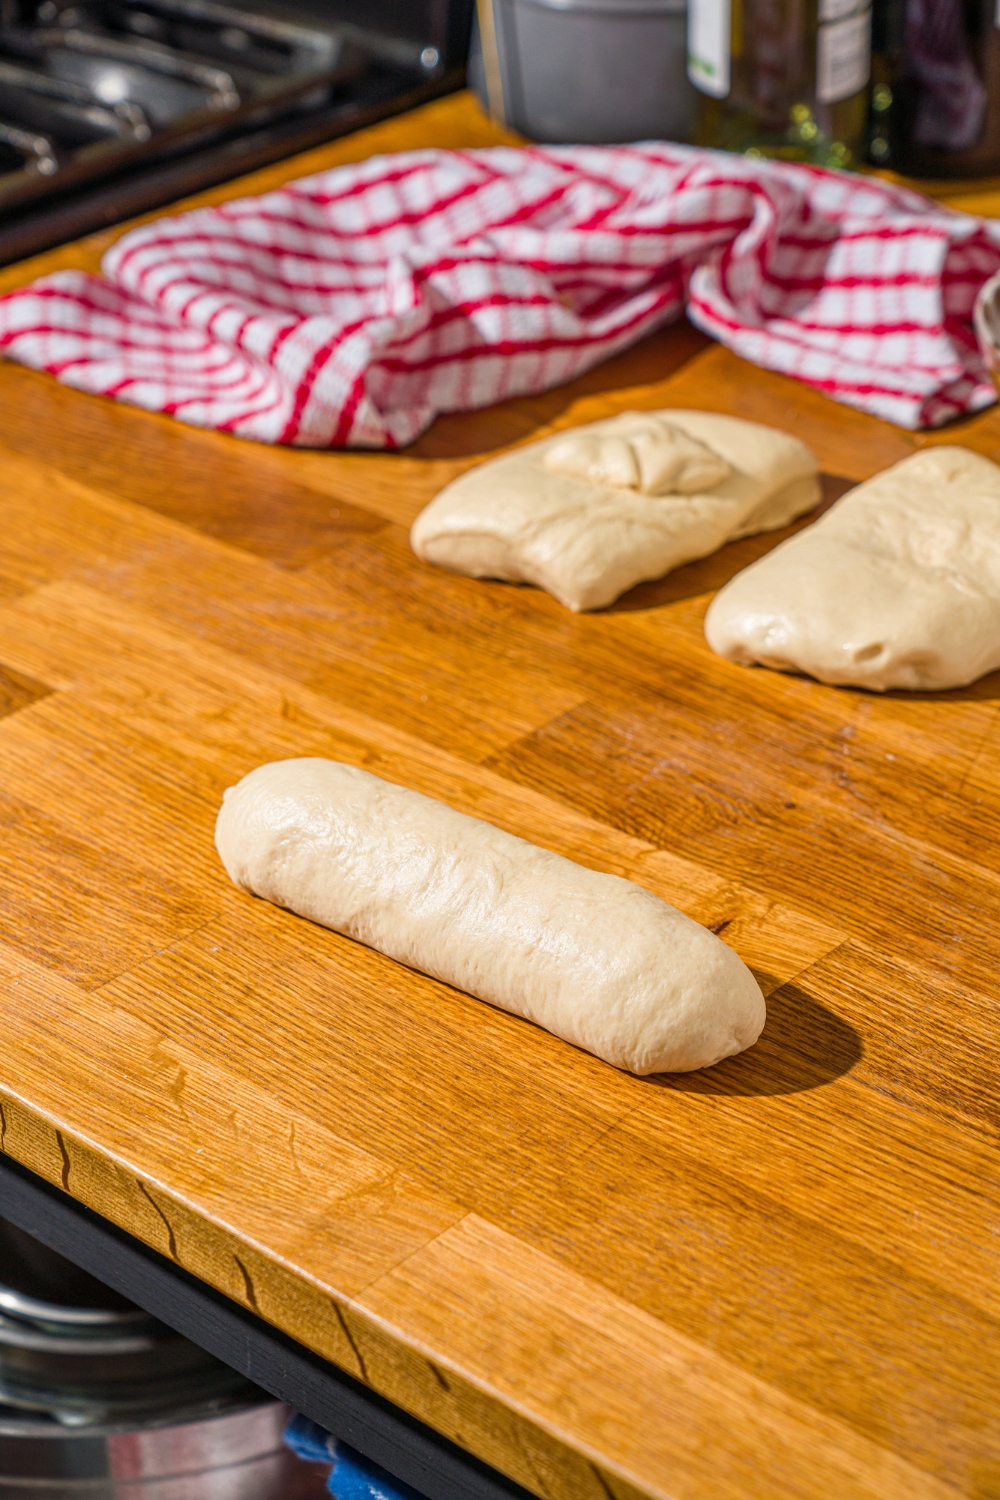
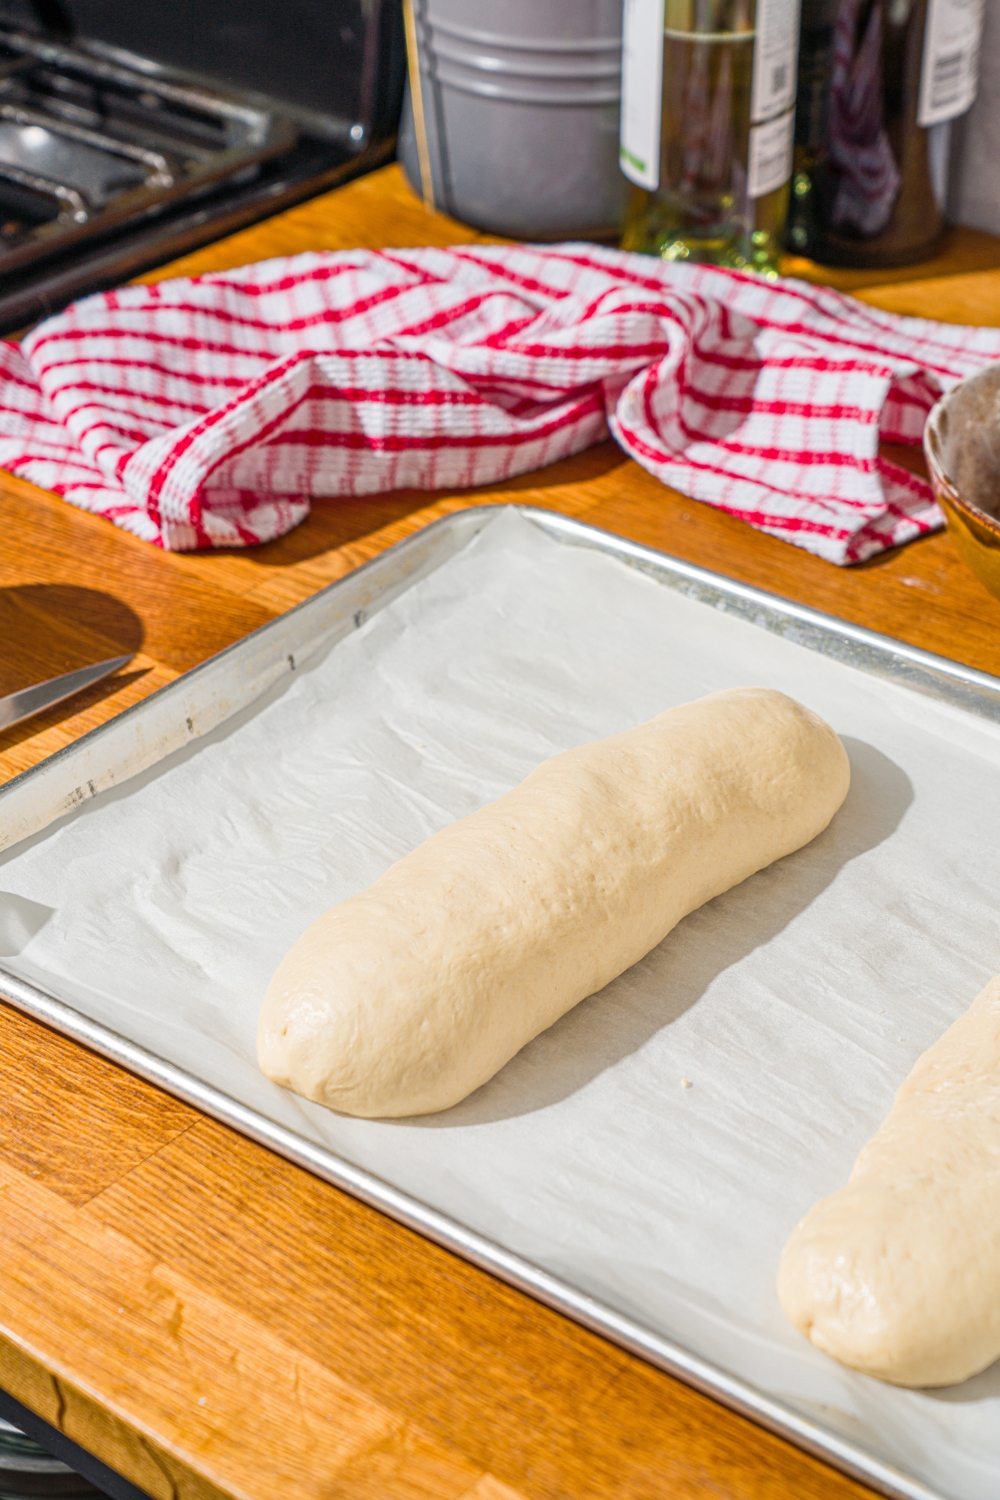
Once doubled, turn the dough out and divide it into 4 equal portions.
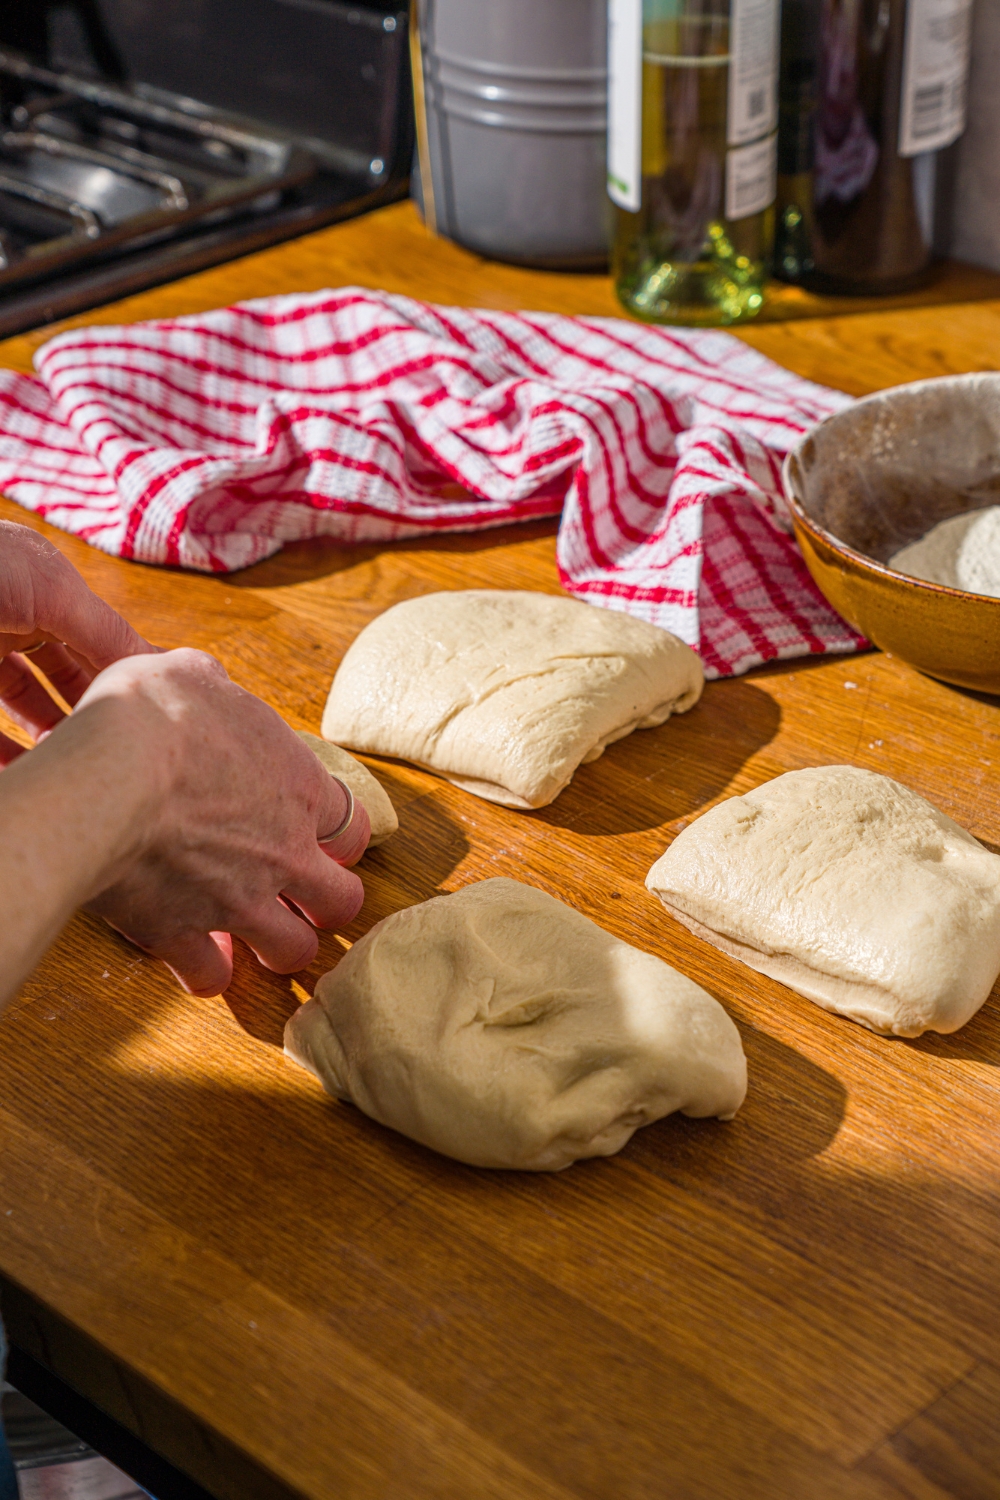
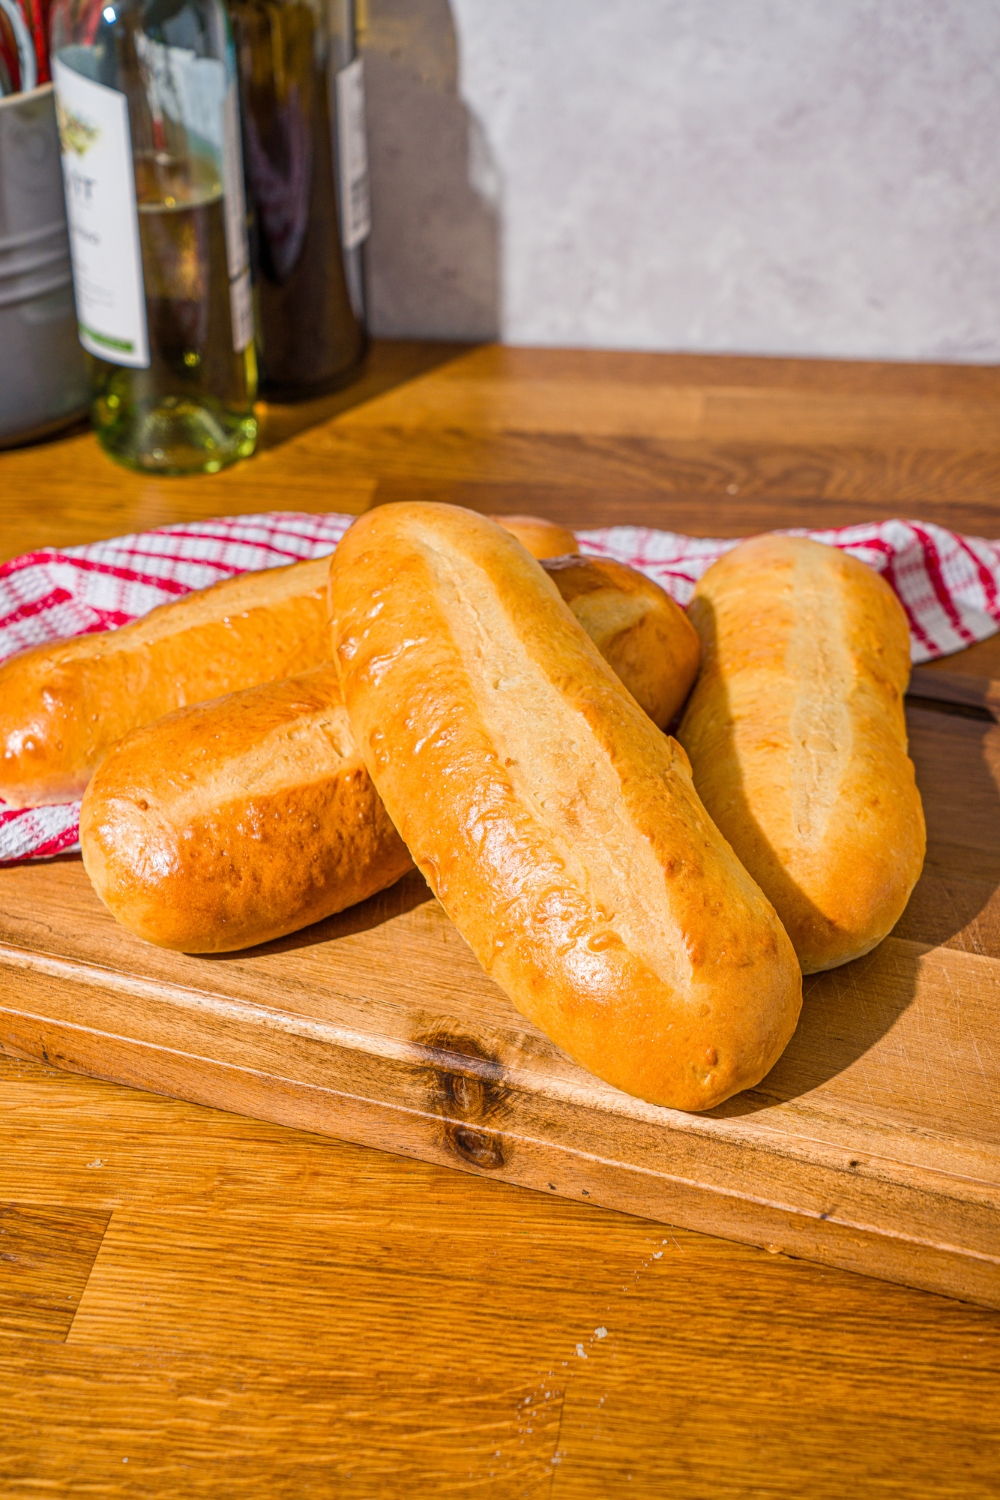
To shape each roll, press a portion into a rough rectangle with your hands, then roll it up tightly from one end to create a long, cylindrical roll shape. Press down slightly on the top to flatten it just a little for that classic hoagie sub roll shape. Place 2 rolls per baking sheet lined with parchment paper, leaving plenty of space between them.
Step 5: Second Rise
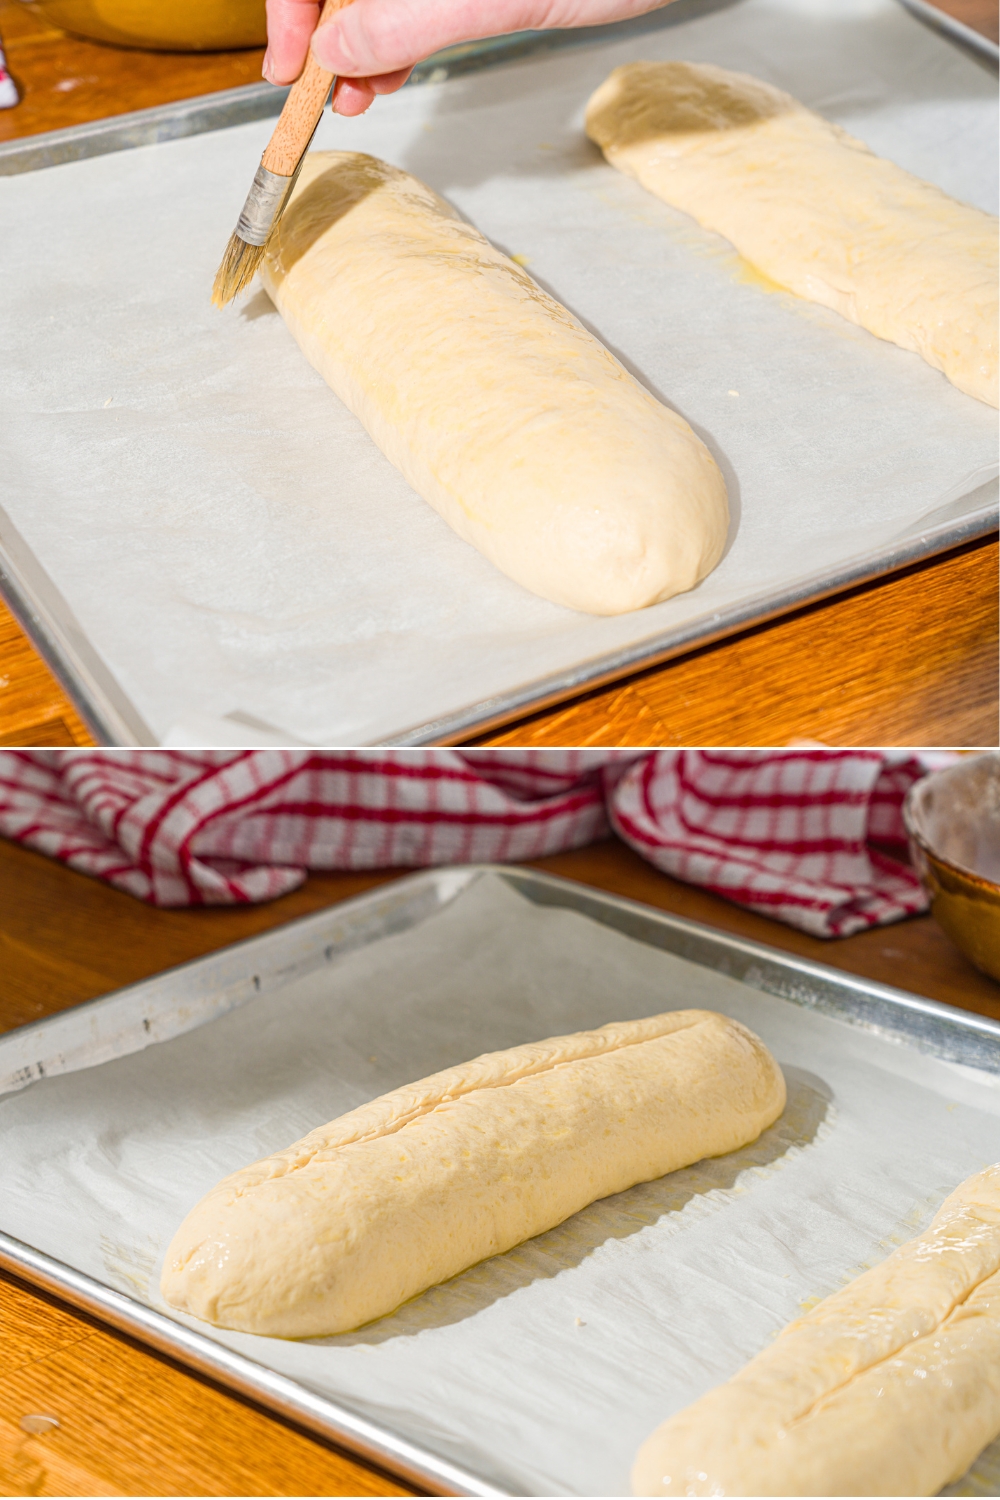
Cover the shaped rolls loosely with plastic wrap and allow them to rise for 30-45 minutes in a warm place. To test if they're ready, gently press a finger into the side of a roll. If a small indent remains and slowly springs back, they're proofed and ready to bake. If it springs back immediately, give them more time.
Step 6: Egg Wash and Score
Brush each roll generously with beaten egg wash. Using a sharp knife or bread lame, cut a single slit lengthwise down the center of each roll. This score controls how the roll expands in the oven and gives them that classic hoagie roll look.
Step 7: Bake
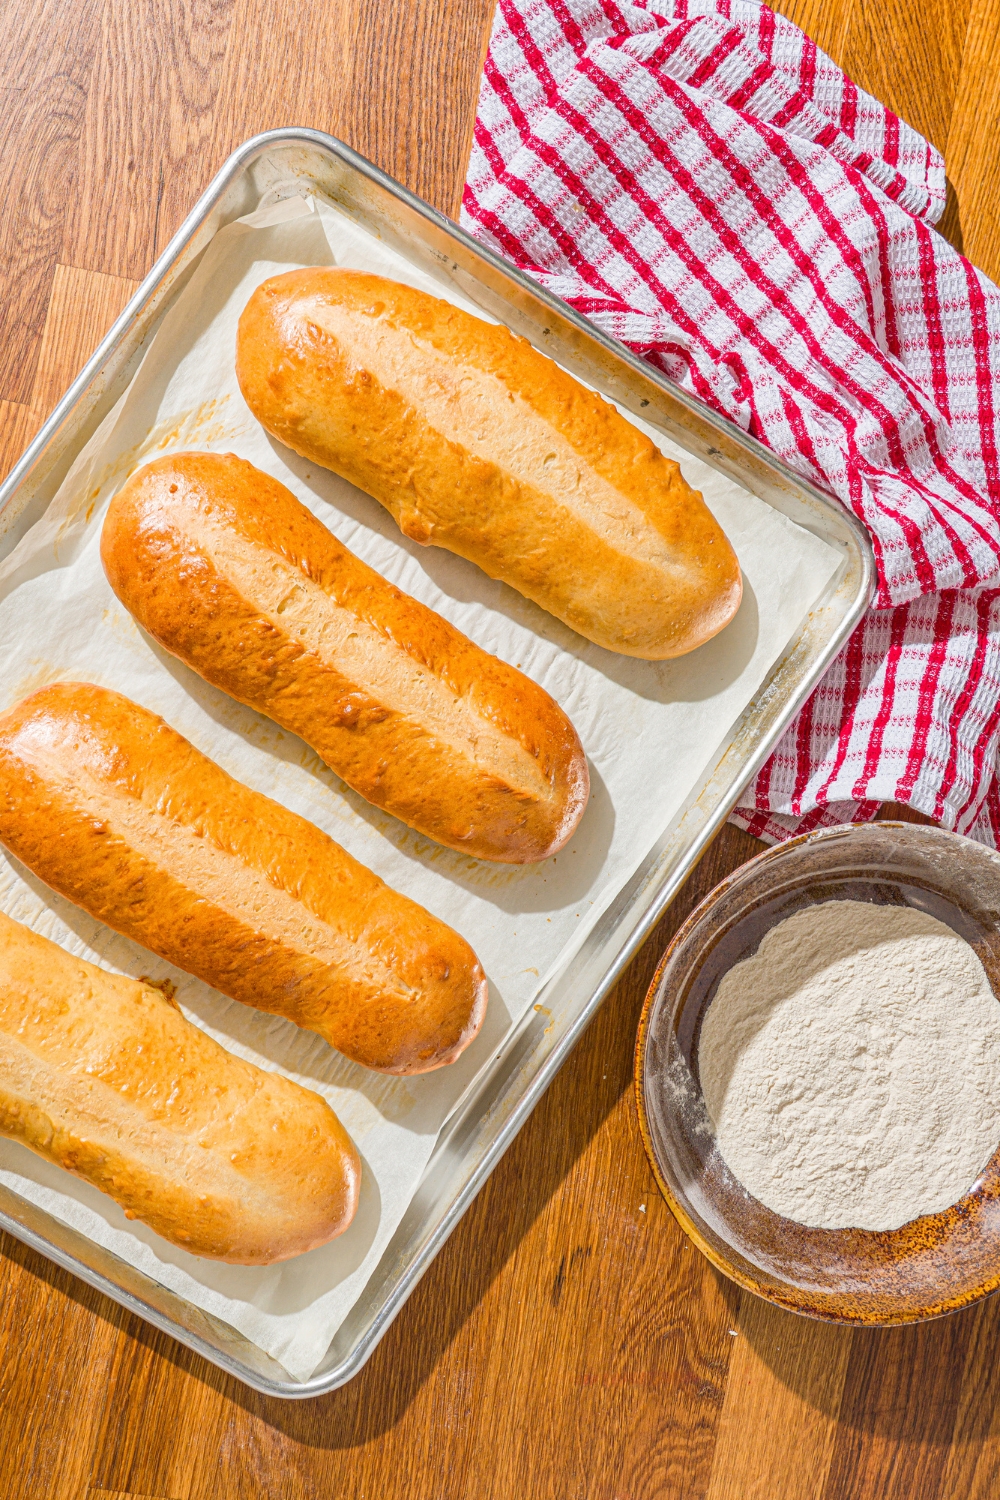
Bake at 350°F for 22-25 minutes until the rolls are deeply golden brown and sound hollow when tapped on the bottom. Transfer to a wire rack and let them cool for at least 15 minutes before slicing; the interior is still setting as they cool and cutting too early can make them gummy inside.

Pro Tips for the Best Hoagie Sub Rolls
Don't skip the milk powder. This is the ingredient that separates a great enriched roll from a basic bread roll. Milk powder adds a subtle sweetness, a tender crumb, and a richness that you can taste in every bite. Find it in the baking aisle, it's inexpensive and lasts a long time.
Use bread flour, not all-purpose. Bread flour has a higher protein content that develops more gluten during kneading, giving the rolls their characteristic chew and structure. All-purpose flour will work but produces a softer, less structured roll that won't hold up as well under heavy sub fillings.
Make sure your liquids are lukewarm, not hot. Liquids that are too hot will kill the yeast before it has a chance to activate. Aim for around 100–110°F, warm to the touch like bathwater, not hot. If you don't have a thermometer, err on the cooler side.
Knead until truly smooth. Undermixed dough produces rolls with a dense, uneven crumb. Five to seven minutes of kneading by hand develops the gluten network that gives the rolls their spring and chew. The dough is ready when it's smooth, slightly tacky, and elastic. Essentially it should stretch without tearing.
Don't rush the rises. Both the bulk ferment and the second proof are essential for flavor and texture. A dough that hasn't risen enough produces dense, heavy rolls. Give it the full time in a warm environment to get light, airy rolls every time.
Score with a sharp blade. A dull knife drags and deflates the dough instead of cutting cleanly through it. Use the sharpest knife you have or a proper bread lame for a clean, controlled score that guides the roll's expansion evenly in the oven.
What to Make with Homemade Hoagie Rolls
The whole point of making great rolls is loading them with great fillings. Here are some of my favorites:
Classic Italian sub. Salami, capicola, provolone, lettuce, tomato, onion, oil, and vinegar. The chewy interior of these rolls soaks up the oil and vinegar perfectly without falling apart. My Italian chopped sub gives you these flavors in an elevated way.
Cheesesteak. Shaved ribeye, sautéed onions and peppers, and melted provolone. A sturdy roll is essential here, since a soft store bought bun can't hold up to all that meat and cheese.
Meatball sub. Homemade meatballs in marinara, smothered in melted mozzarella. These rolls are dense enough to handle the sauce without turning soggy halfway through the sandwich.
Chicken Parmesan sub. Breaded chicken cutlet, marinara, and melted mozzarella. Toasting the inside of the roll first helps keep it from getting soft once the sauce goes on. They're also perfect for making my chicken cutlet sandwich.
Turkey and avocado. Sliced turkey, avocado, bacon, lettuce, and tomato. A lighter option that still benefits from that soft, slightly chewy texture only a fresh baked roll can give you.
French dip. Thinly sliced roast beef with au jus for dipping. These rolls hold their structure even after a quick dunk, which is exactly what you need for a proper French dip.
Hoagie Roll Variations
Sesame seed rolls. Brush with egg wash and sprinkle sesame seeds generously over the top before baking for a classic deli style hoagie roll. This is the version that looks the most like what you'd actually buy at a real sandwich shop.
Garlic butter rolls. Brush with garlic butter right when they come out of the oven instead of egg wash for a rich, savory finish. These are incredible with meatball subs, since the garlic butter soaks slightly into the crust as it cools.
Larger sandwich rolls. Divide the dough into 2 portions instead of 4 for two large, foot long style rolls perfect for feeding bigger appetites or splitting a sandwich down the middle for two people.
Whole wheat version. Replace up to half the bread flour with whole wheat flour for a nuttier, heartier roll. Add a tablespoon of extra honey to compensate for the added density, which helps keep the texture from turning too dense or dry.
How to Store and Freeze Hoagie Rolls
Room temperature. Store in a sealed bag or airtight container at room temperature for up to 2 days. They're at their absolute best on day one, but still great on day two if you toast the cut side before assembling a sandwich.
Freezer. These rolls freeze well, which makes them a great recipe to double up on. Let them cool completely, wrap each roll individually in plastic wrap, then transfer to a zip-lock freezer bag and freeze for up to 2 months. To thaw, leave them at room temperature for an hour, or warm them straight from frozen in a 325°F oven for 8-10 minutes. They come out tasting freshly baked either way.
Homemade Sub Rolls FAQs
What is the difference between a sub roll and a hoagie roll?
Sub rolls and hoagie rolls are very similar. Both are soft, long sandwich rolls made for subs, hoagies, grinders, and deli-style sandwiches. Most of the difference comes down to region and what people call them.
What kind of bread is best for homemade subs?
A soft but sturdy roll is best for subs. You want a roll that’s fluffy inside, slightly chewy, and strong enough to hold meats, cheese, sauces, and toppings without falling apart. That’s exactly what these homemade sub rolls are made to do.
Why didn’t my yeast mixture get frothy?
If the yeast doesn’t foam after sitting, the yeast may be old or the liquid may have been too hot or too cold. The yeast should look bubbly and active before you move on, or the dough may not rise properly.
How do I know when the dough has risen enough?
The dough should look noticeably puffed and about doubled in size during the first rise. For the second rise, the rolls are ready when you gently press the dough and a small indent stays behind instead of springing back right away.
Why are my homemade sub rolls dense?
Dense rolls usually happen when too much flour is added, the dough isn’t kneaded enough, or the dough didn’t rise long enough. The dough should feel smooth and soft, not dry or stiff.
Can I make hoagie rolls ahead of time?
Yes. You can bake the rolls ahead and store them once cooled. They’re great for meal prep, sandwiches throughout the week, or making ahead for parties.
Why do you slash the top of the rolls before baking?
The slit helps the rolls expand more evenly in the oven and gives them that classic sub-roll look. It also helps control where the bread opens as it bakes.
Can I use these rolls for sandwiches other than subs?
Definitely. These rolls work well for cold deli sandwiches, meatball subs, cheesesteaks, sausage sandwiches, chicken parm, and even breakfast sandwiches if you want a larger roll.
More Bread Recipes to Try Next
- Italian Herbs and Cheese Bread
- Ezekiel Bread
- Longhorn Steakhouse Bread
- Rice Cooker Banana Bread
- Blender Rice Bread
Homemade Hoagie Rolls

These homemade sub rolls are soft, chewy, golden on the outside, and pillowy on the inside — everything a great hoagie roll should be and everything store-bought rolls consistently fail to deliver. Made with bread flour, milk powder, honey, and butter, they come out of the oven tasting like something from a real bakery. Once you make them yourself, going back to the bag is not an option.
Ingredients
- 3-31/2 Cups Bread Flour
- 1 Cup Lukewarm Water
- ½ Cup Lukewarm Milk
- 2 Tablespoons Honey
- 3 Tablespoons Melted and Cooled Butter
- 1 Tablespoon Instant Yeast
- 1 Tablespoon Milk Powder
- 1 ½ Teaspoon Salt
Instructions
- In a large bowl, add the water, milk, honey, and yeast. Stir together and allow to sit for 10 minutes until frothy.
- Add the 3 cups of flour, milk powder, melted butter, and salt. Stir together until a shaggy dough forms. Turn out onto a floured surface and knead in the remaining flour or as much as it takes to make a smooth dough, about 5-7 minutes. You may not use all the flour.
- Return the dough to a lightly oiled bowl and cover with plastic. Allow to bulk ferment in a warm area for about an hour until it has doubled in size.
- Portion the dough into 4 equal loaves. Shape each portion by pressing into a rectangle and roll to create a long roll shape. Slightly press down to flatten out the top and place 2 rolls per baking sheet lined with parchment paper.
- Cover again with plastic and allow to rise for 30-45 minutes. You will know its ready when you press and a small indent is left. Towards the end of rising, preheat your oven to 350°F.
- After they rise again, brush with egg wash and using a sharp knife cut a single slit lengthwise down the center of each roll.
- 6. Bake at 350°F for 22-25 minutes until they are golden brown.
Notes
- Bread flour is strongly recommended over all-purpose for the best chew and structure.
- Don't skip the milk powder; it's the key to a tender, enriched crumb.
- Liquids should be lukewarm (around 100–110°F), not hot.
- The finger-dent test tells you when the second rise is complete.
- Freeze individually wrapped cooled rolls for up to 2 months.
Leave a Reply