If you’ve been seeing salt bread all over social media and wondering if it’s worth making at home, it absolutely is. Also known as shio pan, this bakery-style bread has crisp buttery bottoms, soft fluffy centers, and just the right salty finish on top. It looks simple, but when it’s made right, the texture is what makes it so special. This salt bread recipe walks you through each step so you can get that classic shape, tender interior, and rich buttery bite at home.
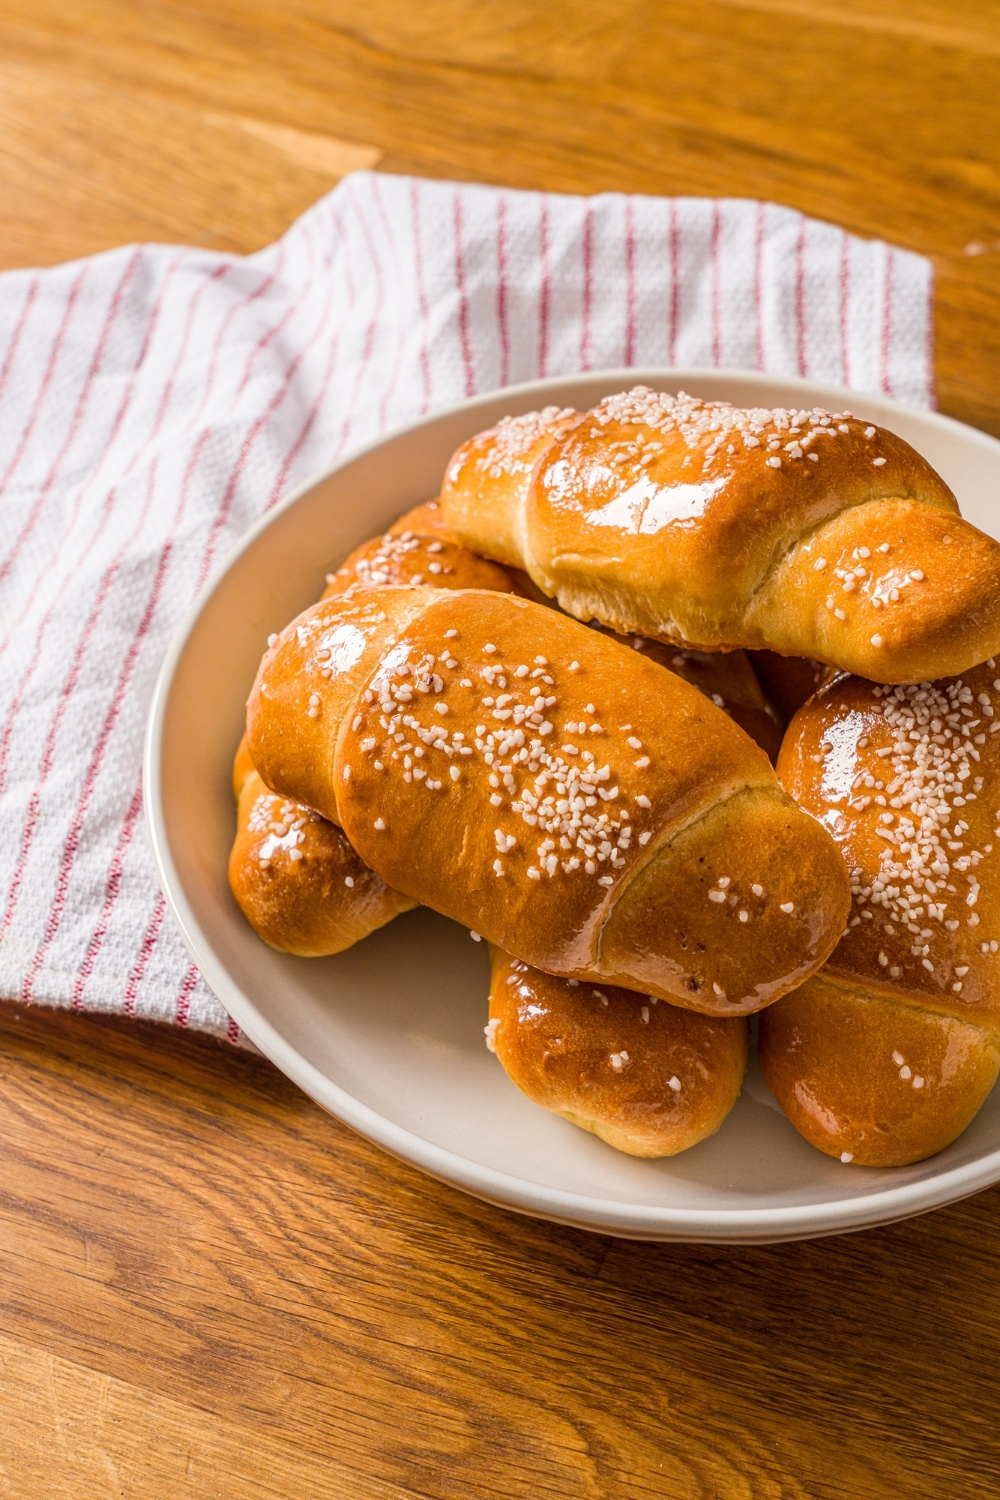
Table of Contents
Why You’ll Love This Salt Bread Recipe
When salt bread started taking over my feed, I could instantly see why people were obsessed with it. It looked buttery, fluffy, and honestly a lot easier to make than some other viral bread recipes. After testing it myself, I ended up with a salt bread recipe that gives you that bakery-style result with simple ingredients and a technique that’s totally doable at home.
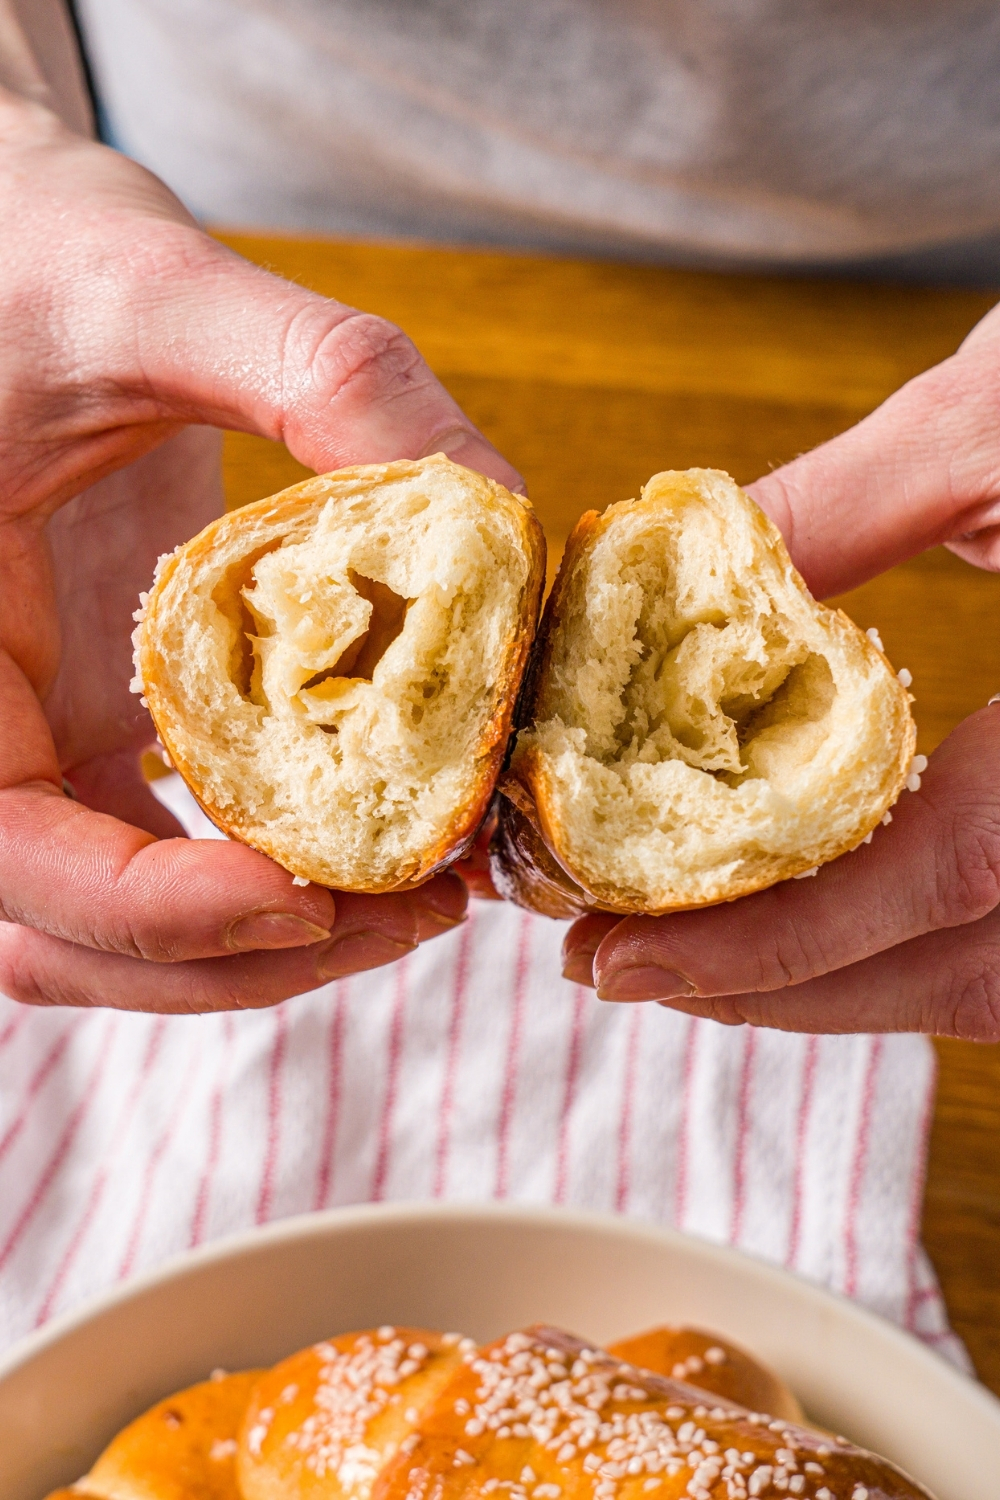
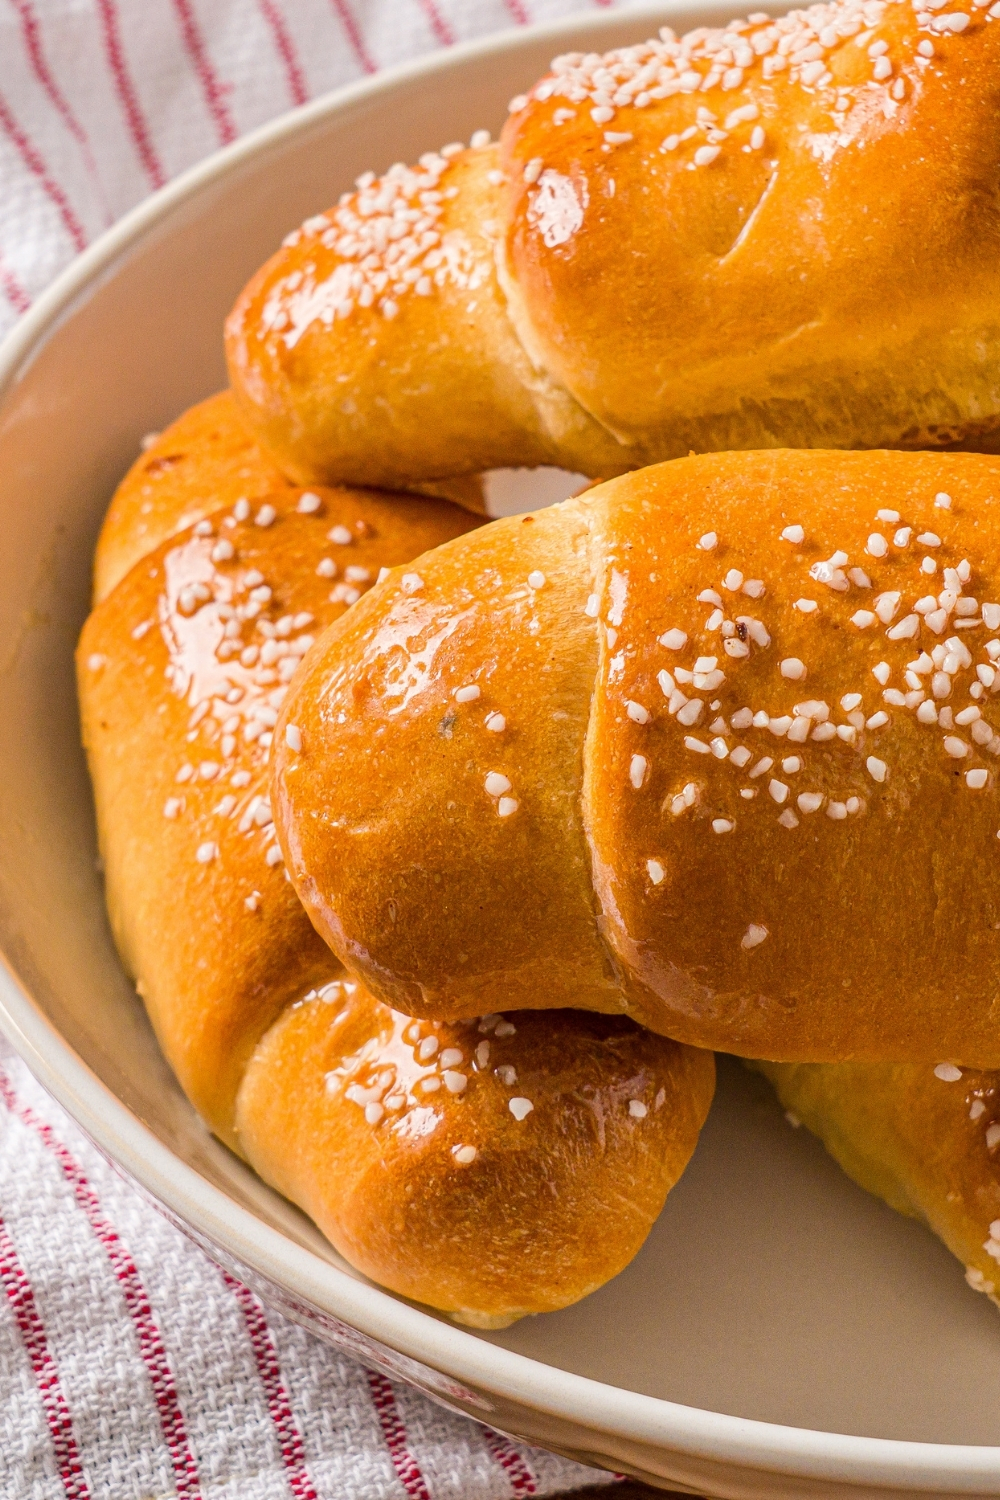
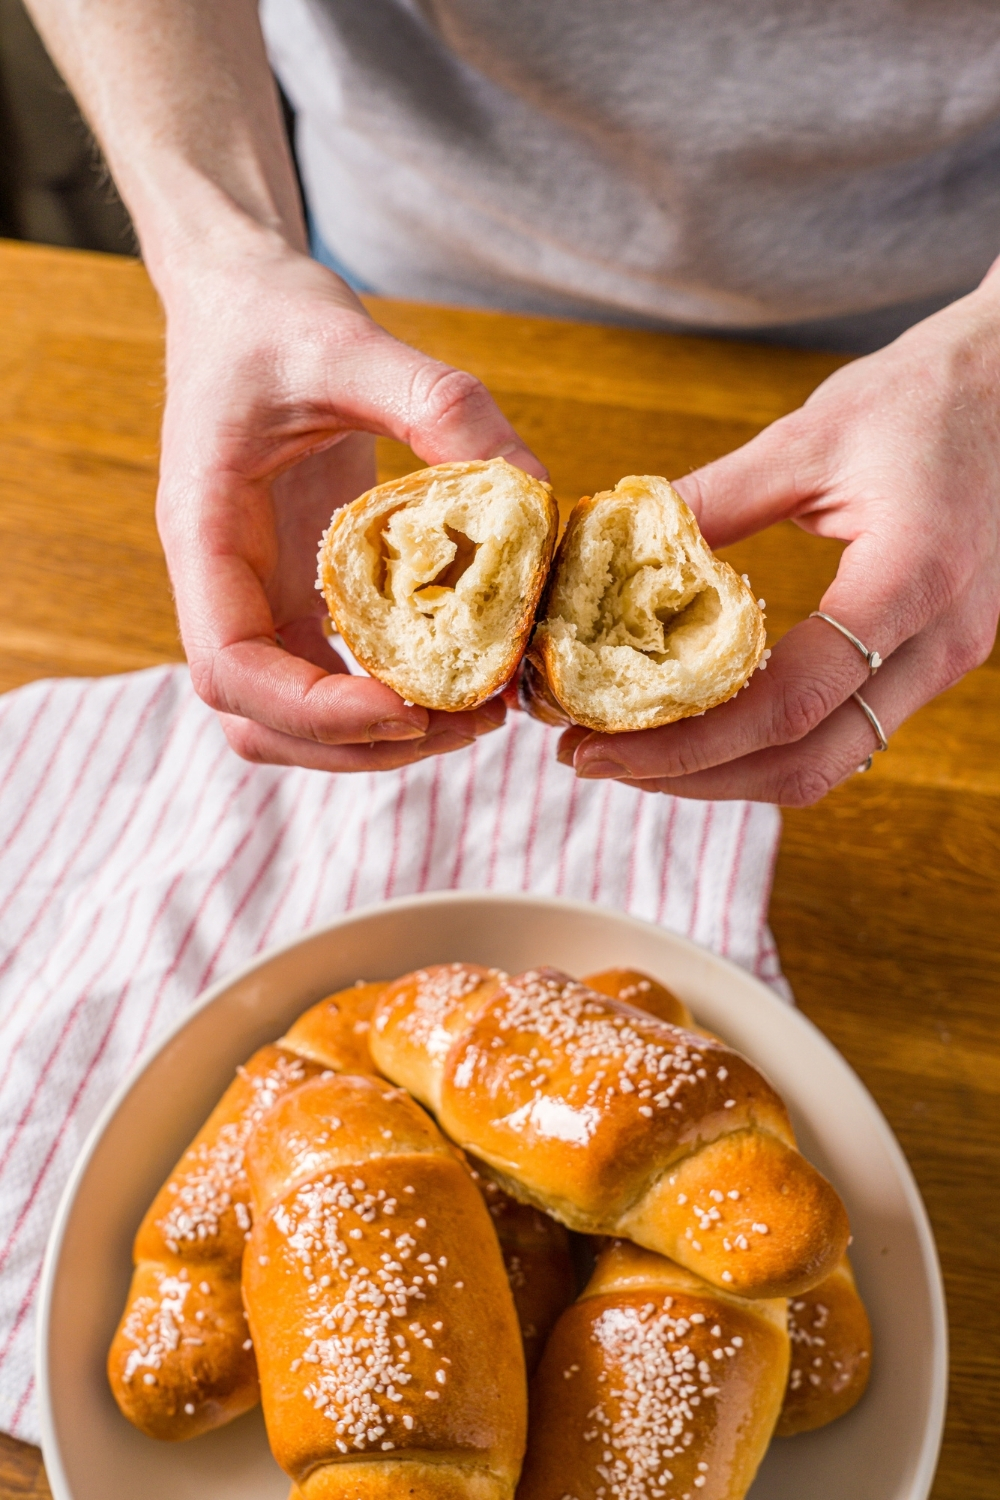
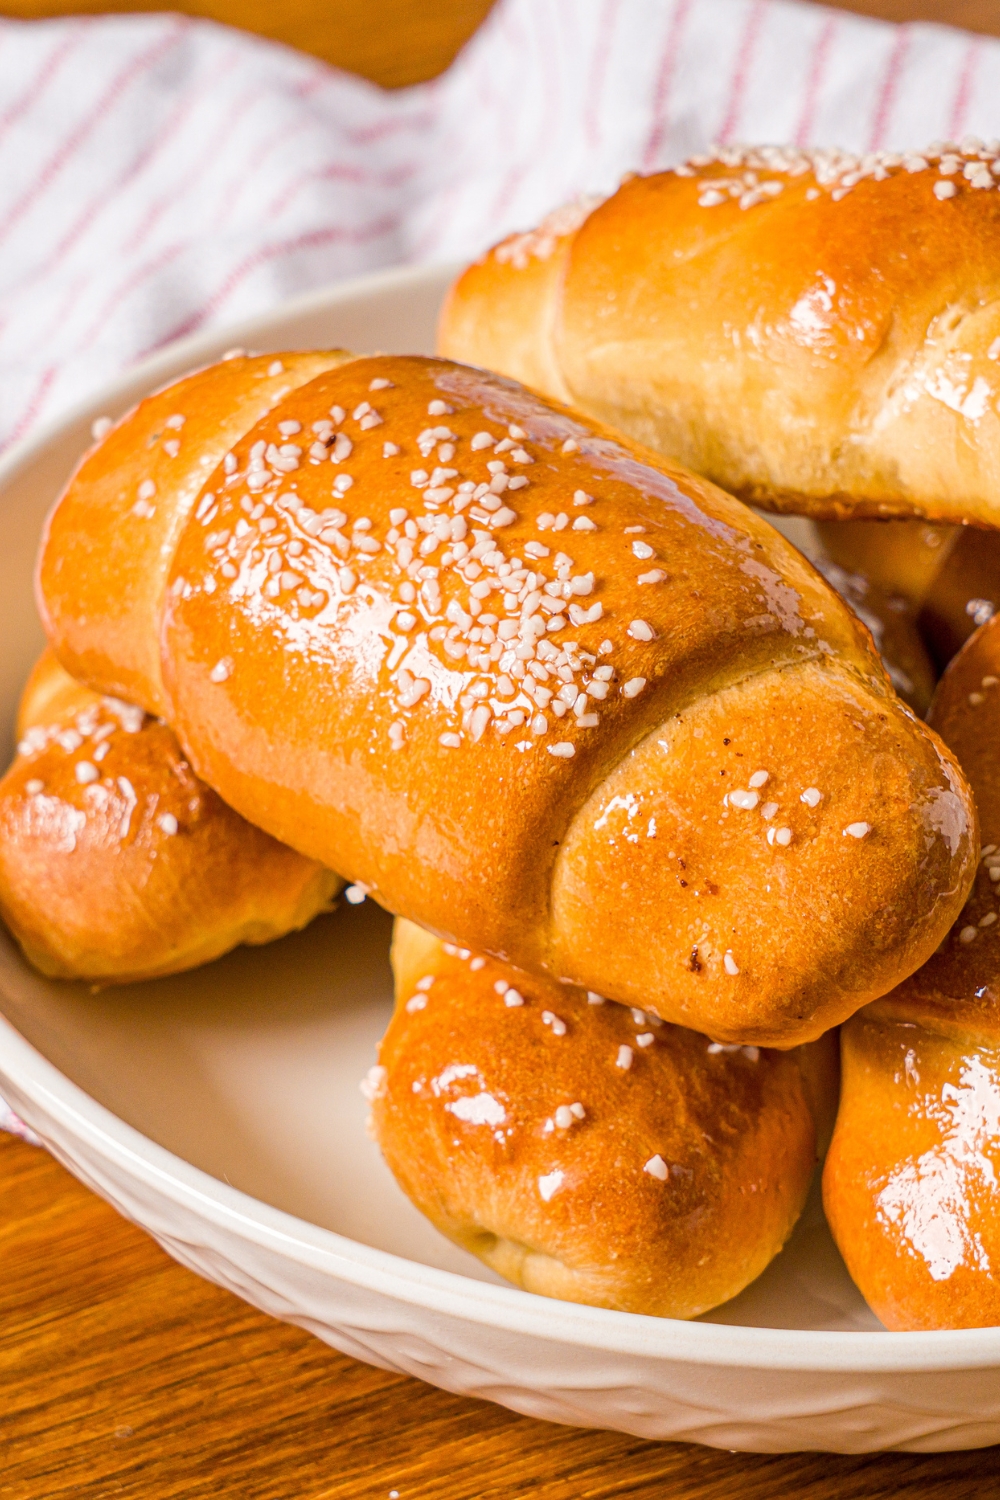
What makes this shio pan so good is the contrast in texture. The tops bake up lightly golden with that signature salty finish, while the bottoms get crisp and buttery from the cold butter melting into the dough as it bakes. Inside, the bread stays soft, light, and tender with that perfect pull-apart texture.
Another reason to love this salt bread recipe is that it really teaches you what to look for as you go. The dough may seem sticky at first, but once it is kneaded properly and reaches the windowpane stage, it becomes smooth, elastic, and much easier to shape. In the end, you get warm homemade rolls that taste like they came from a bakery, only even better because they’re fresh from your own oven.
What Is Salt Bread?
Salt bread, also known as shio pan, is a buttery bakery roll with a lightly salty top, a soft fluffy center, and a crisp, golden bottom. It’s especially popular in Japan and Korea, where the dough is often rolled around a piece of cold butter before baking. As the bread bakes, the butter melts into the dough and pan, which helps create that rich flavor, tender interior, and signature buttery underside that makes salt bread so good.
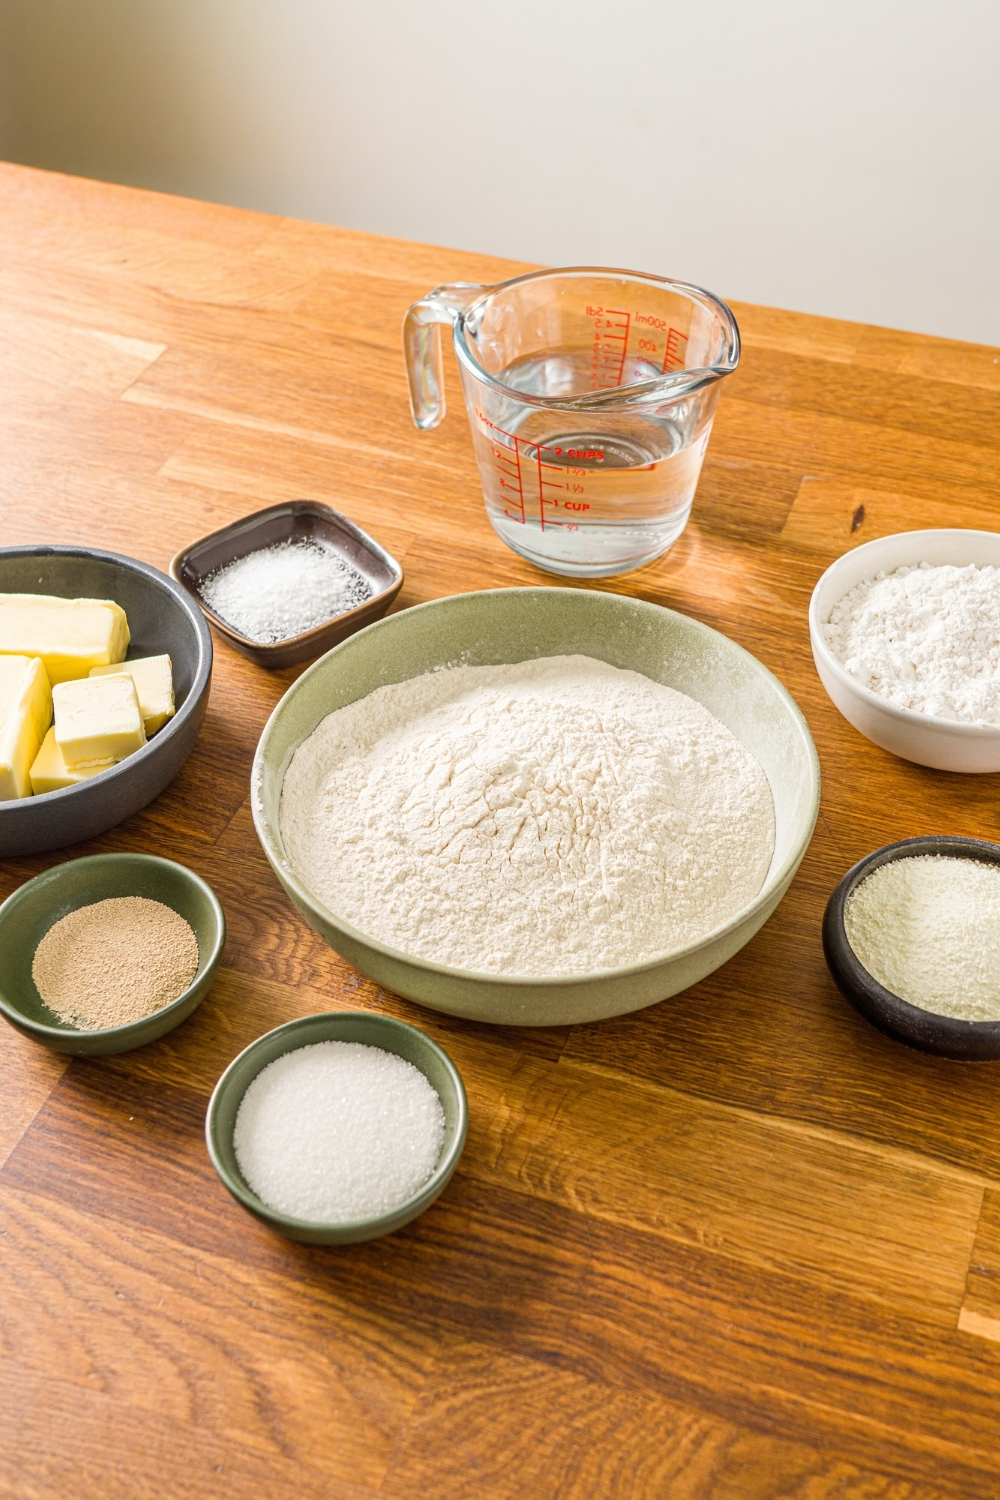
Ingredients You Need
For the Dough:
- 400g bread flour
- 120g cake flour
- 365g ice water
- 26g sugar
- 10g salt
- 30g non-fat milk powder
- 7g instant dry yeast
- 40g cold unsalted butter (straight from the fridge)
- 180g butter, portioned into 15 g blocks (12 sticks)
For Finishing:
- Egg wash (1 egg whisked with a splash of water)
- Pretzel salt or flaky salt (for topping)
Key Ingredient Notes
- Bread flour and cake flour: Using both gives this salt bread the best texture. The bread flour adds structure and chew, while the cake flour keeps the crumb softer and lighter, so the rolls stay fluffy instead of dense.
- Ice water: Ice water helps keep the dough cool while mixing and kneading. That matters in a recipe like this because you want the butter to stay controlled and the dough to develop properly without getting too warm too early.
- Cold butter: Butter is used in two important ways here, with a little mixed into the dough and more rolled into each piece before baking. Keeping it cold makes shaping easier and helps create that signature buttery bottom and soft layered texture once the bread bakes.
- Milk powder: Milk powder adds richness and helps the salt bread brown more evenly in the oven. It also improves the overall flavor without adding extra liquid to the dough.
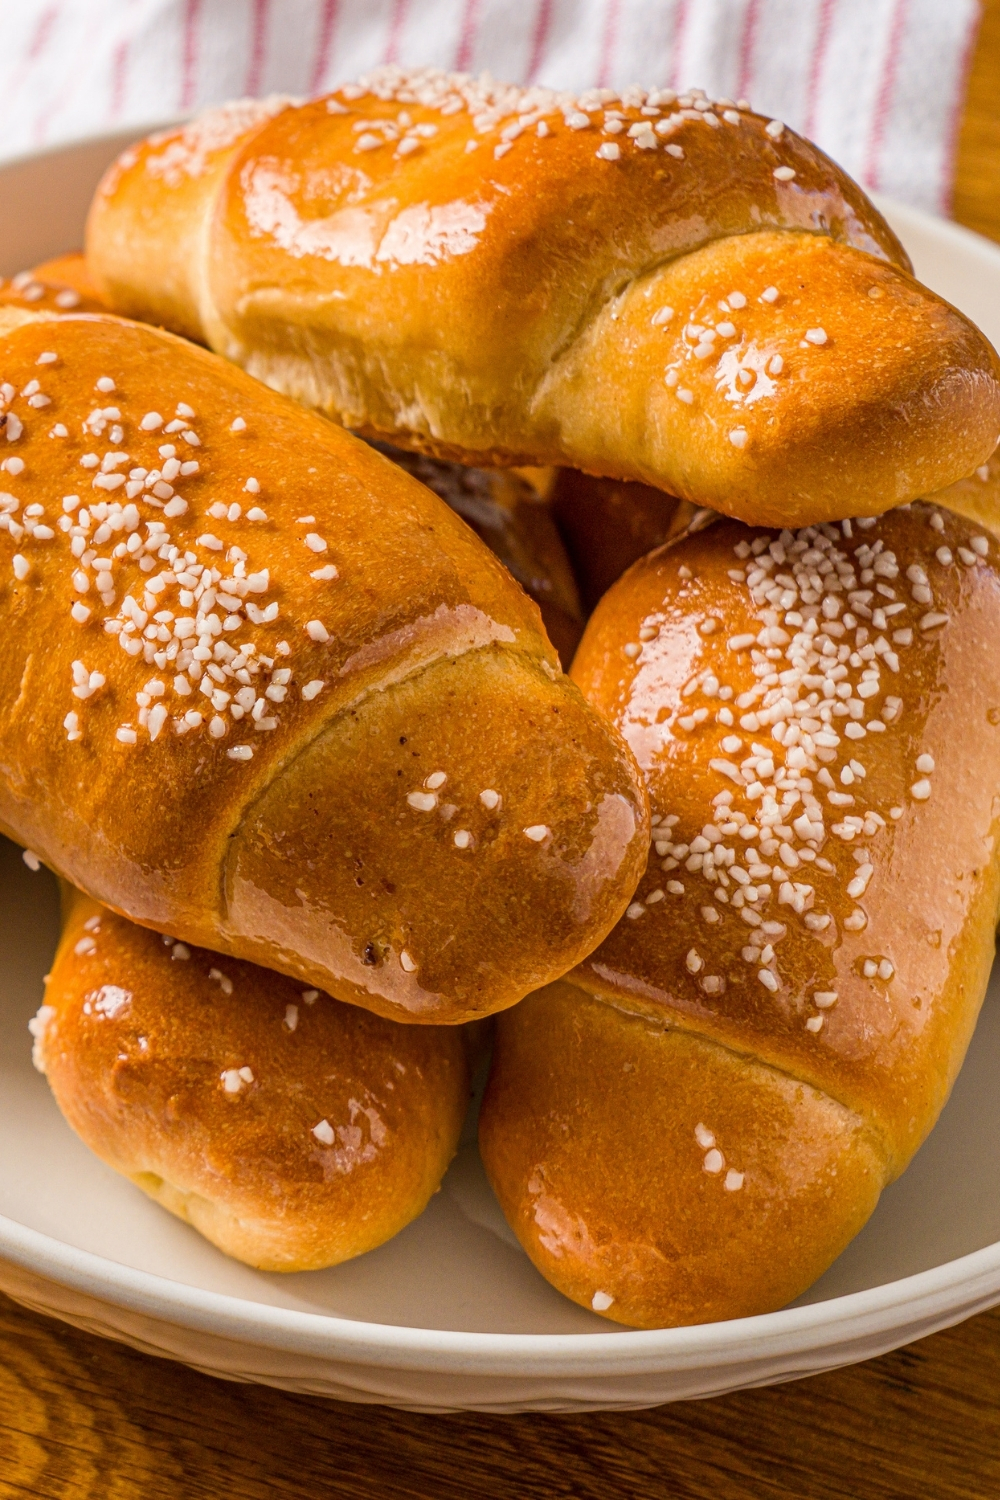
- Pretzel salt or flaky salt: Pretzel salt gives salt bread that classic bakery-style look and a more noticeable salty bite on top. Flaky salt also works, but pretzel salt tends to stay more visible after baking.
Equipment You’ll Want
You don't need a lot of fancy tools to make this recipe, but a few things make the process easier. A stand mixer with a dough hook is helpful for kneading, and a kitchen scale makes it much easier to get the dough portions consistent. A rolling pin, parchment paper, and a baking sheet are all useful for shaping and baking, and a spray bottle helps with misting during proofing. A thermometer can also be helpful if you want more accuracy during proofing, but it's not required.
How to Make Salt Bread
Step 1: Mix the dough
Add bread flour, cake flour, sugar, salt, milk powder, yeast, and ice water to the bowl of a stand mixer. Mix with a dough hook on low speed until a shaggy cohesive dough forms, about 1 minute.
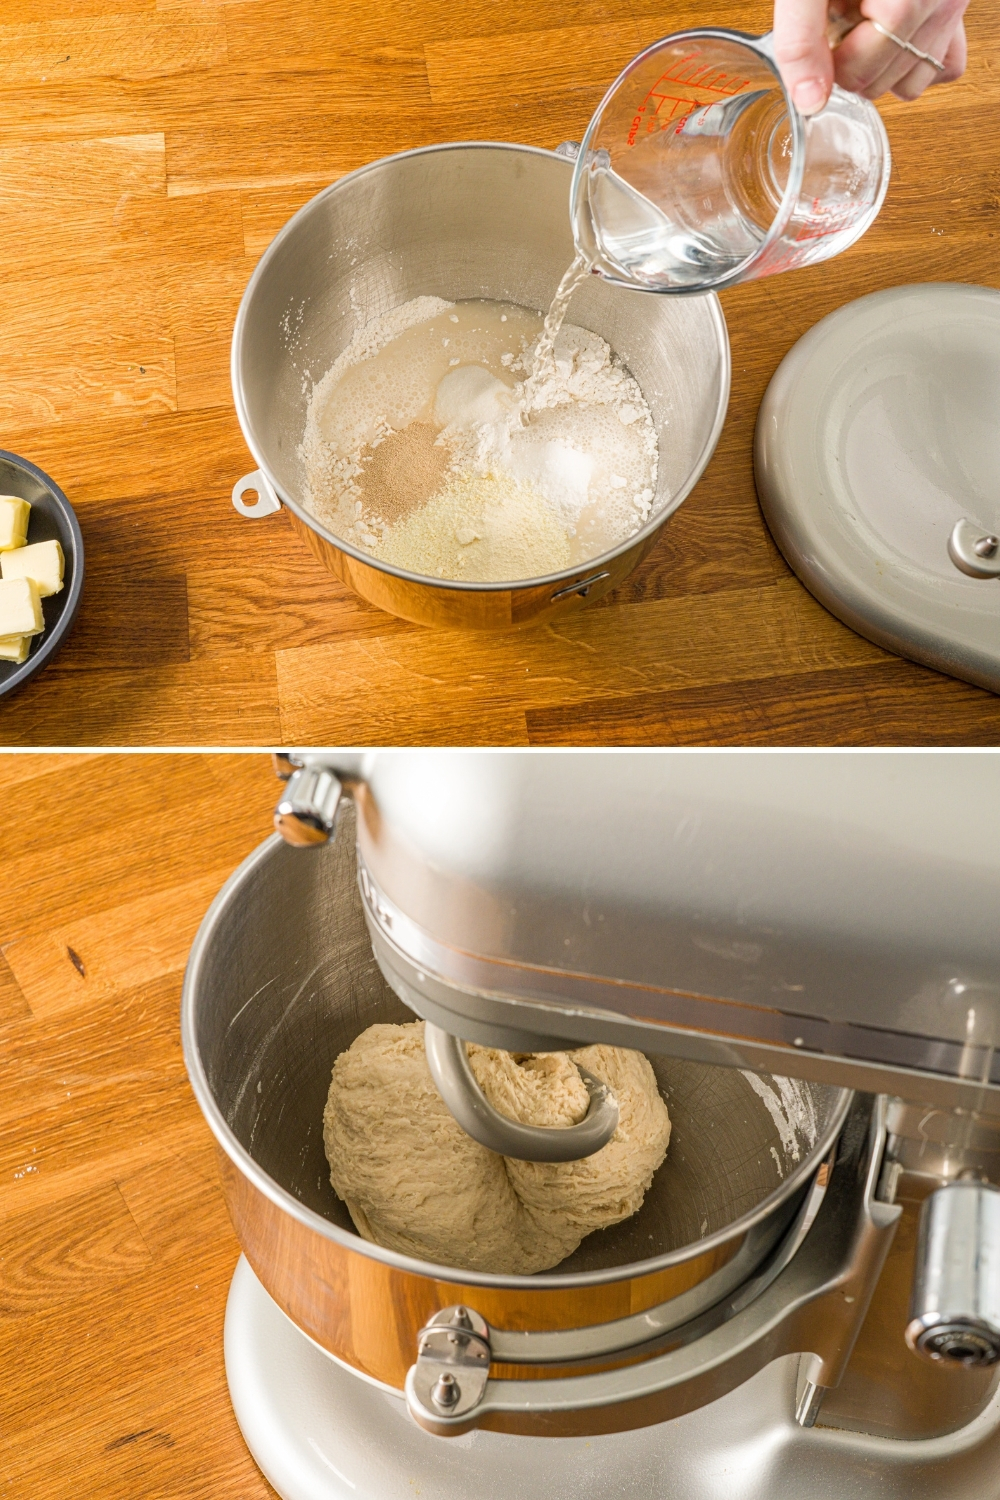
Step 2: Add cold butter and knead
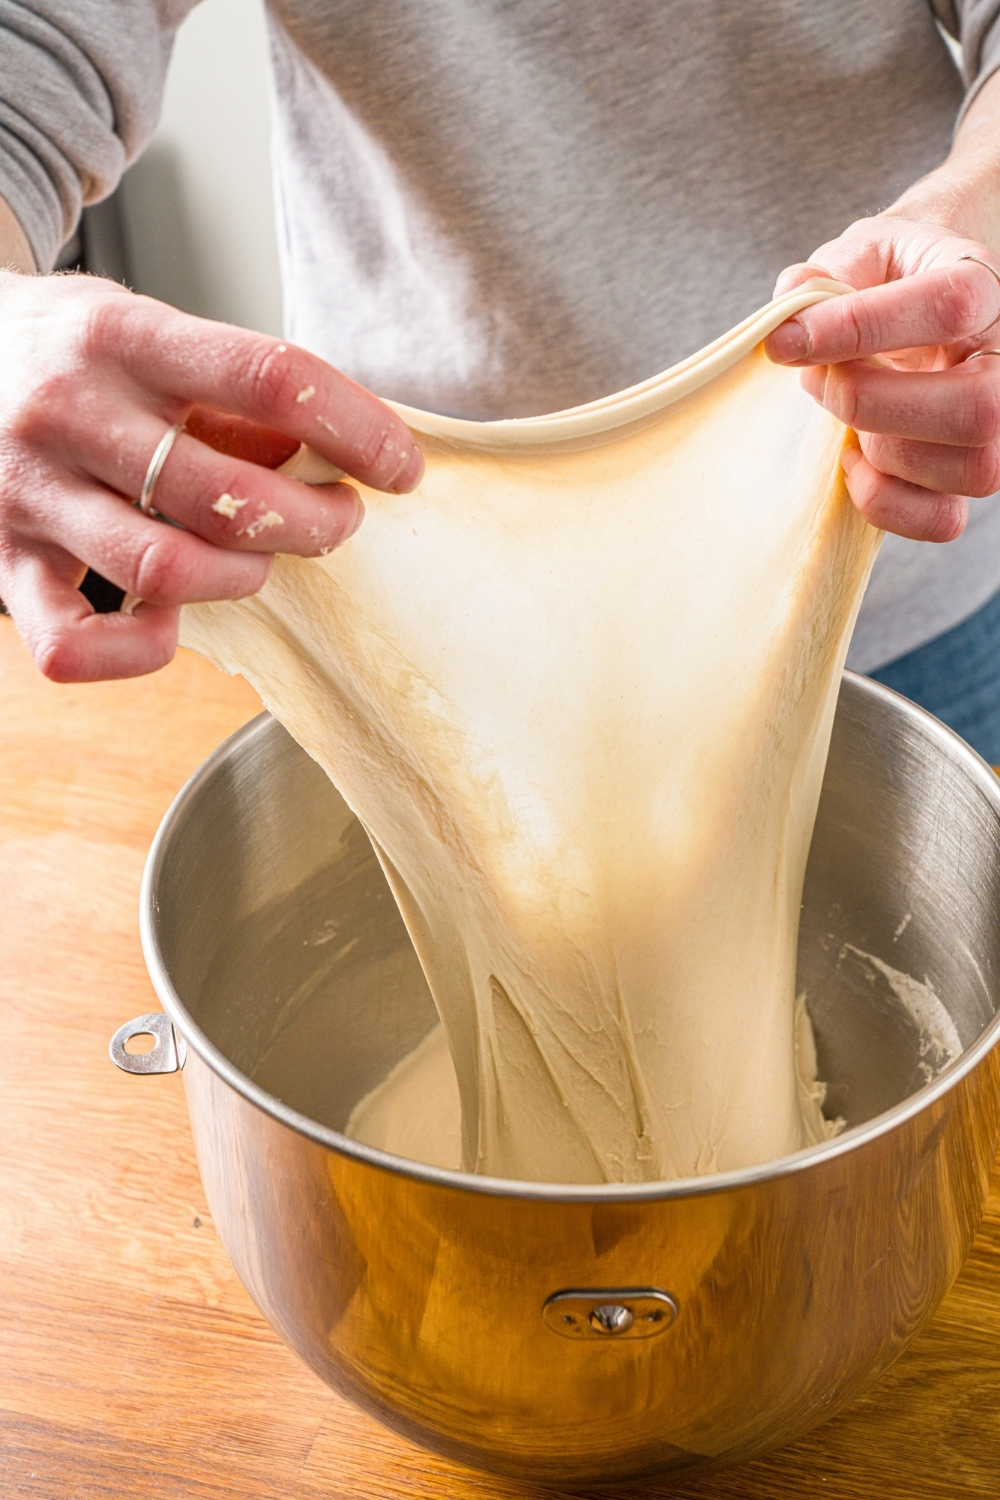
Add the 40 grams of cold unsalted butter and increase to medium speed. Knead until the dough is smooth and passes the windowpane test, about 20 to 25 minutes depending on your mixer.
Important note: Don’t add extra flour just because the dough feels sticky at first. Stickiness early on is normal. The dough tightens and becomes smooth as gluten develops.
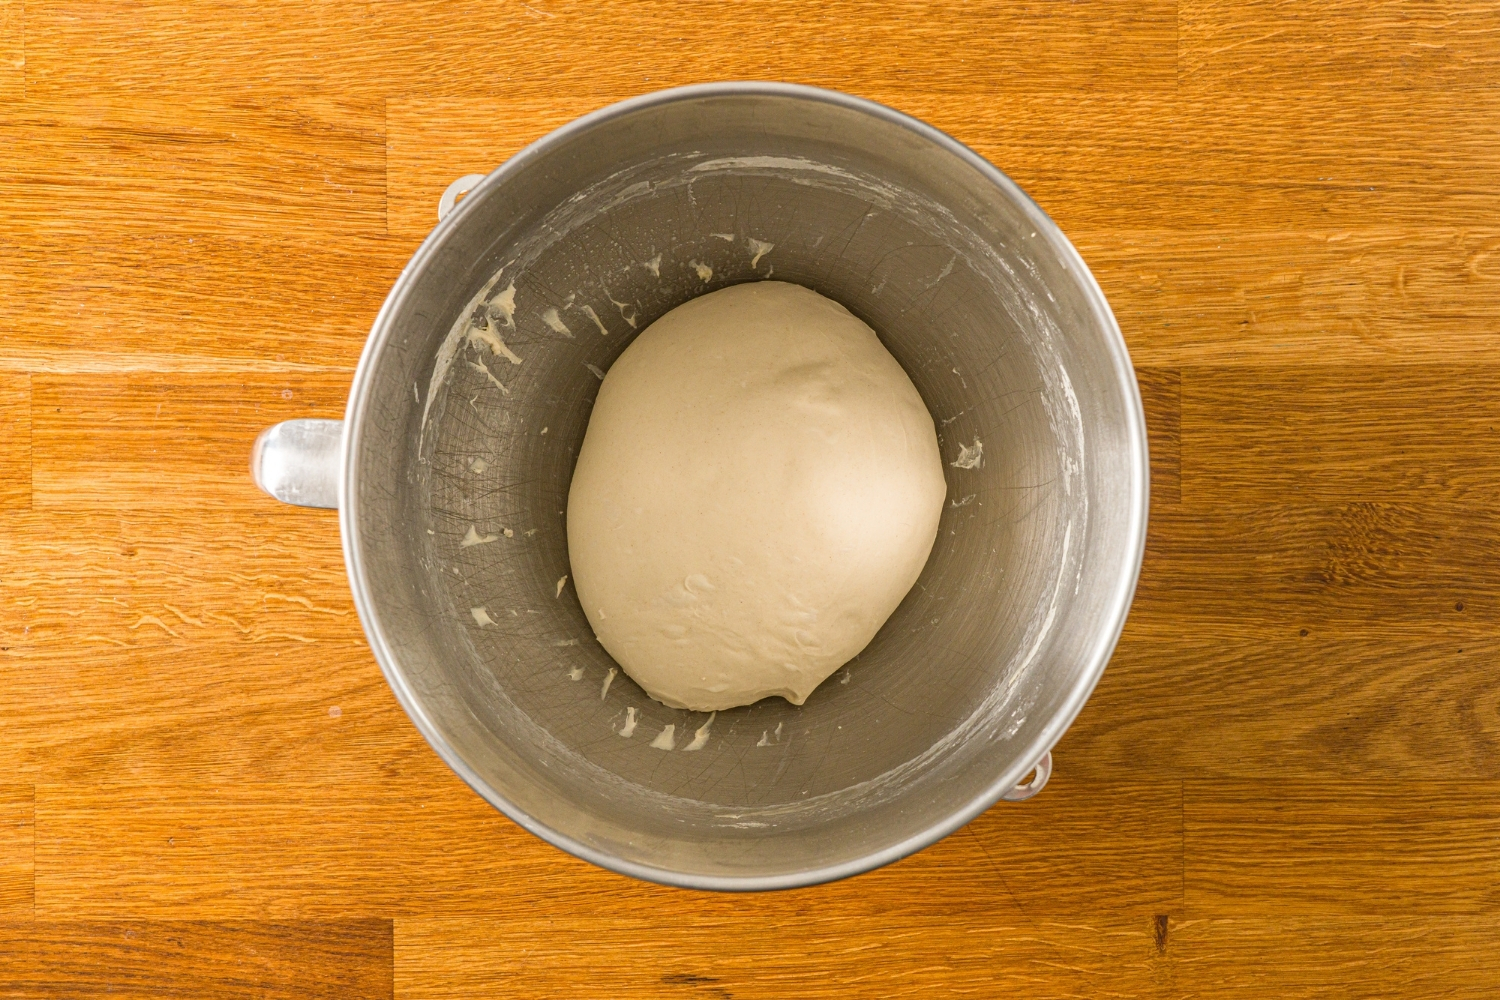
Step 3: First rise (bulk fermentation)
Shape the dough into a smooth ball, place it in a bowl, cover, and let it rise until doubled in size. This usually takes about 1 hour in a 78°F environment, but it depends on your room temperature.
Poke test: Flour your finger and gently poke the dough. If the indentation stays and doesn’t spring back quickly, it’s ready.
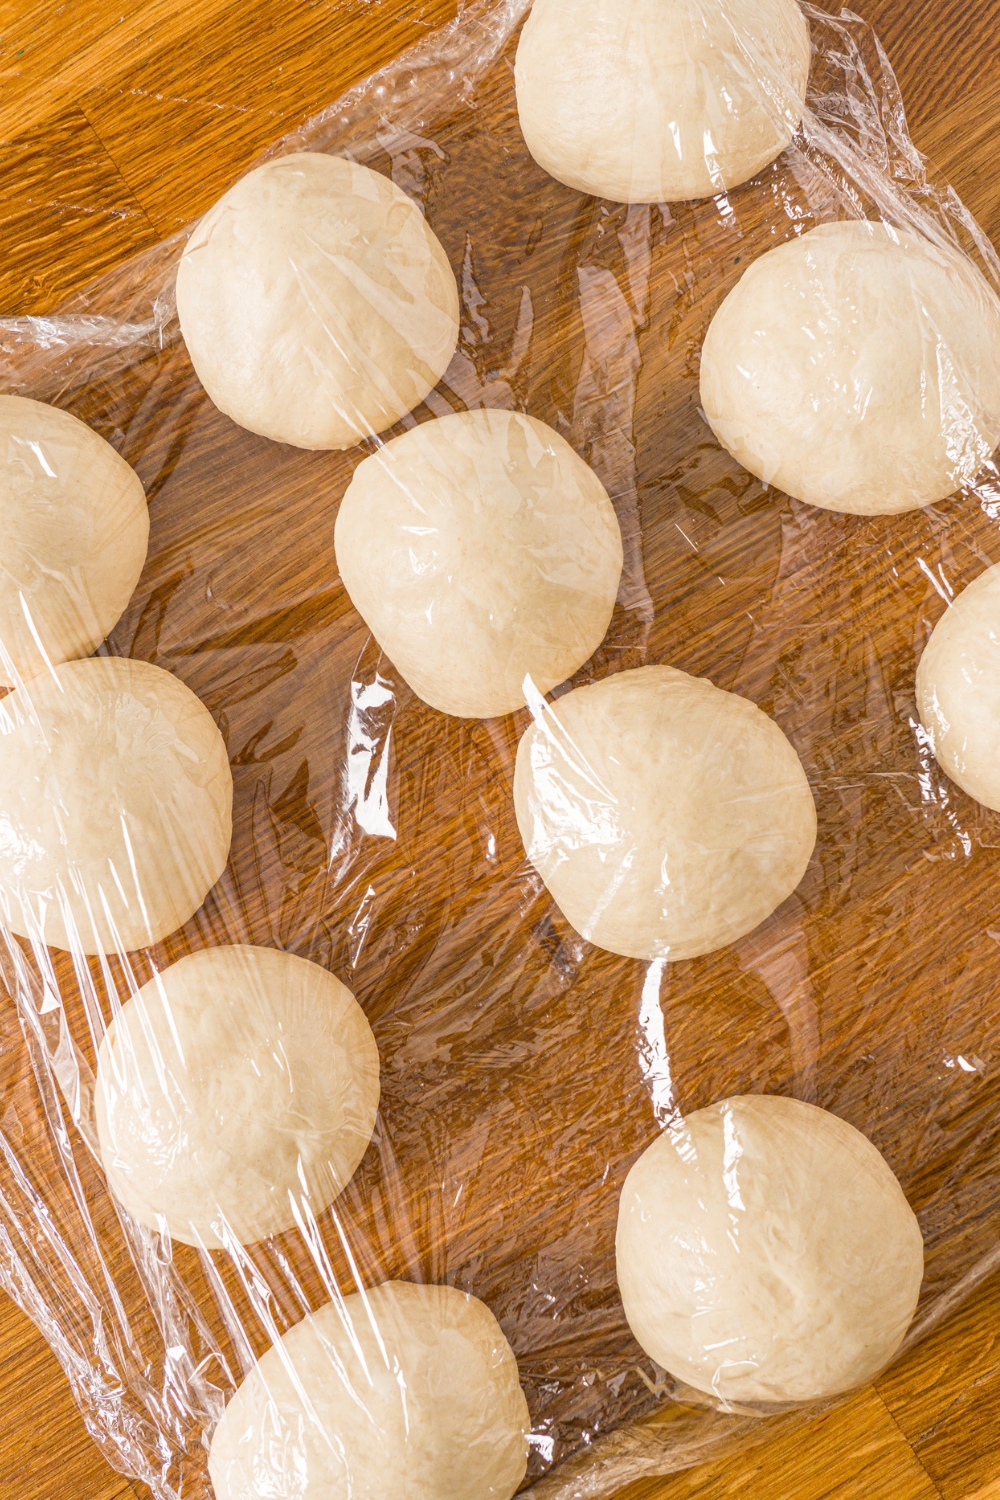
Step 4: Divide and rest
Degas the dough and divide into 80 gram portions. Roll each into a smooth ball, cover, and rest 15 minutes. This relaxes gluten and makes shaping easier.
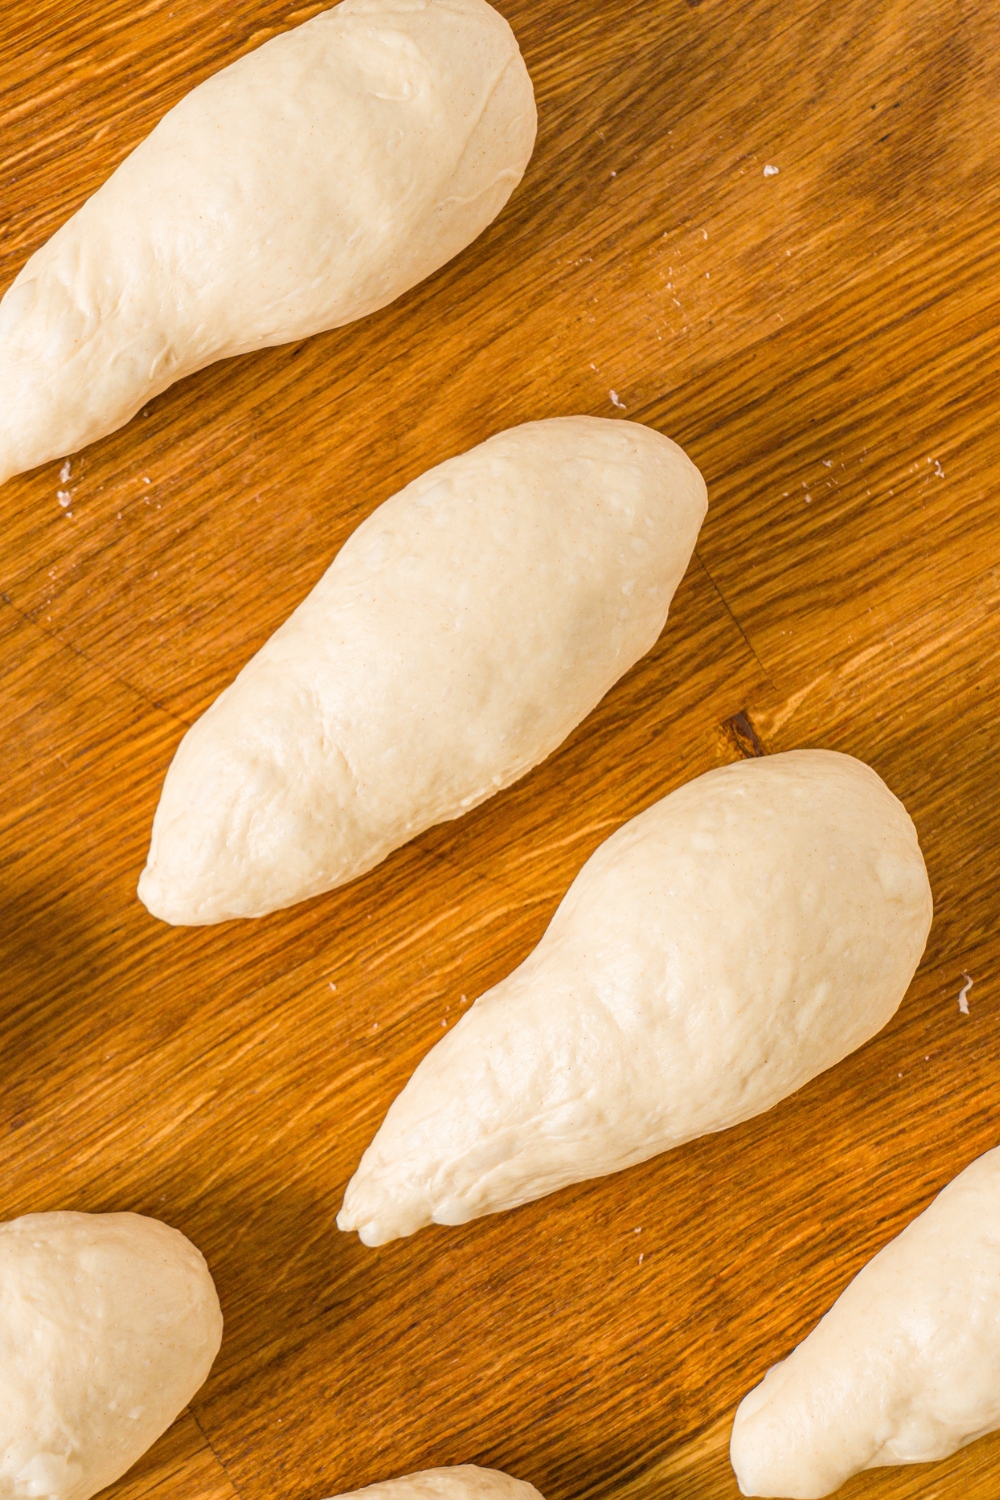
Step 5: Shape into triangles
Roll each ball into a long teardrop, with a wider top and narrower bottom. Use a rolling pin to flatten the bottom half first, gently pulling downward as you roll to lengthen the dough. Flatten the wider end into a triangle base about the same width as your butter stick. You want a long skinny upside-down triangle.
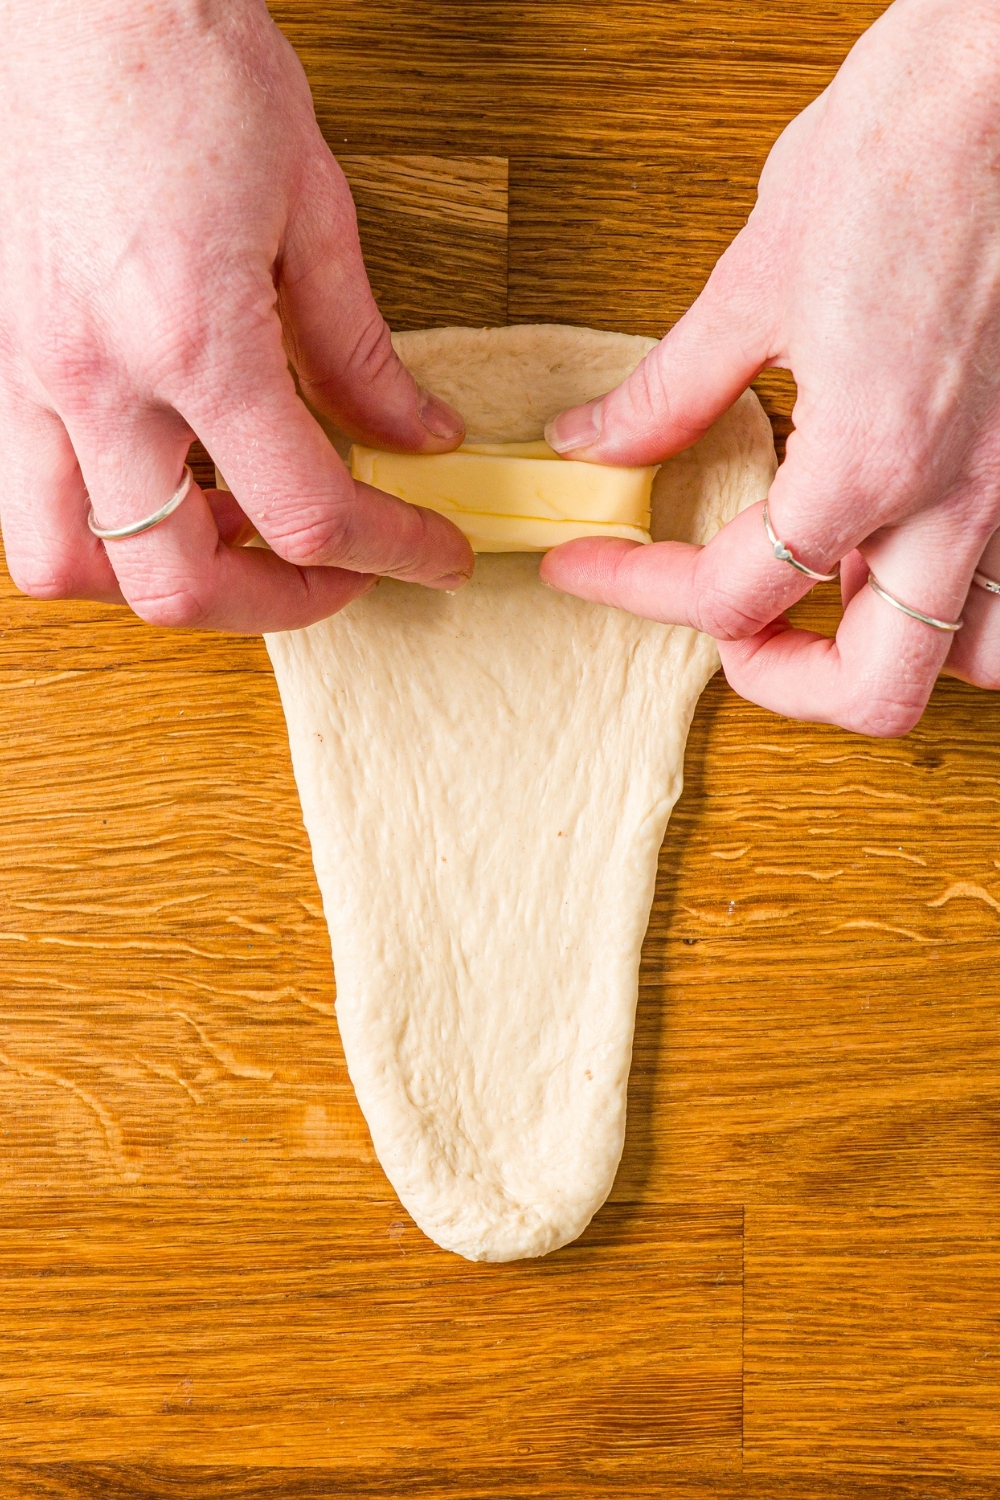
Step 6: Add butter and roll
Place a 15 gram butter stick at the wide end and roll down toward the point, tugging gently for tension as you roll. Place seam-side down on the baking tray.
Step 7: Final proof
Arrange rolls on a parchment-lined tray with space between them. Cover and proof until doubled.
Proof test: Gently press the edge of a roll. If it leaves a dent that slowly springs back and still shows a slight indentation, they’re ready.
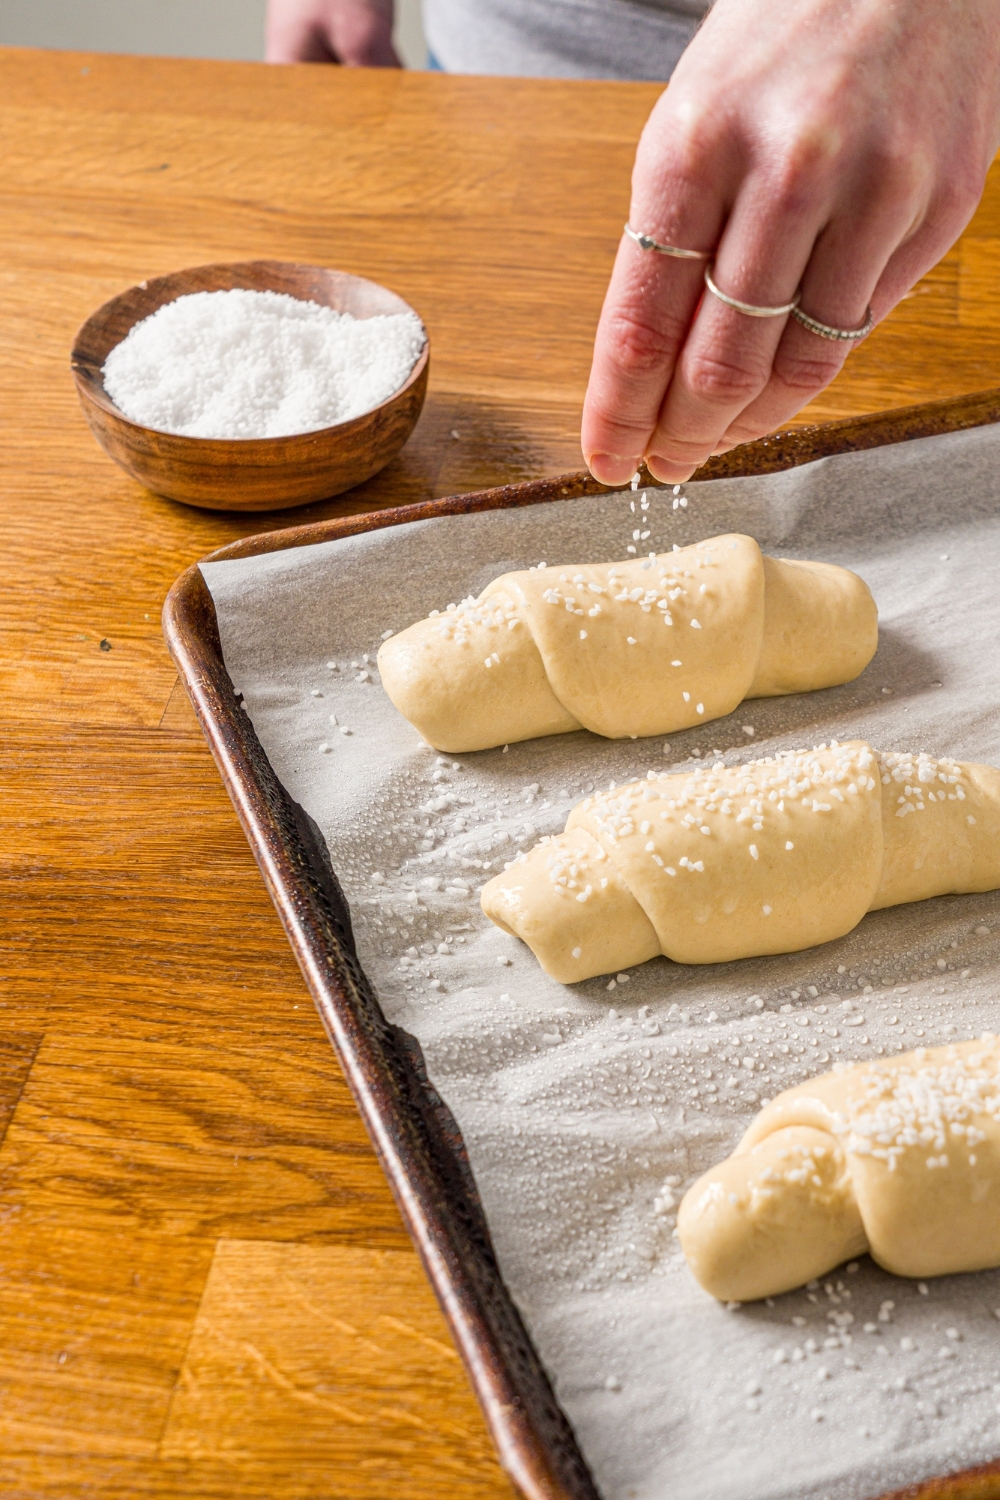
Step 8: Bake
Preheat your oven to 450°F (232°C). Brush the rolls with egg wash and sprinkle with pretzel salt. Just before baking, mist each roll generously with water for steam. Lower your oven to 400°F (204°C) as soon as it preheats, and bake 12 to 15 minutes, rotating halfway if needed, until golden.
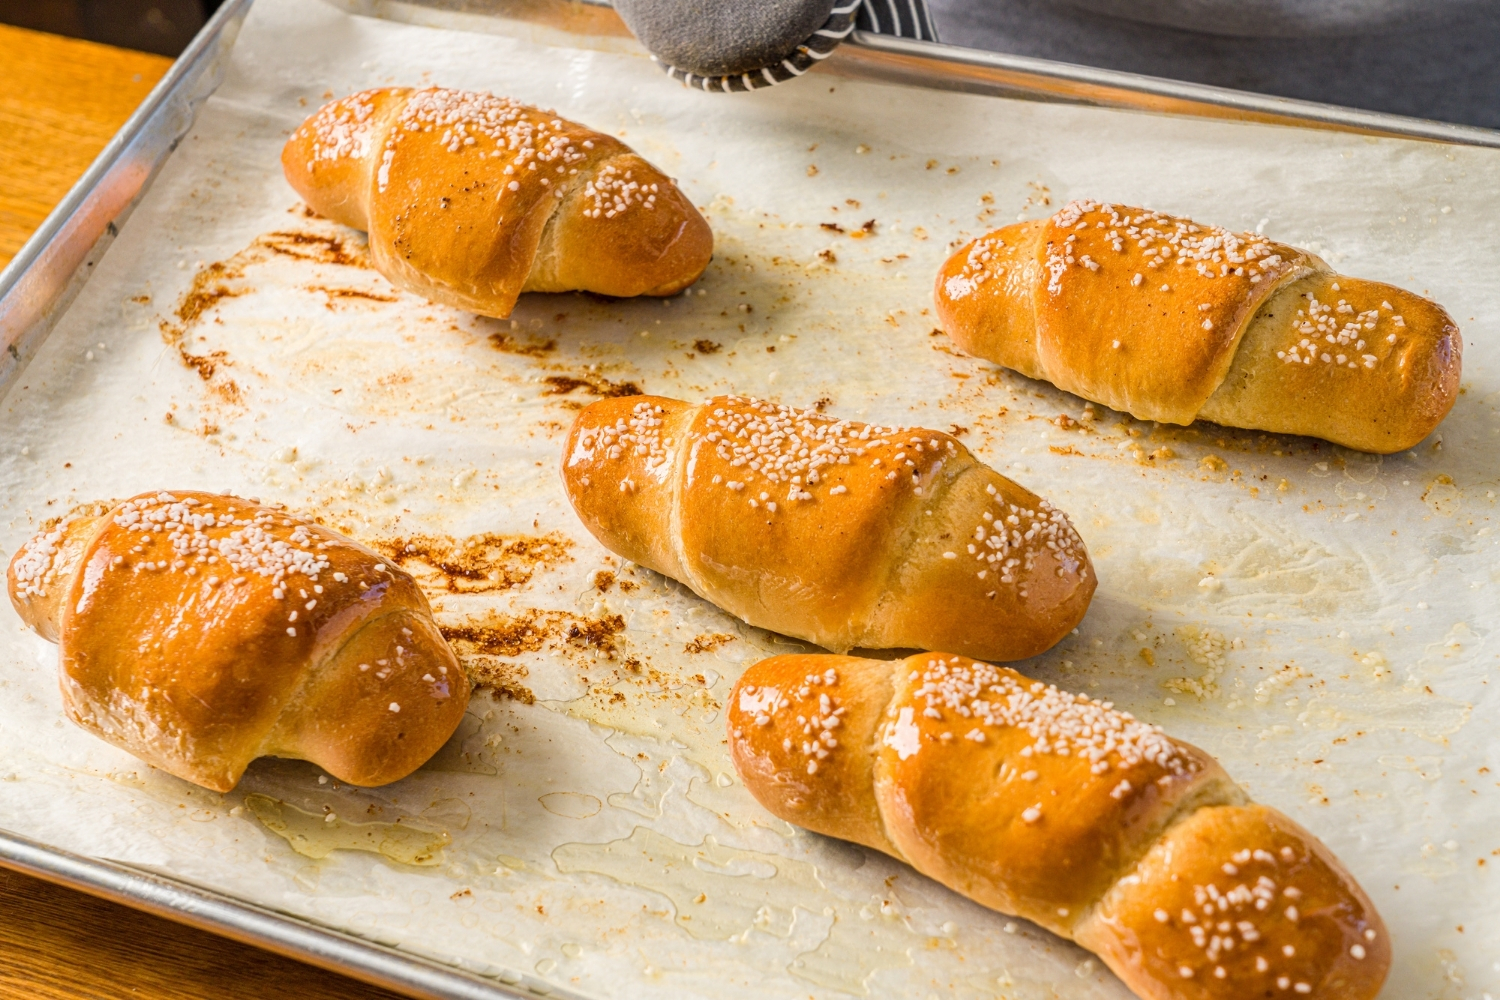
Step 9: Enjoy
Salt bread is best hot. The bottoms will be crisp and buttery, and the inside will be soft and fluffy.
Expert Tips for Bakery-Style Salt Bread
- Keep the butter cold from start to finish. If the butter softens too much, it will smear into the dough while you shape the rolls instead of staying tucked inside. That can cause early leaking and keep you from getting that signature buttery bottom. Leave the butter in the fridge and only take out what you need as you shape each piece.
- Use a kitchen scale if you can. Even dough portions and evenly sized butter pieces make a big difference with a recipe like this because they help all of the rolls proof and bake at the same rate. That means a tray of salt bread that looks more uniform and finishes with a better overall texture.
- Don’t rush the kneading stage. A proper windowpane test really matters here because it tells you the dough has developed enough gluten to stretch, roll, and hold its shape well. If the dough tears easily when you stretch it, keep kneading. That extra time is what helps create soft, airy rolls instead of dense ones.
- Don’t add extra flour too early. The dough can look sticky at first, but that does not mean it's wrong. As the gluten develops, it will become smoother and easier to work with. Adding too much flour during mixing can throw off the hydration and leave you with heavier, drier salt bread.
- Proof the dough based on how it feels, not just the clock. Room temperature can change how quickly the dough rises, so the timing is not always exact. The poke test is a much better guide for both rises because it helps you tell whether the dough is ready or still needs more time.
- Mist the rolls with water right before baking. A generous spray helps create steam in the oven, which gives the rolls a better rise and helps the crust develop nicely. It's a small step, but it can make the finished bread look more bakery-style.
- Rotate the pan halfway through baking. Most ovens have hot spots, and turning the tray helps the rolls brown more evenly from side to side. That's especially helpful when you want the tops golden and the bottoms evenly crisp.
- Bake until the rolls are properly golden, not just lightly colored. If you pull them too early, the centers can stay a little doughy and the bottoms will not develop that crisp, buttery finish that makes salt bread so good. A deeper golden color usually means the texture will be much better.

Salt Bread FAQs
What is salt bread made of?
Salt bread, also called shio pan, is made with a soft enriched yeast dough that’s shaped around a piece of cold butter, baked until golden, and finished with salt on top. As it bakes, the butter melts into the dough and pan, which helps create the soft fluffy center and the crisp, buttery bottom that makes salt bread so popular.
Why is my salt bread dough so sticky?
It’s normal for salt bread dough to feel sticky at first, especially early in the mixing and kneading process. This is a higher-hydration dough, so it needs time for the gluten to develop before it becomes smooth and elastic. Keep kneading until it reaches the windowpane stage, and try not to add extra flour unless the dough is truly wet and impossible to handle, since too much flour can make the rolls dense.
Why did the butter leak out of my salt bread?
Butter usually leaks out if it got too warm before shaping, if the dough wasn’t sealed and placed seam-side down, or if the dough was rolled too thin in certain spots. Keeping the butter cold and shaping each roll carefully makes a big difference. A little butter leakage is normal, but too much can keep you from getting that signature buttery center and crisp bottom.
How do I know when salt bread is proofed and ready to bake?
The best way to tell is with the gentle poke test. Lightly press the dough with your finger and watch how it responds. If it slowly springs back and leaves a slight indentation, it’s ready to bake. If it springs back right away, it needs more time. If it doesn’t spring back much at all, it may be overproofed.
Can I make salt bread without milk powder?
Yes, you can make salt bread without milk powder, but it does help with flavor, softness, and browning. If you leave it out, the rolls should still turn out well, but they may be a little less rich and not brown quite as deeply in the oven.
Why is my salt bread not fluffy?
If your salt bread turned out dense instead of fluffy, the dough may not have been kneaded enough, proofed long enough, or baked at the right stage. Reaching the windowpane test is really important for structure, and proper proofing gives the rolls the light texture they’re known for. Using too much flour during mixing can also make the bread heavier.
Why is the bottom of my salt bread not crispy?
The crisp bottom usually comes from the butter melting during baking and frying the underside of the roll slightly on the pan. If the bottom isn’t crisp, the butter may have leaked too early, the rolls may be underbaked, or the pan may not have been hot enough during baking. Baking until the rolls are properly golden helps a lot.
What kind of salt is best for salt bread?
Pretzel salt is one of the best options because it gives salt bread that classic bakery-style look and a noticeable salty bite on top. Flaky salt also works well and is easier to find, but it may melt into the dough a little more during baking. Either works, but larger salt crystals usually give the most traditional finish.
Can I make salt bread ahead of time?
Salt bread is best the day it’s baked, when the bottoms are crisp and the centers are still warm and soft. If you want to get ahead, you can make the dough in advance and refrigerate it for part of the process, or bake the rolls ahead and warm them back up before serving. Reheating in the oven works much better than the microwave if you want to keep the texture as close to fresh as possible.
How do I store leftover salt bread?
Store leftover salt bread in an airtight container at room temperature for up to 2 days, or in the refrigerator for a little longer if needed. For the best texture, reheat the rolls in the oven or air fryer for a few minutes before serving. That helps bring back some of the crispness on the outside and warms the butter inside.
Can I freeze salt bread?
Yes, salt bread freezes well. Let the rolls cool completely, then store them in a freezer-safe bag or container. When you’re ready to eat them, reheat them in the oven until warmed through so the outside crisps back up and the inside softens again.
My Final Thoughts
This salt bread is one of those recipes that’s easy to understand the second you take a bite. It has that perfect mix of a buttery crisp bottom, soft fluffy center, and just enough salt on top to keep you going back for another.
If you make it, leave a comment below and let me know how it turned out. And if you loved it, please give it a star rating too. I'd really appreciate your feedback.
More Viral Recipes to Try Next
Salt Bread (Viral Shio Pan Recipe)

If you’ve been seeing salt bread all over social media and wondering if it’s worth making at home, it absolutely is. Also known as shio pan, this bakery-style bread has crisp buttery bottoms, soft fluffy centers, and just the right salty finish on top. It looks simple, but when it’s made right, the texture is what makes it so special. This salt bread recipe walks you through each step so you can get that classic shape, tender interior, and rich buttery bite at home.
Ingredients
- 400g bread flour
- 120g cake flour
- 365g ice water
- 26g sugar
- 10g salt
- 30g non-fat milk powder
- 7g instant dry yeast
- 40g cold unsalted butter (straight from the fridge)
- 180g butter, portioned into 15 g blocks (12 sticks)
- Egg wash (1 egg whisked with a splash of water)
- Pretzel salt or flaky salt (for topping)
Instructions
1. In the bowl of a stand mixer, add bread flour, cake flour, sugar, salt, milk powder, yeast, and cold water.
2. Mix with a dough hook on low speed until a shaggy, cohesive dough forms. Approx 1 Minute.
3. Add the unsalted butter (fridge-cold, not softened) and increase to medium speed.
4. Knead until the dough is smooth and passes the windowpane test (about 20–25 minutes, depending on your mixer).
5. Shape the dough into a smooth ball by rolling it taut. Place into a bowl, cover, and let rise until doubled in size. Takes around an hour in a 78° F location, but will depend on your environment Test readiness by poking the dough with a floured finger — if the hole stays without springing back, it’s ready.
6. De-gas the dough and divide into 80 g portions. Roll each into a smooth ball, cover, and let rest for 15 minutes (starting from the first ball you shaped).
7. Roll each ball into a long teardrop shape, keeping the top wider and the bottom narrower. Start with the bottom half of the tear drop shape (narrower part.) Use a rolling pin to flatten the bottom half while using the other hand to slightly pull downward. Do the same for the upper half to flatten the wider end into a triangle base about the same width as your butter stick. The dough should look like a long, skinny, upside-down isosceles triangle.
8. Place a butter stick at the wide end and roll down toward the point, gently tugging for tension Keep the seam side down on the tray.
9. Place rolls on a baking tray with parchment, leaving space between them to double in size. Cover and let rise until doubled in size. Test by gently pressing the edge: if it leaves a dent that slowly springs back but still shows a slight indentation, they’re ready to bake.
10. Preheat oven to 450°F (232°C). Brush rolls with egg wash and sprinkle pretzel salt on top. Just before baking, spray each roll generously (about 20 pumps) for added steam. Lower oven to 400°F (204°C) and bake for 12-15 minutes, rotating the tray halfway if needed for even browning.
11. Enjoy hot out of the oven — the bottoms will be crisp and buttery, the insides fluffy and soft.
Nutrition Information:
Yield:
6Serving Size:
1Amount Per Serving: Calories: 601Total Fat: 31gSaturated Fat: 19gUnsaturated Fat: 12gCholesterol: 79mgSodium: 839mgCarbohydrates: 70gFiber: 2gSugar: 5gProtein: 11g
Leave a Reply