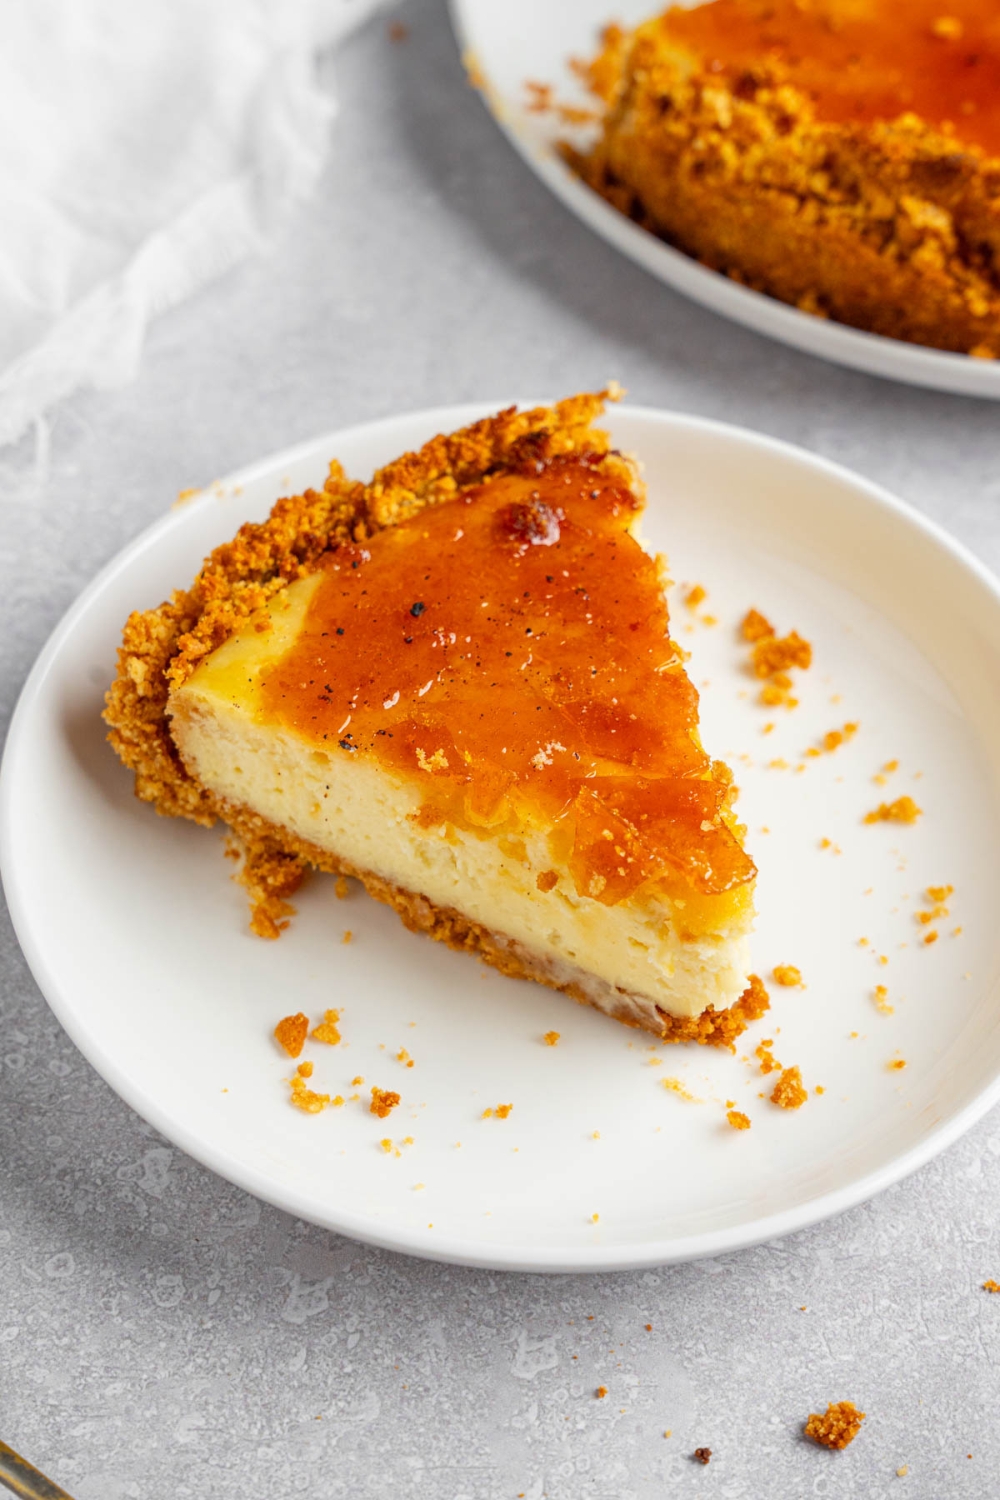
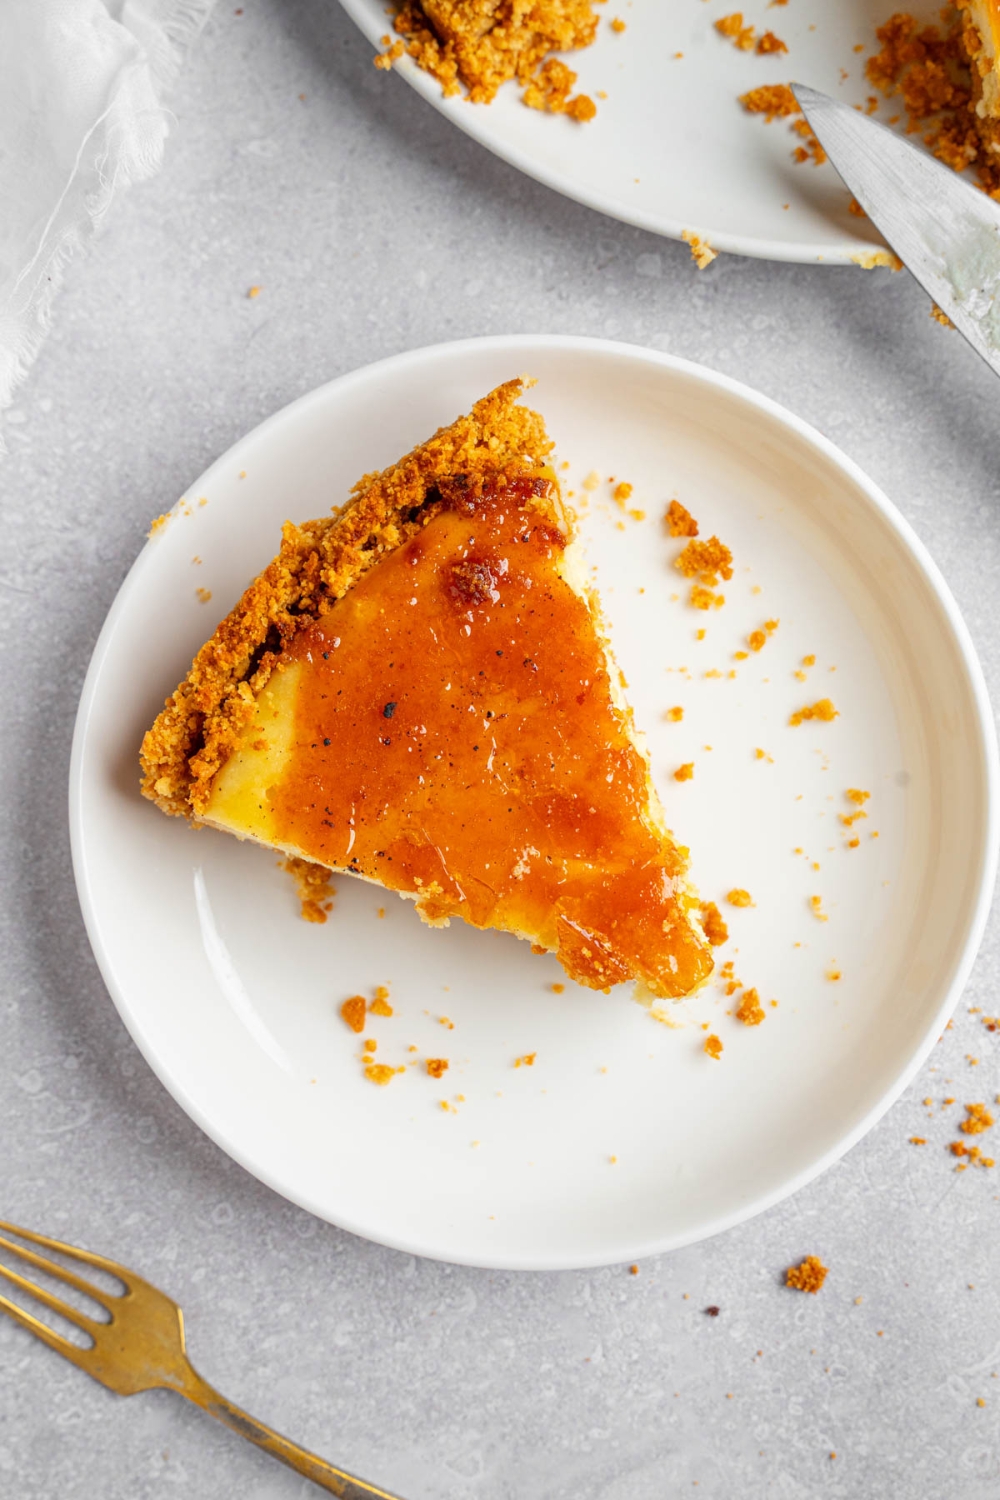
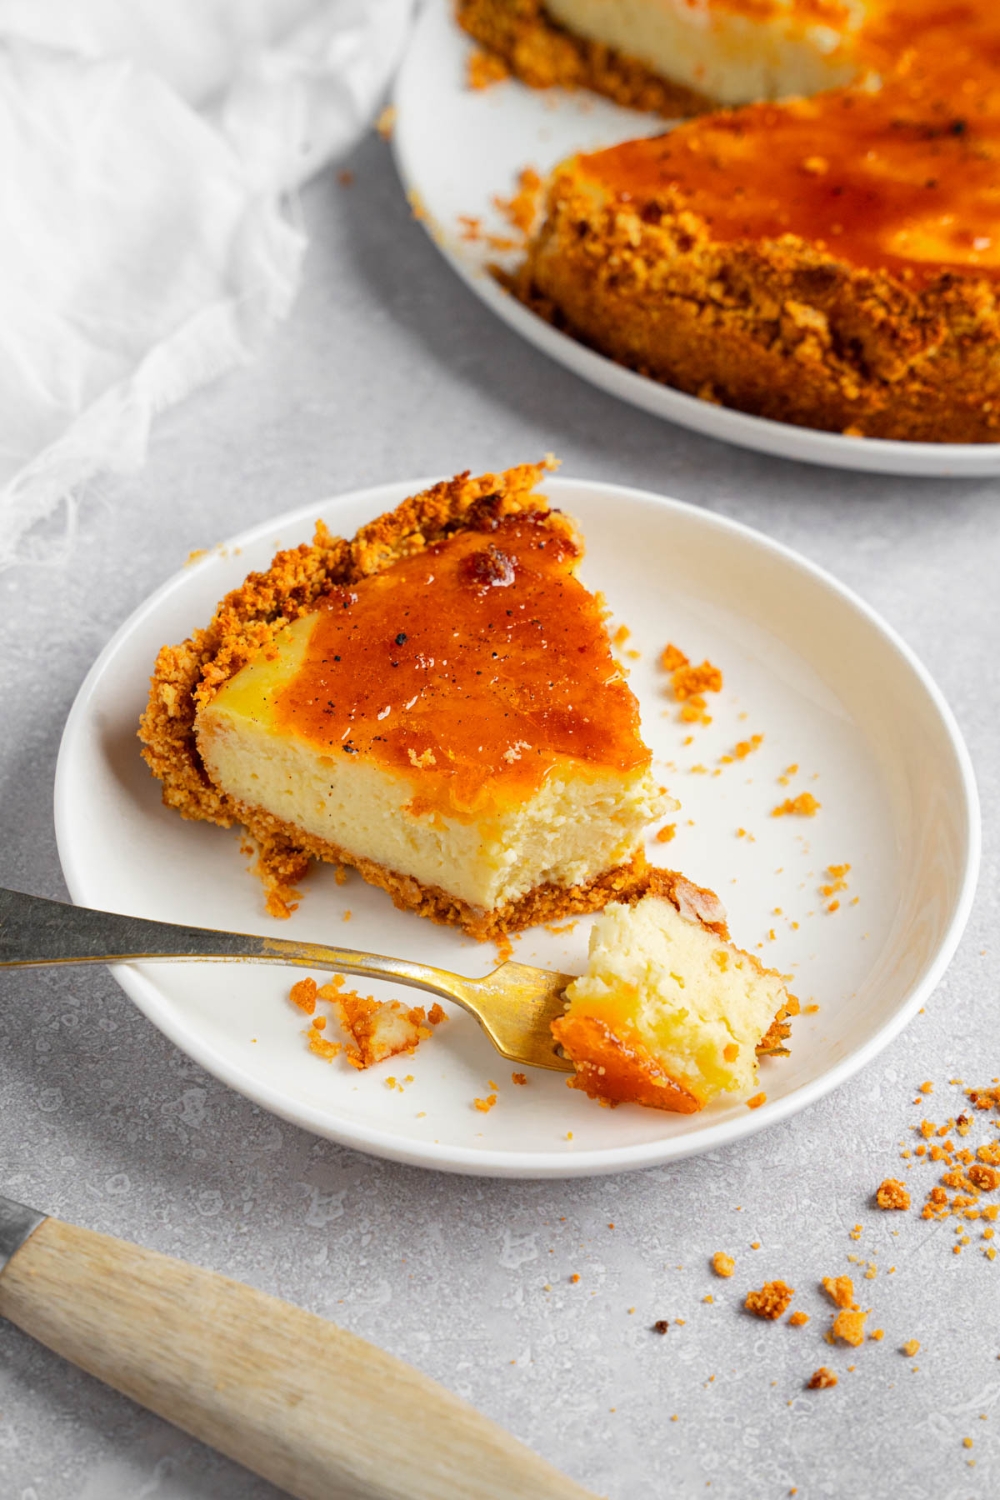
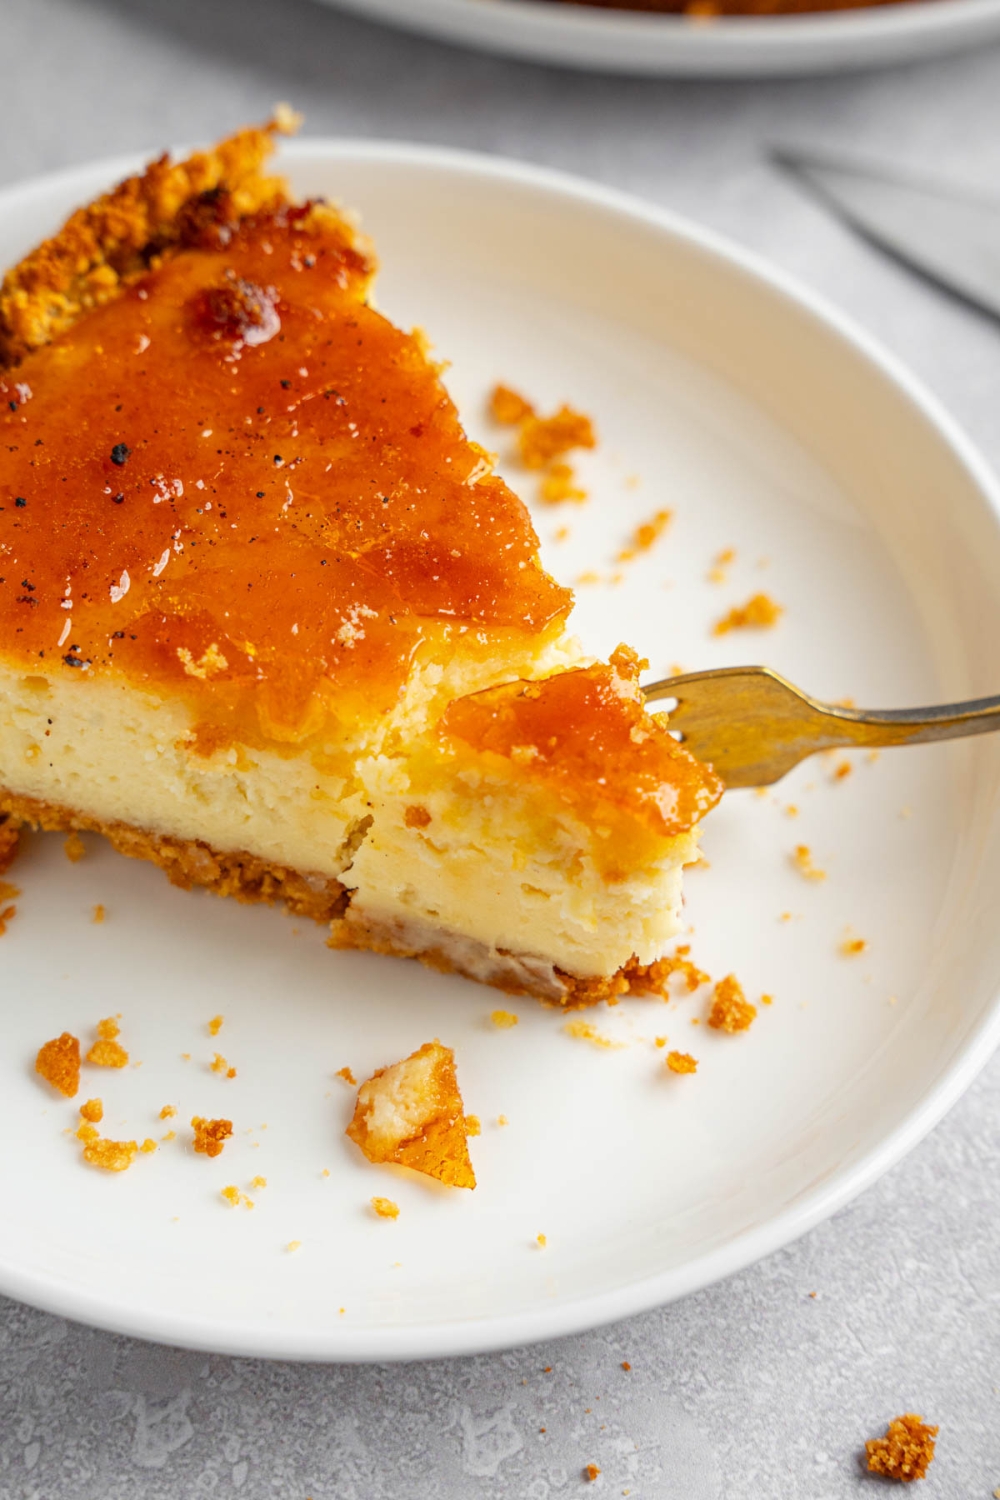
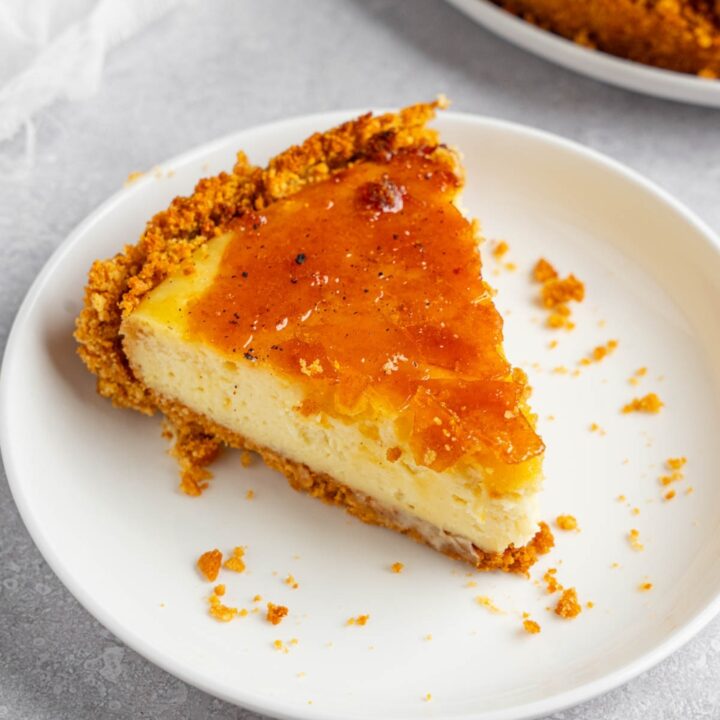
This creme brulee cheesecake perfectly combines two classic desserts into one irresistible treat! It's got a rich, creamy cheesecake filling, and a crisp, caramelized sugar topping...and all of that sits atop a buttery honey graham cracker crust. It's elegant enough for special occasions yet simple enough to whip up at home.
Why I Love This Creme Brulee Cheesecake
The first time I tasted creme brulee cheesecake was during a dinner party at my cousin's house, and it instantly stole my heart.
Inspired, I experimented with his recipe until I perfected my own version of it. And, well, if you ask me, it's even a touch better than his...and his recipe was incredible to begin with.
Every bite feels decadent, making it my go-to dessert of mine to make for family parties - I just made it for my nephew's birthday last week - or anytime I just want to have something a little more indulgent around the house.
No matter when I make it though, it always gets rave reviews!
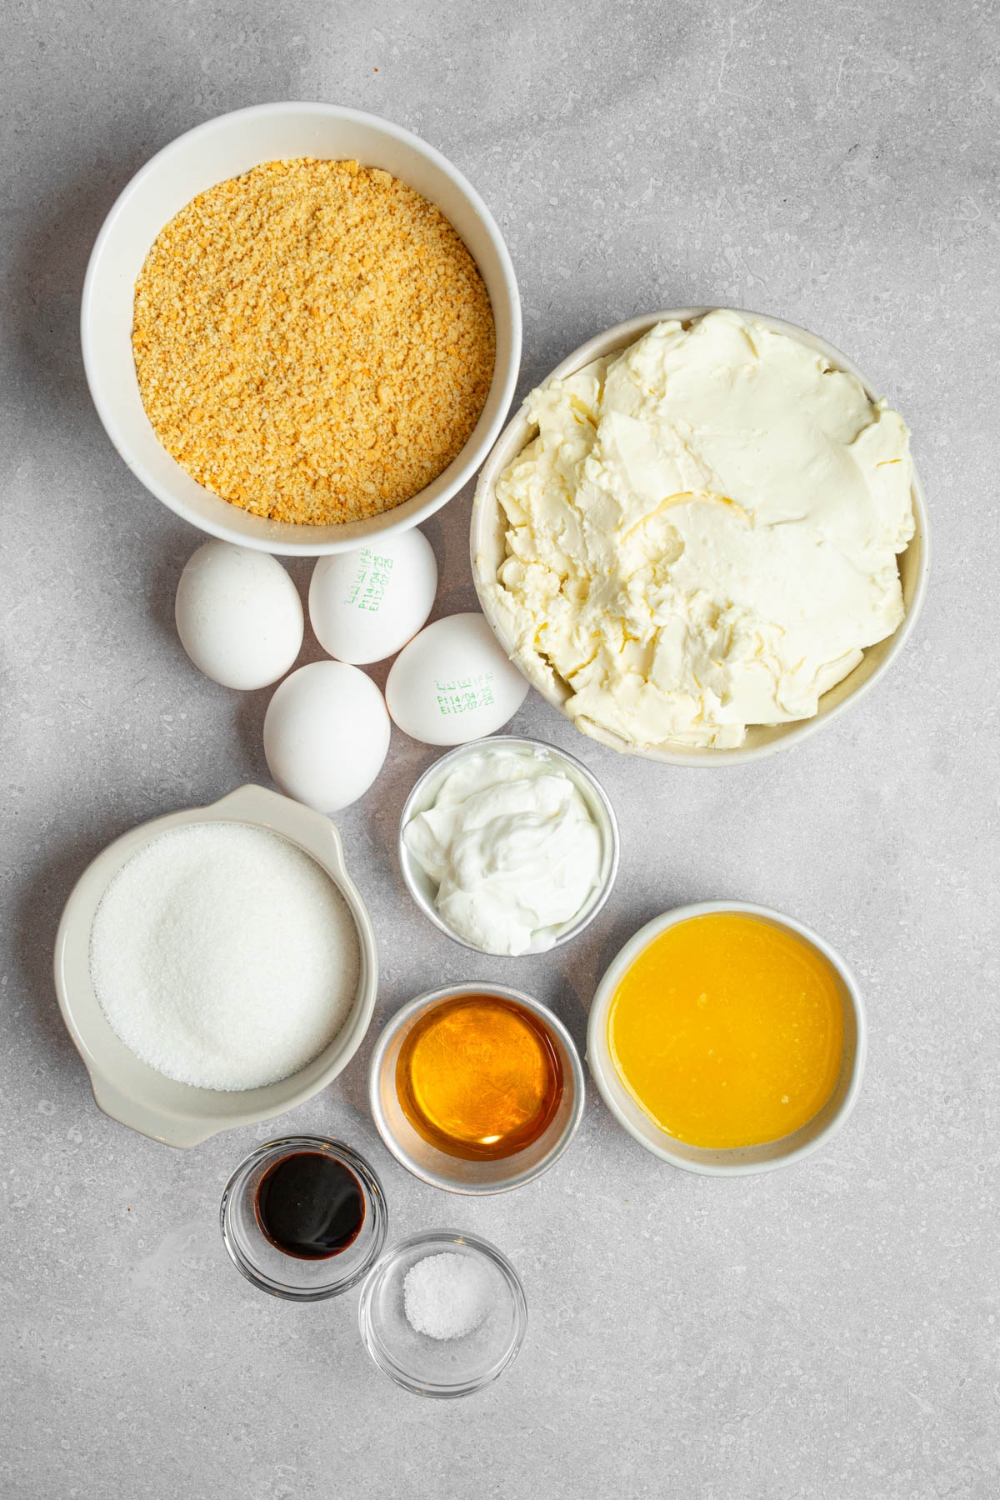
Ingredients You'll Need To Make This Cheesecake
Here's what you’ll need for this creme brulee cheesecake:
For The Graham Cracker Crust:
- 1 ½ cups graham cracker crumbs
- ¼ cup honey
- 6 tablespoon unsalted butter, melted
For The Cheesecake Batter:
- 907 grams cream cheese, softened
- 1 ⅓ cups granulated sugar
- ½ cup sour cream
- 4 large eggs, room temperature
- ½ tablespoon vanilla extract
- ½ teaspoon salt
For The Caramelized Sugar Topping:
- ¼ cup granulated sugar
How to Make Creme Brulee Cheesecake
Just a handful of simple steps are all you have to follow to make this recipe.
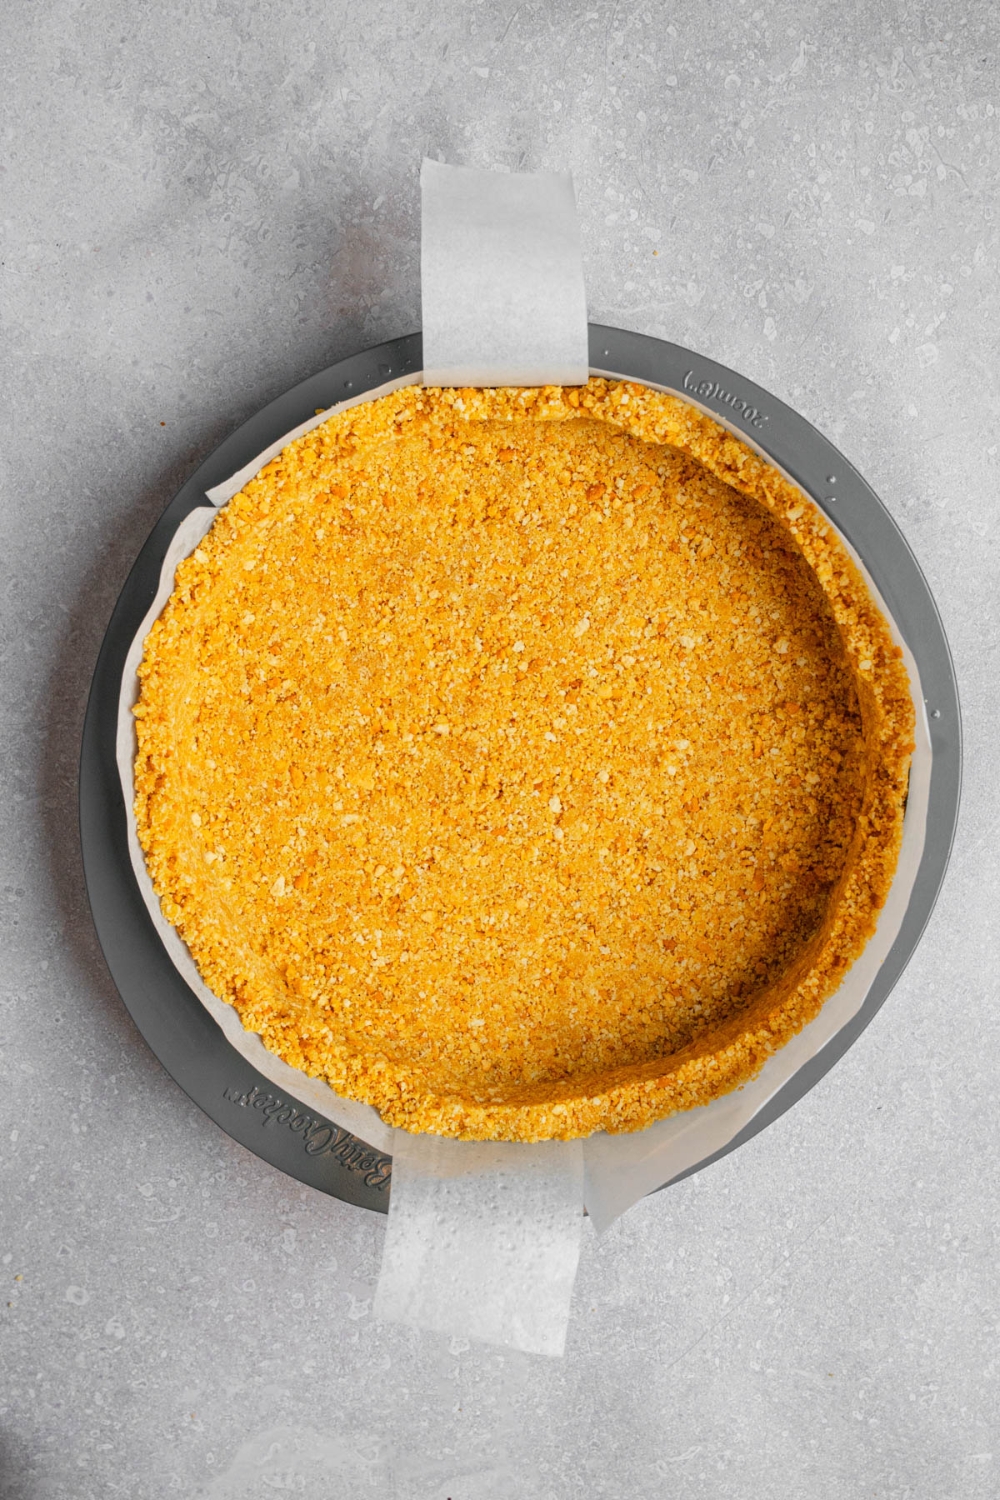
Step 1: Prepare and Bake the Graham Cracker Crust
Preheat oven to 325°F. Combine graham cracker crumbs, honey, and melted butter until evenly mixed.
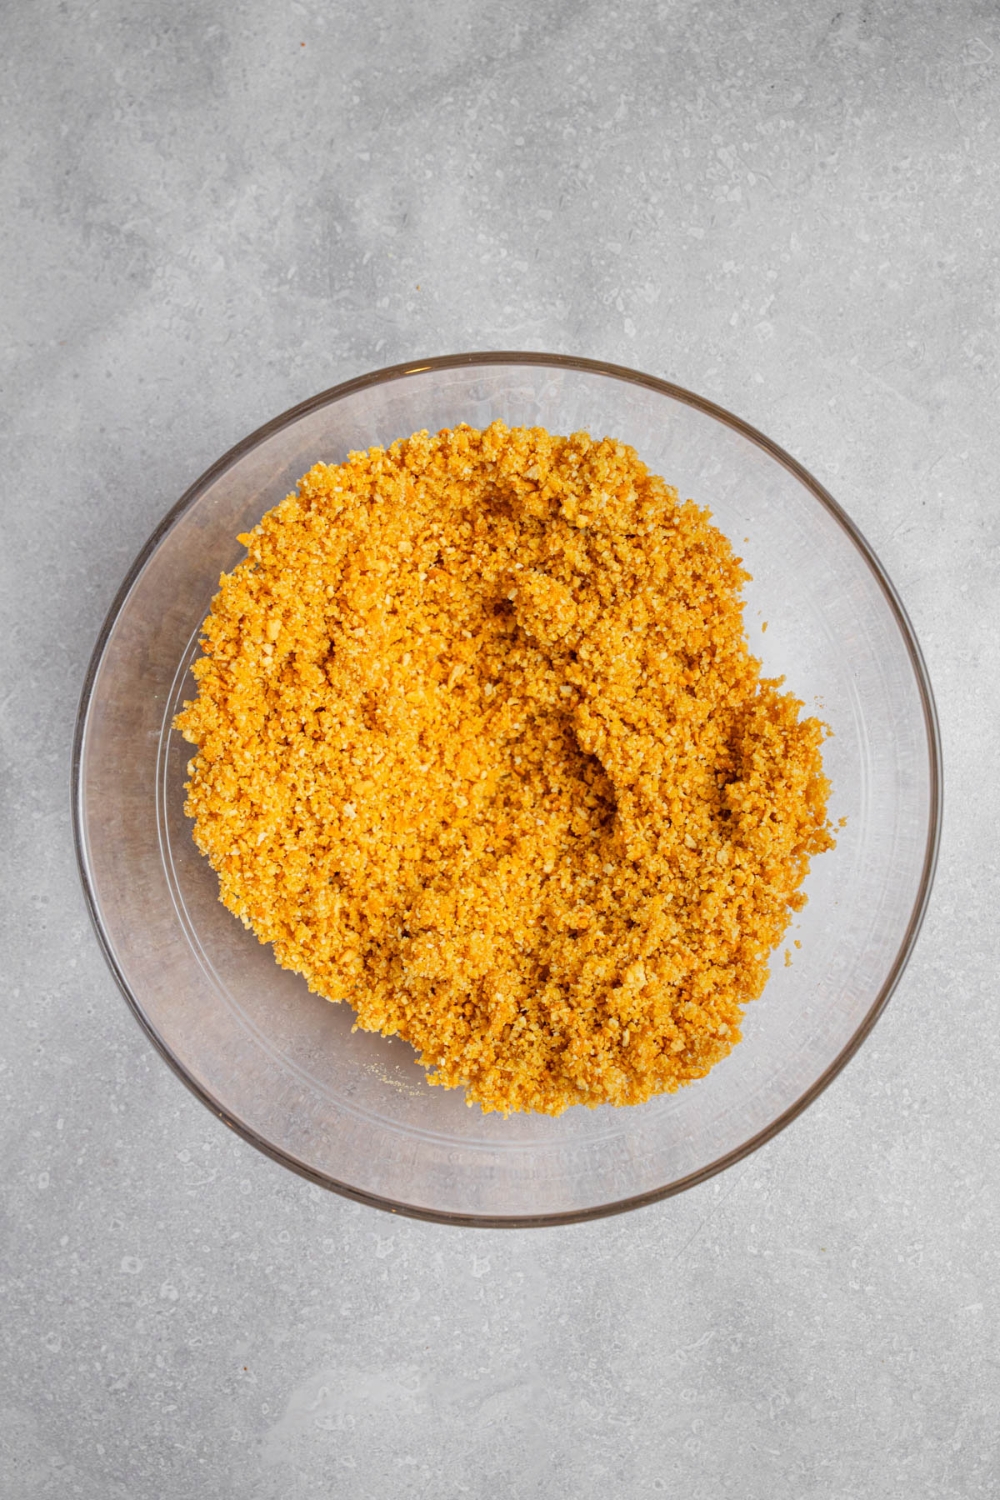
Press firmly into the bottom of an 8- or 9-inch springform pan and bake for 10 minutes. Let cool completely.
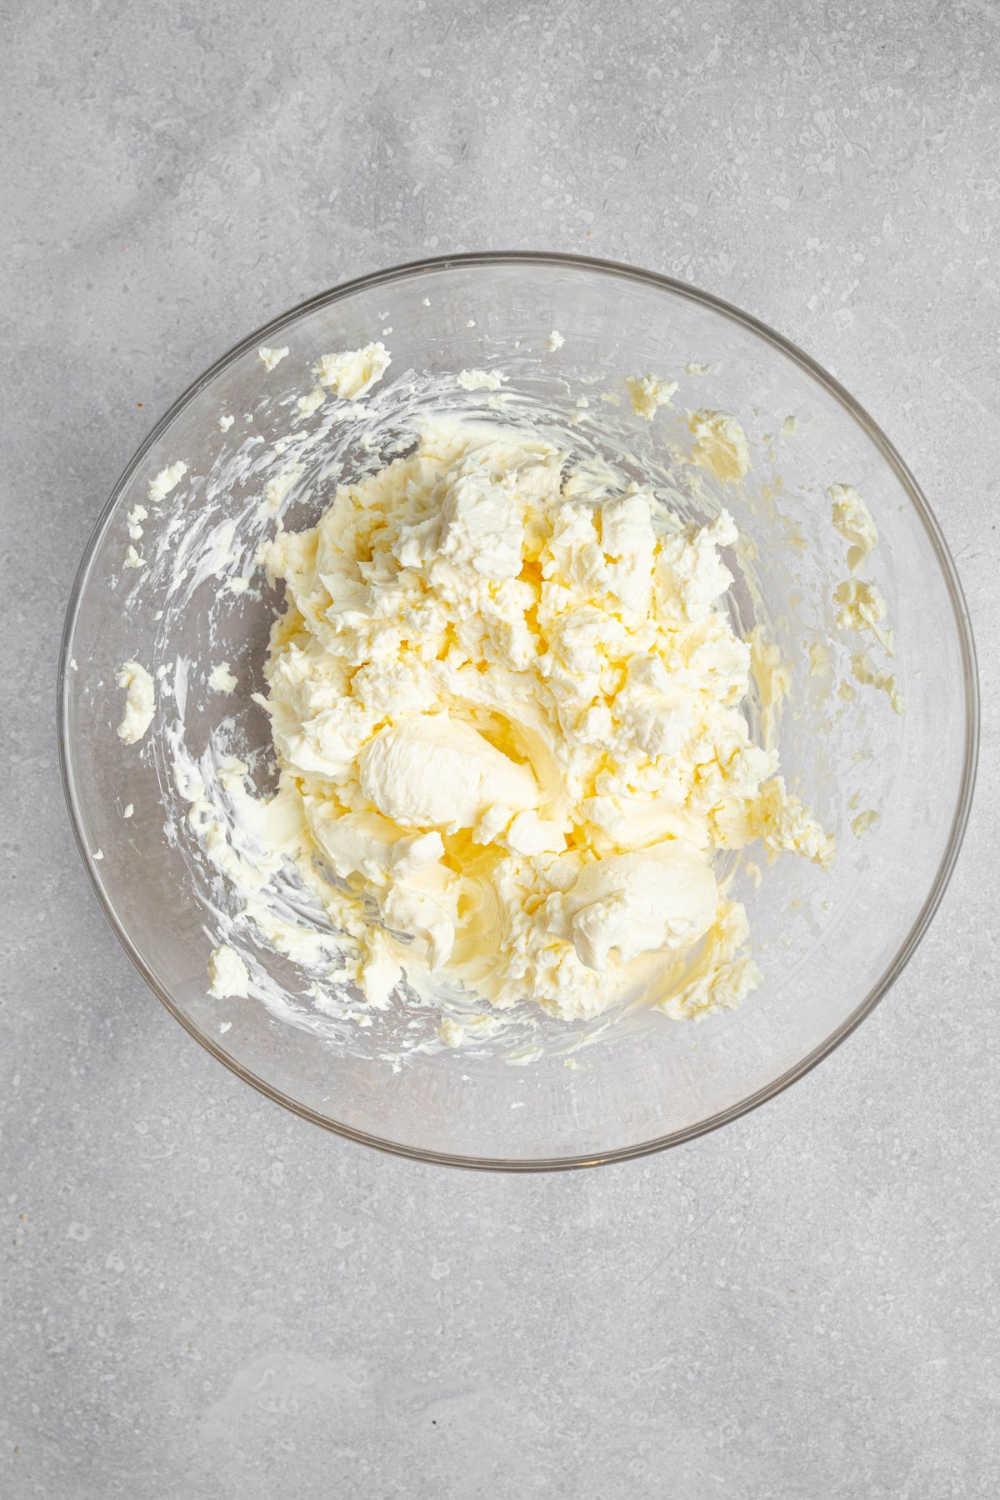
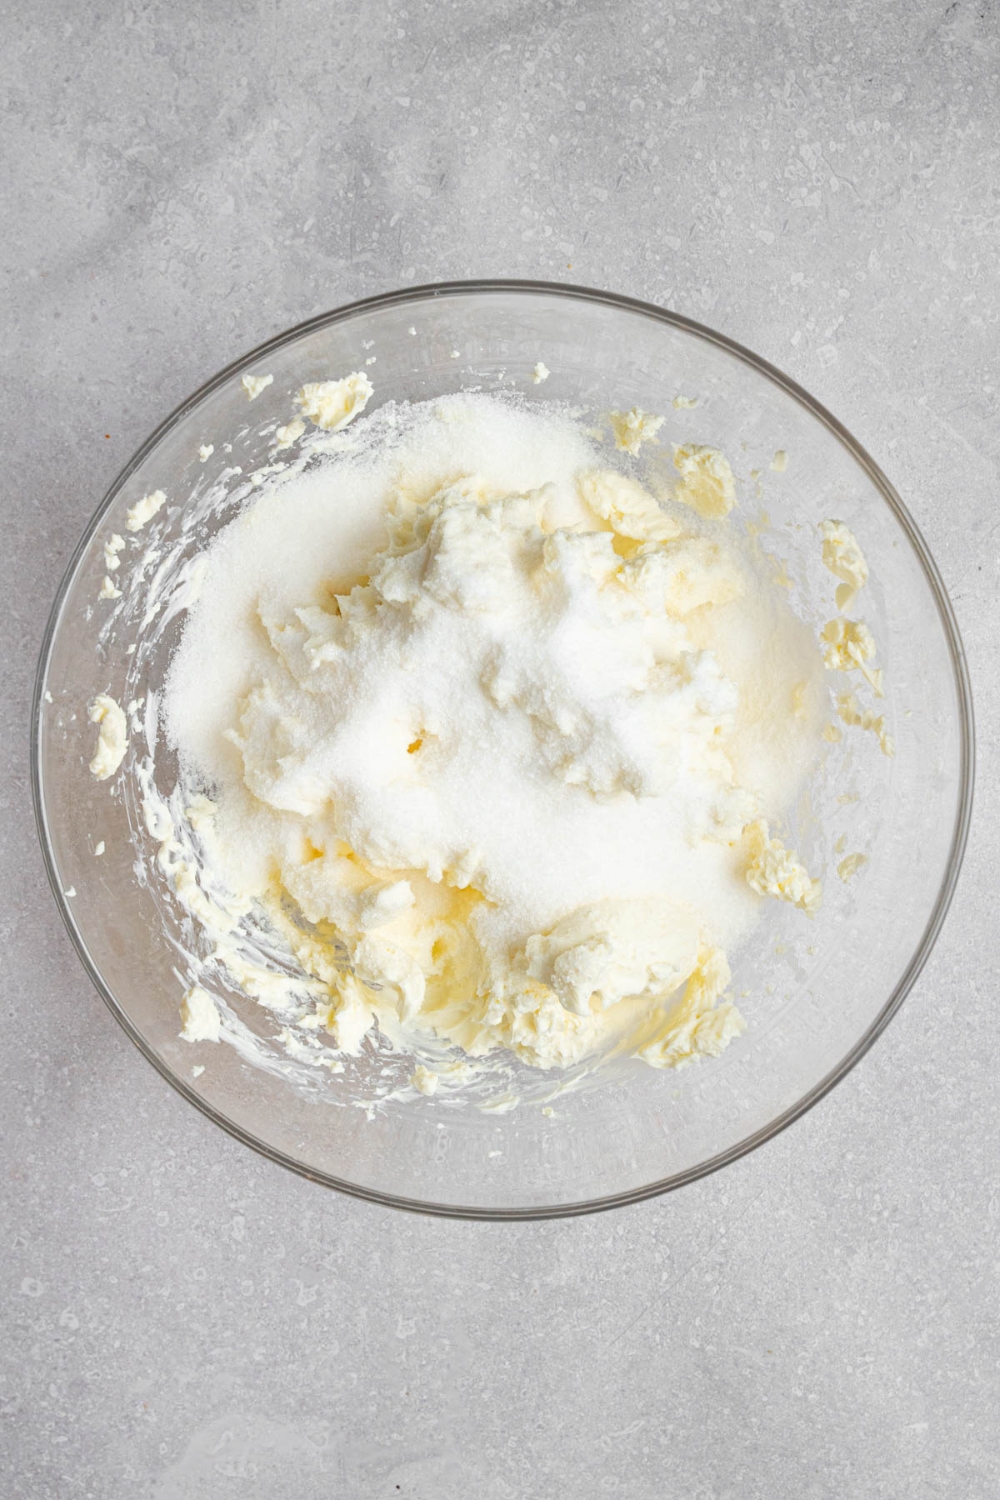
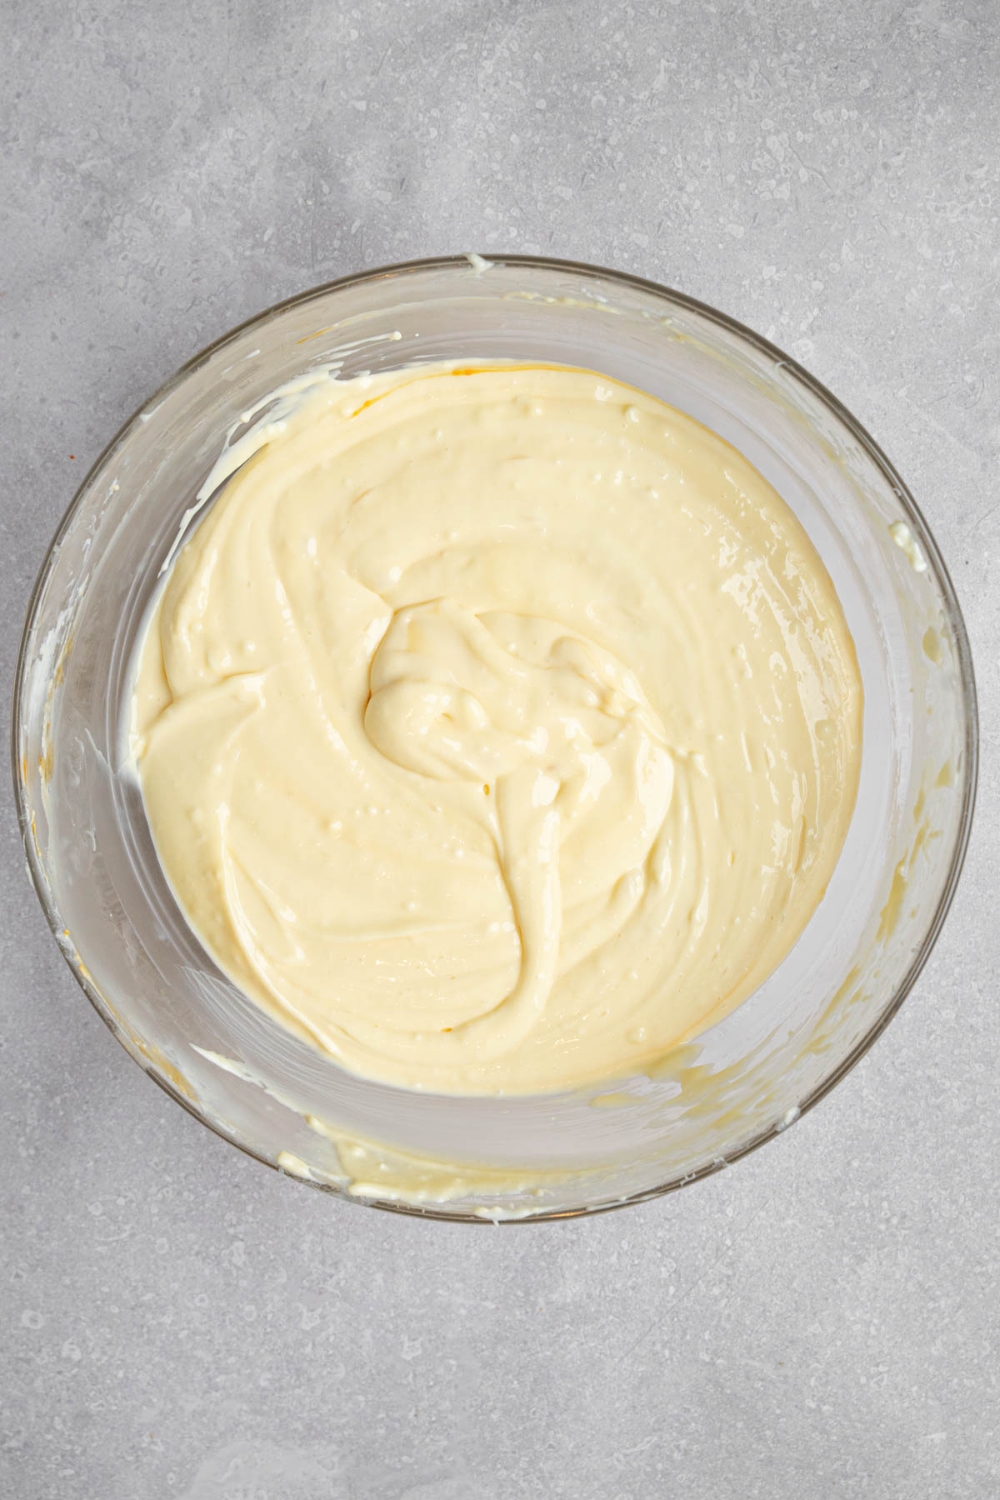
Step 2: Mix the Cheesecake Batter
Beat cream cheese until smooth and creamy, about 3 minutes.
Add sugar and vanilla extract, beating another 2 minutes.
Mix in sour cream, then add eggs one at a time, mixing briefly after each addition to prevent overmixing. Stir in salt gently.
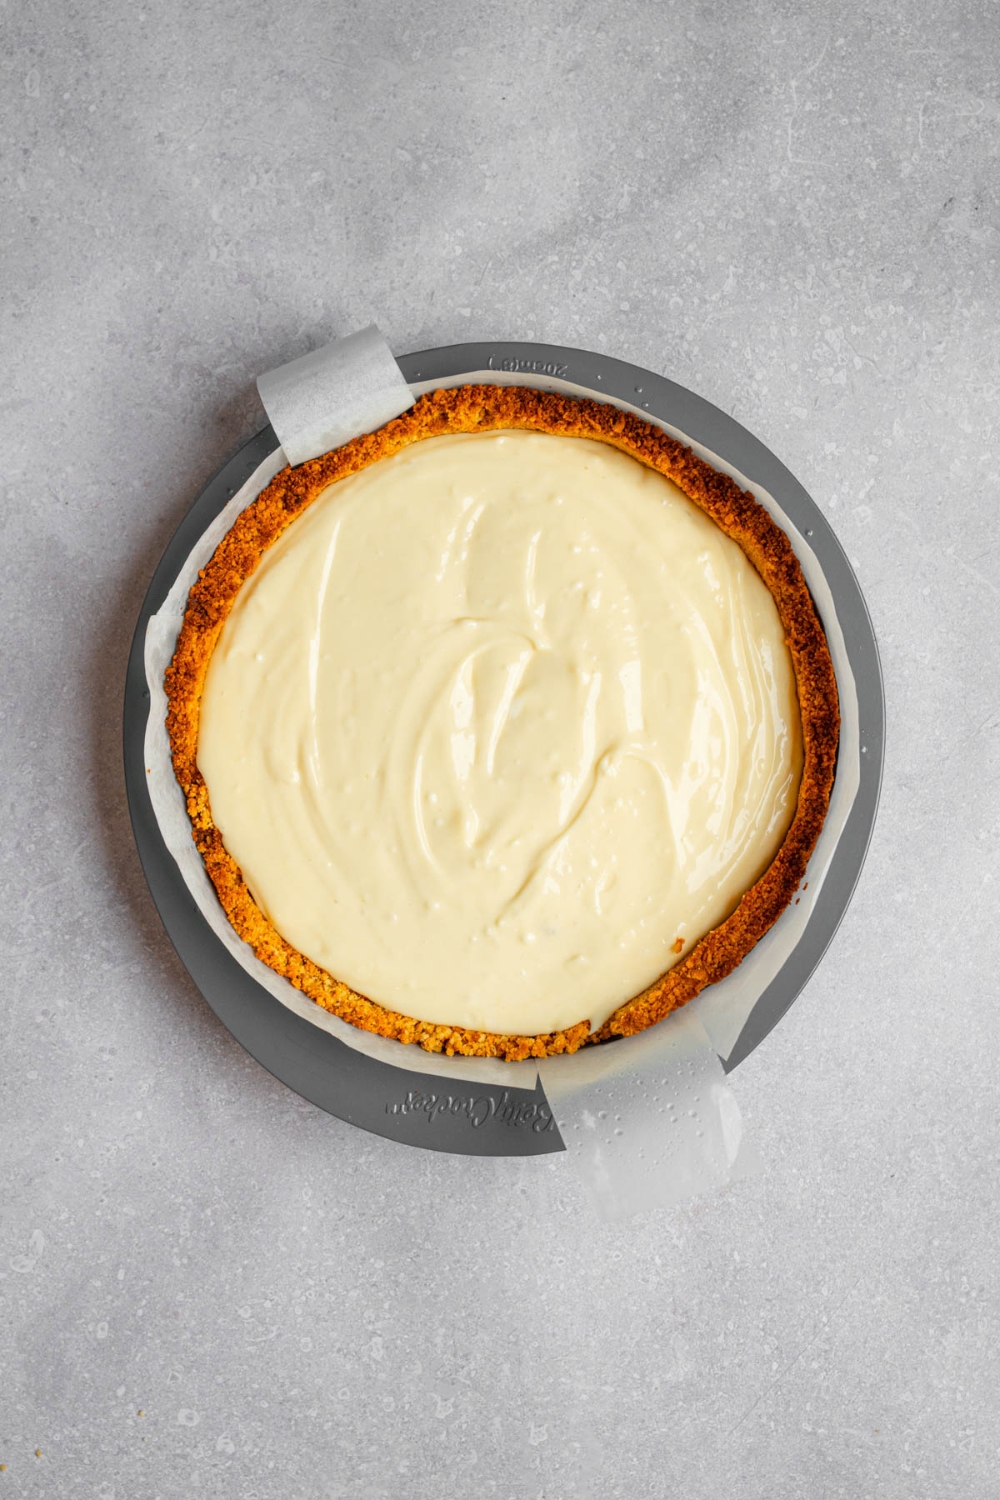
Step 3: Bake Cheesecake in a Water Bath
Pour batter over the cooled crust. Wrap the pan in several layers of foil, place in a roasting pan, and pour hot water around the springform pan to create a water bath. Bake for 60-75 minutes until edges are set and the center slightly jiggles.
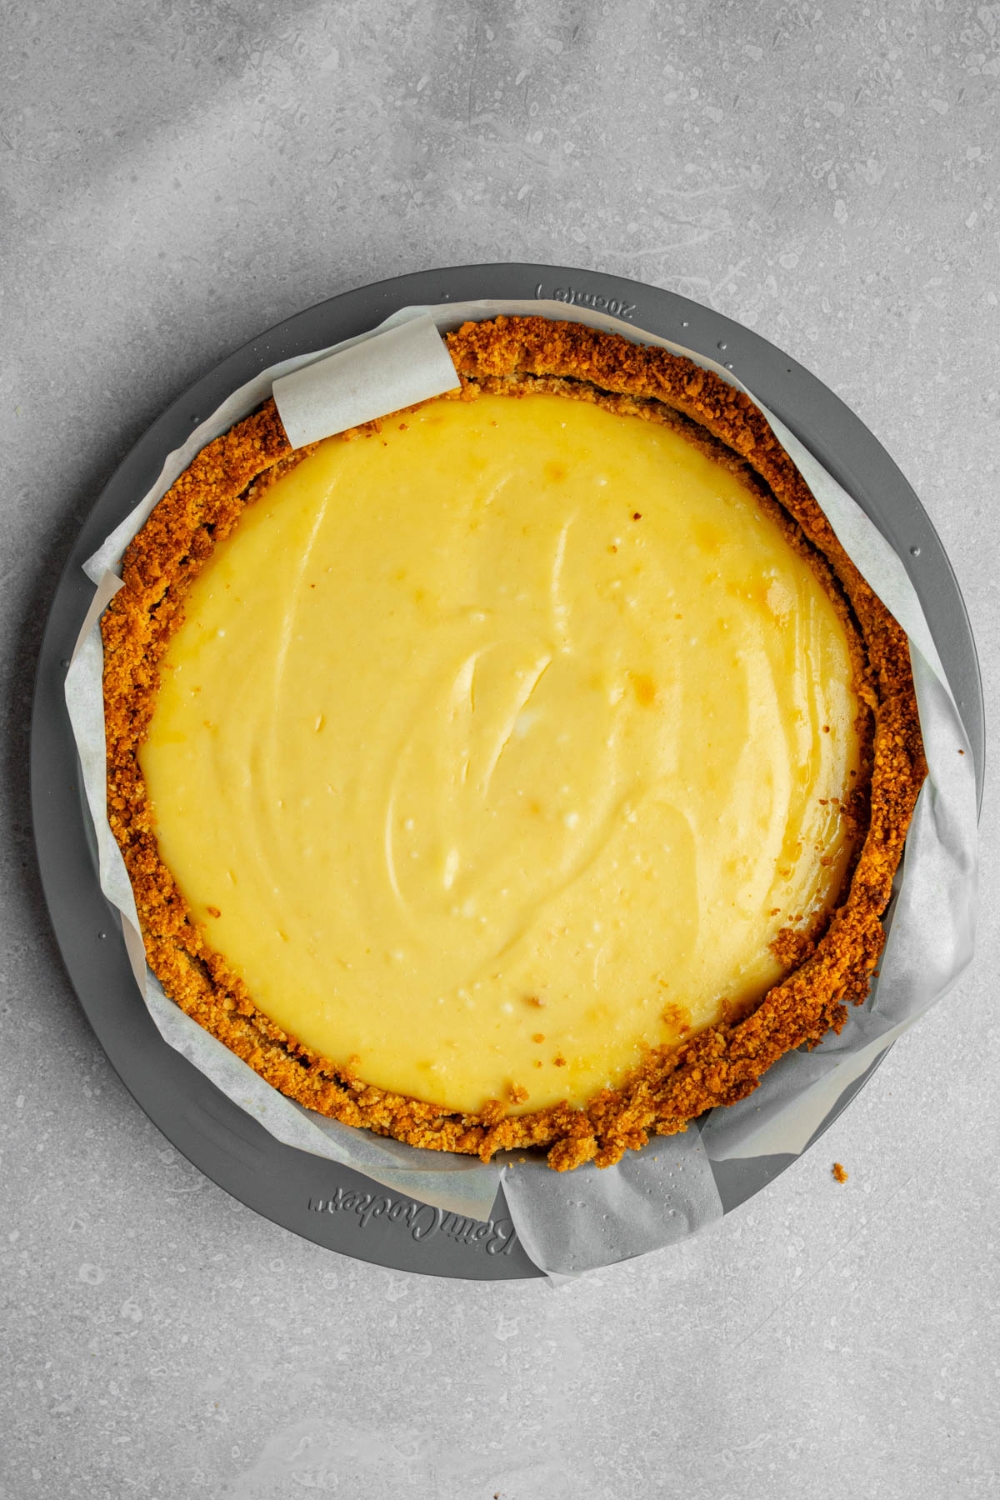
Step 4: Cool and Chill
Turn off the oven and leave the cheesecake inside for one hour. Then, remove and let cool at room temperature before refrigerating for at least 6 hours to fully set.
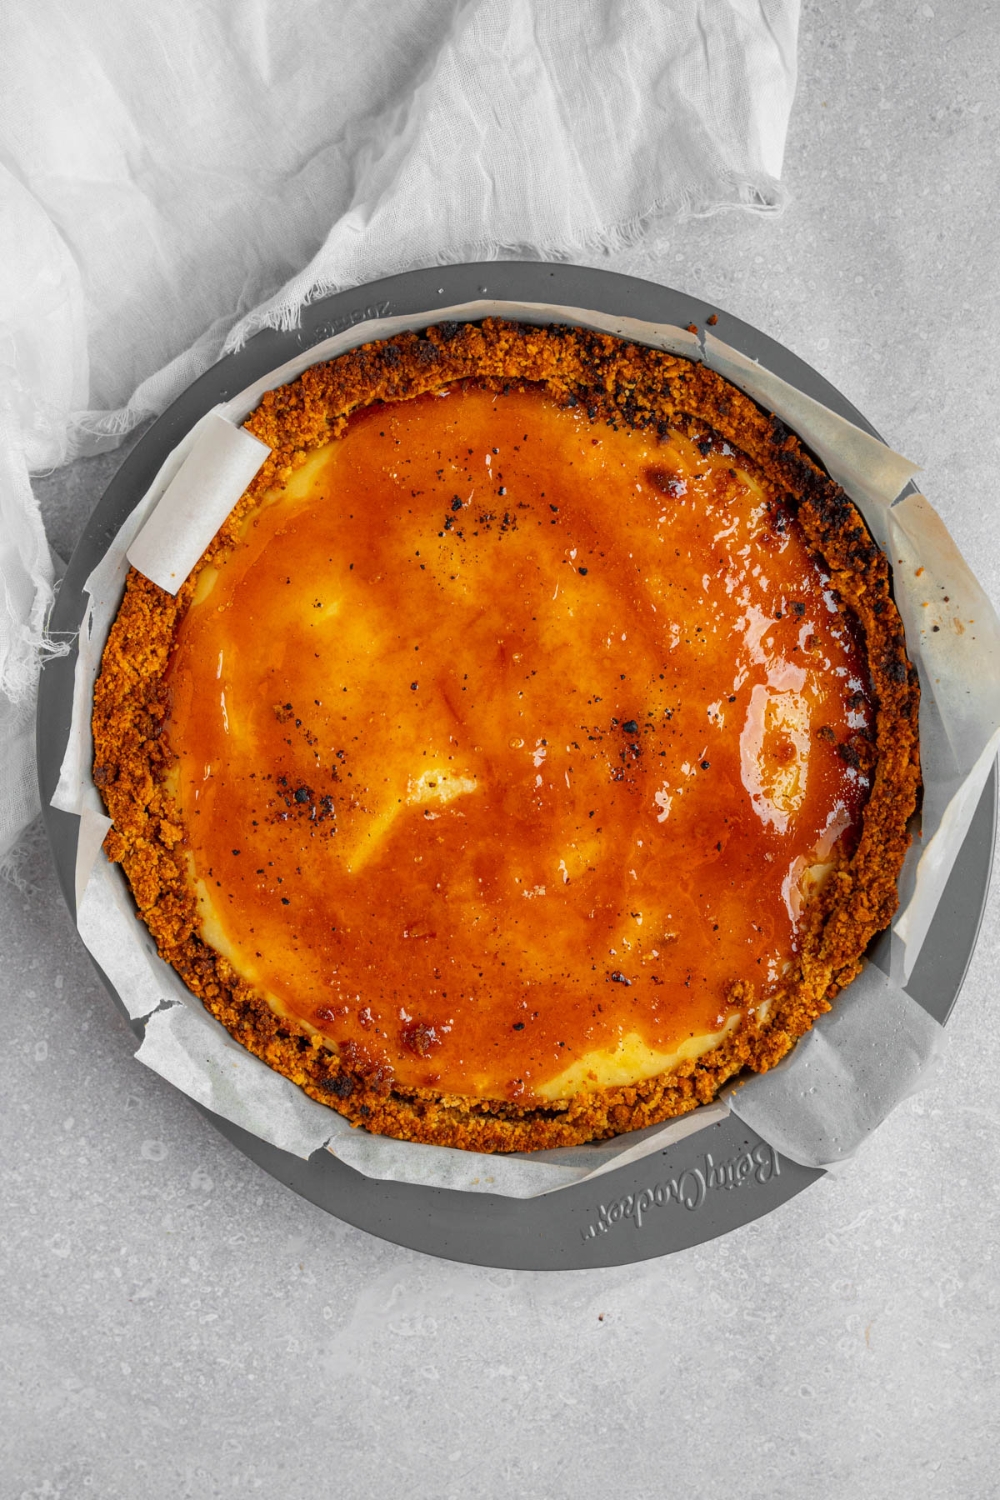
Step 5: Caramelize the Sugar Topping
Remove cheesecake from pan. Sprinkle an even layer of sugar on top. Using a kitchen torch on low, caramelize the sugar in slow, circular motions until evenly golden. Allow sugar to harden briefly, then slice and serve.
My Expert Tips For Making The Perfect Creme Brulee Cheesecake
- Avoid Overmixing: Gently mix ingredients once eggs are added to prevent excess air, reducing the risk of cracks.
- Proper Cooling: Allow the cheesecake to cool gradually in the oven to minimize cracks and ensure a smooth texture.
- Water Bath Method: Don't skip the water bath—it ensures even baking and prevents cracks.
- Caramelizing Sugar: Move the kitchen torch continuously to evenly caramelize without burning the sugar.
- Fresh Ingredients: Always use room-temperature cream cheese and eggs for the smoothest cheesecake texture.
FAQ's About This Creme Brulee Cheesecake Recipe
How do I prevent cracks in my cheesecake?
The water bath, gentle mixing, and gradual cooling method help prevent cracks. Avoid sudden temperature changes during baking and cooling.
Can I caramelize the sugar without a kitchen torch?
Yes! Broil the cheesecake briefly under your oven's broiler, watching carefully to prevent burning. It takes only a few minutes, and the sugar should caramelize nicely.
How should I store creme brulee cheesecake leftovers?
Store leftovers covered in the refrigerator for up to 4 days. If the caramelized top softens, briefly re-torch it on a low setting to restore crunch.
Can creme brulee cheesecake be frozen?
You can freeze cheesecake without the sugar topping. Wrap tightly in plastic wrap and foil, freeze for up to 2 months, and thaw overnight in the refrigerator. Add and caramelize sugar topping just before serving.
What type of cheesecake pan works best?
A deep 8- or 9-inch springform pan is ideal because it makes cheesecake removal effortless, maintaining the dessert's beautiful presentation.
My Final Thoughts on This Creme Brulee Cheesecake Recipe
This creme brulee cheesecake is a standout dessert. I mean, how can you beat a creamy, dreamy cheesecake with a crisp crunchy caramelized sugar topping?!
It's perfect for holidays, celebrations, or anytime you want to indulge in some yummy cheesecake deliciousness. It guarantees compliments from everyone lucky enough to taste it. Give it a try, and prepare to fall in love!

More Dessert Recipes to Try Next
Enjoyed this creme brulee cheesecake? We've got plenty of other yummy dessert recipes for you to try next!
- 3 ingredient cheesecake
- No bake cheesecake balls
- Deviled strawberries
- Crepe cake
- Bisquick strawberry cheesecake
Easy Creme Brulee Cheesecake Recipe
This creme brulee cheesecake perfectly combines two classic desserts into one irresistible treat! A rich, creamy cheesecake filling with a crisp, caramelized sugar topping sits atop a buttery honey graham cracker crust. Elegant enough for special occasions yet simple enough to whip up at home, this creme brulee cheesecake is sure to impress every time.
Ingredients
- 1 ½ cups graham cracker crumbs
- ¼ cup honey
- 6 tablespoon unsalted butter melted
- 907 grams cream cheese, softened
- 1 ⅓ cup granulated sugar
- ½ cup sour cream
- 4 large eggs room temp
- ½ tablespoon vanilla extract
- ½ teaspoon salt
- ¼ cup granulated sugar
Instructions
1. Preheat your oven to 325°F. Pulse the graham crackers in a food processor until you get fine crumbs, then add the honey and pulse again to combine.
2. Melt the butter and stir it into the crumb mixture until evenly moistened. Press the mixture firmly into the bottom of an 8- or 9-inch cheesecake pan — if you're using an 8-inch springform pan, make sure it’s deep enough.
3. Bake the crust for about 10 minutes, then remove it from the oven and let it cool completely.
4. While the crust cools, lightly grease the sides of the cheesecake pan to help the cheesecake release cleanly later.
5. In a large bowl, beat the cream cheese with a mixer on medium speed for about 3 minutes until it’s creamy and smooth.
6. Add the granulated sugar along with the vanilla extract, and beat for another 2 minutes. Scrape down the sides and bottom of the bowl, then beat again for 30 seconds to make sure everything is combined.
7. Mix in the sour cream, scraping the bowl as needed to avoid lumps.
8. Then, add the eggs one at a time, mixing just until each is incorporated before adding the next. Be careful not to overmix once the eggs are in, as that can cause cracking. Stir in the salt briefly.
9. Pour the cheesecake batter over the cooled crust. Wrap the bottom of the pan with a few layers of foil to protect it, then place it inside a larger roasting pan.
10. Carefully pour hot water into the roasting pan to create a water bath — this step is key for a crack-free cheesecake.
10. Bake the cheesecake for 60 to 75 minutes; it should jiggle slightly in the center when you gently shake the pan, but the edges should look set.
11. Once it’s baked, turn the oven off and leave the cheesecake inside for another hour. After that, let it cool at room temperature without removing the springform ring, then refrigerate it for at least 6 hours to fully set.
12. When you’re ready to decorate, remove the cheesecake from the fridge and gently release it from the pan. Sprinkle an even layer of sugar over the top.
13. Using a kitchen torch on the lowest setting, slowly caramelize the sugar, moving the flame in circular motions and avoiding staying in one spot for too long. Let the caramelized sugar harden for a few minutes before slicing and serving.
14. If you have leftovers and the caramelized top softens, you can quickly re-torch the surface using a low setting to bring back some crunch — it won’t be quite as crisp as the first time, but it’ll still taste amazing.
Nutrition Information:
Yield:
8Serving Size:
1 SliceAmount Per Serving: Calories: 793Total Fat: 55gSaturated Fat: 31gTrans Fat: 0gUnsaturated Fat: 18gCholesterol: 239mgSodium: 616mgCarbohydrates: 68gFiber: 1gSugar: 57gProtein: 12g
Leave a Reply