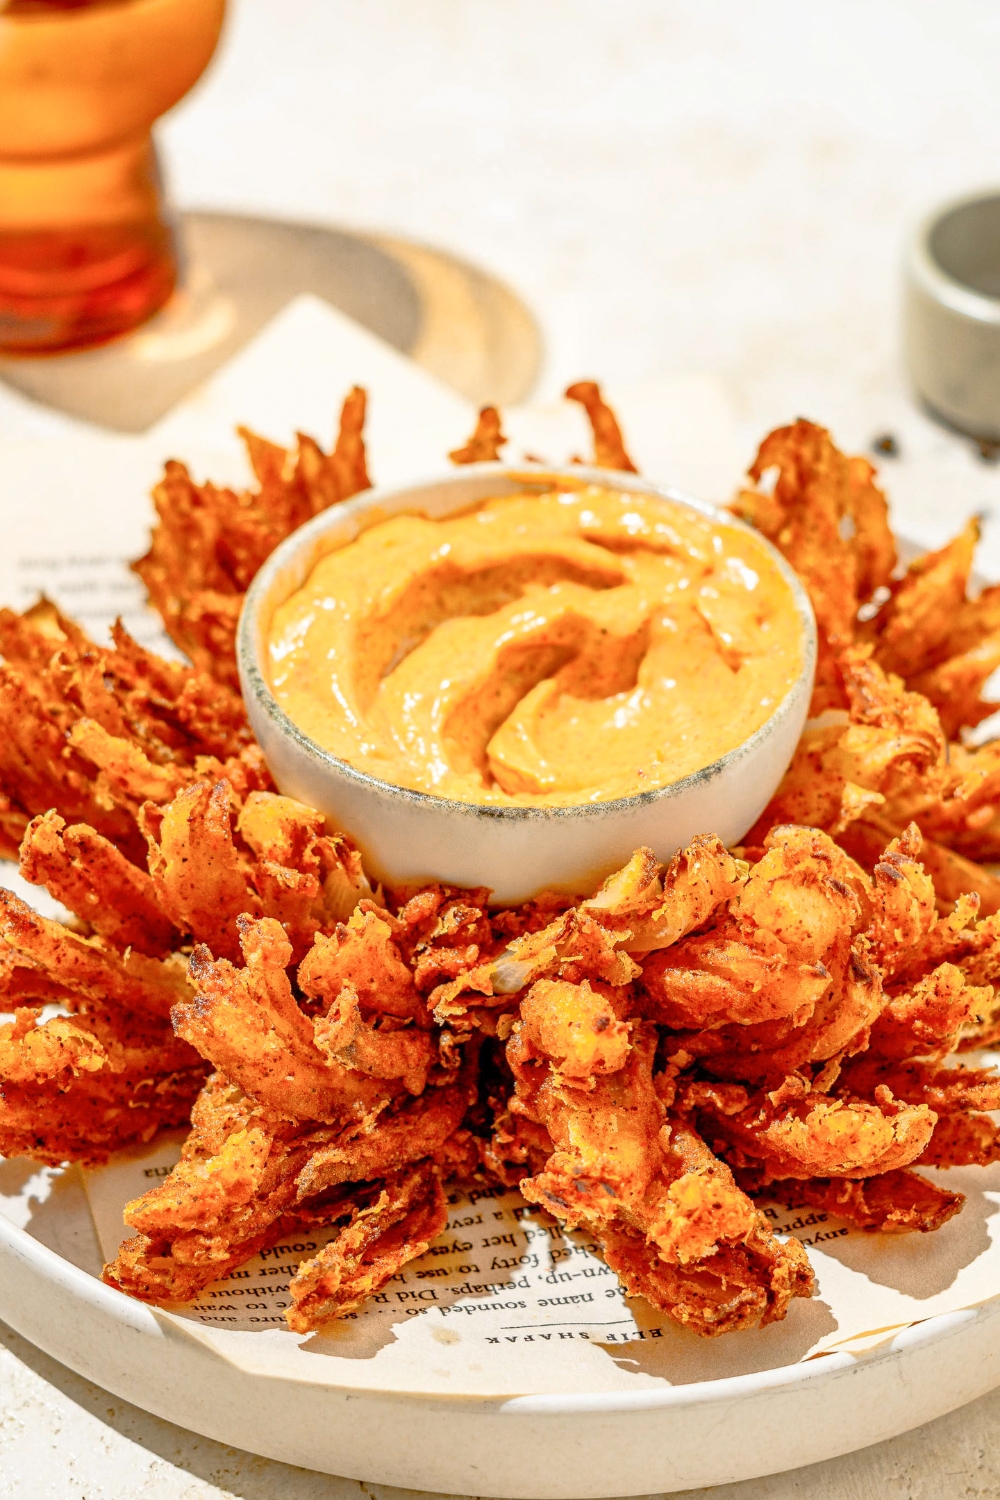
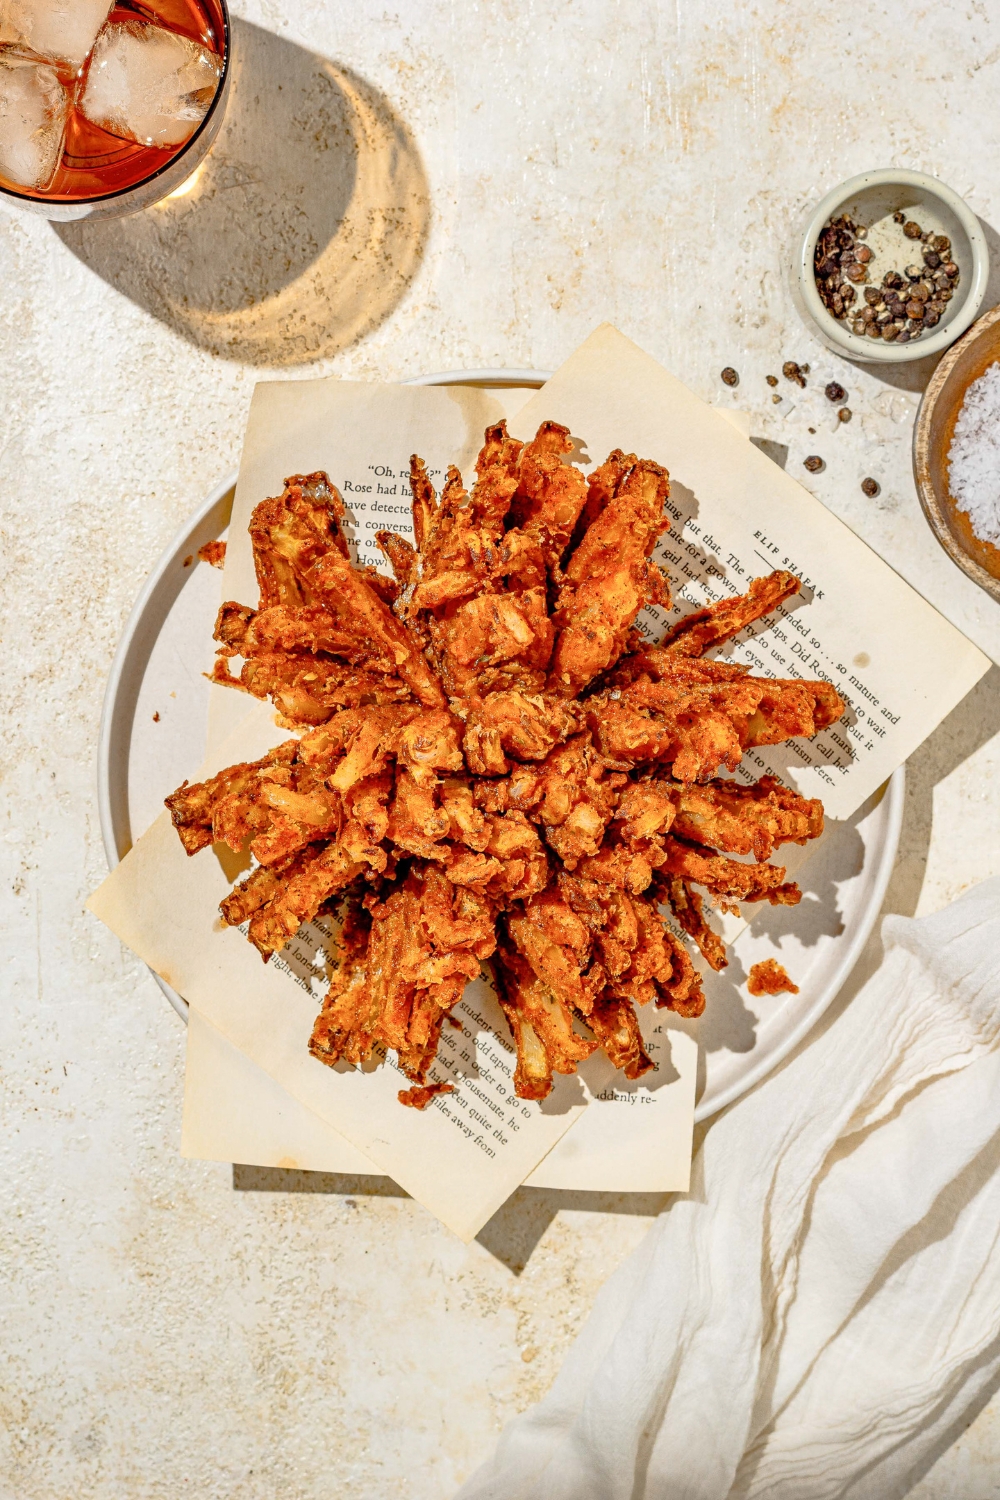
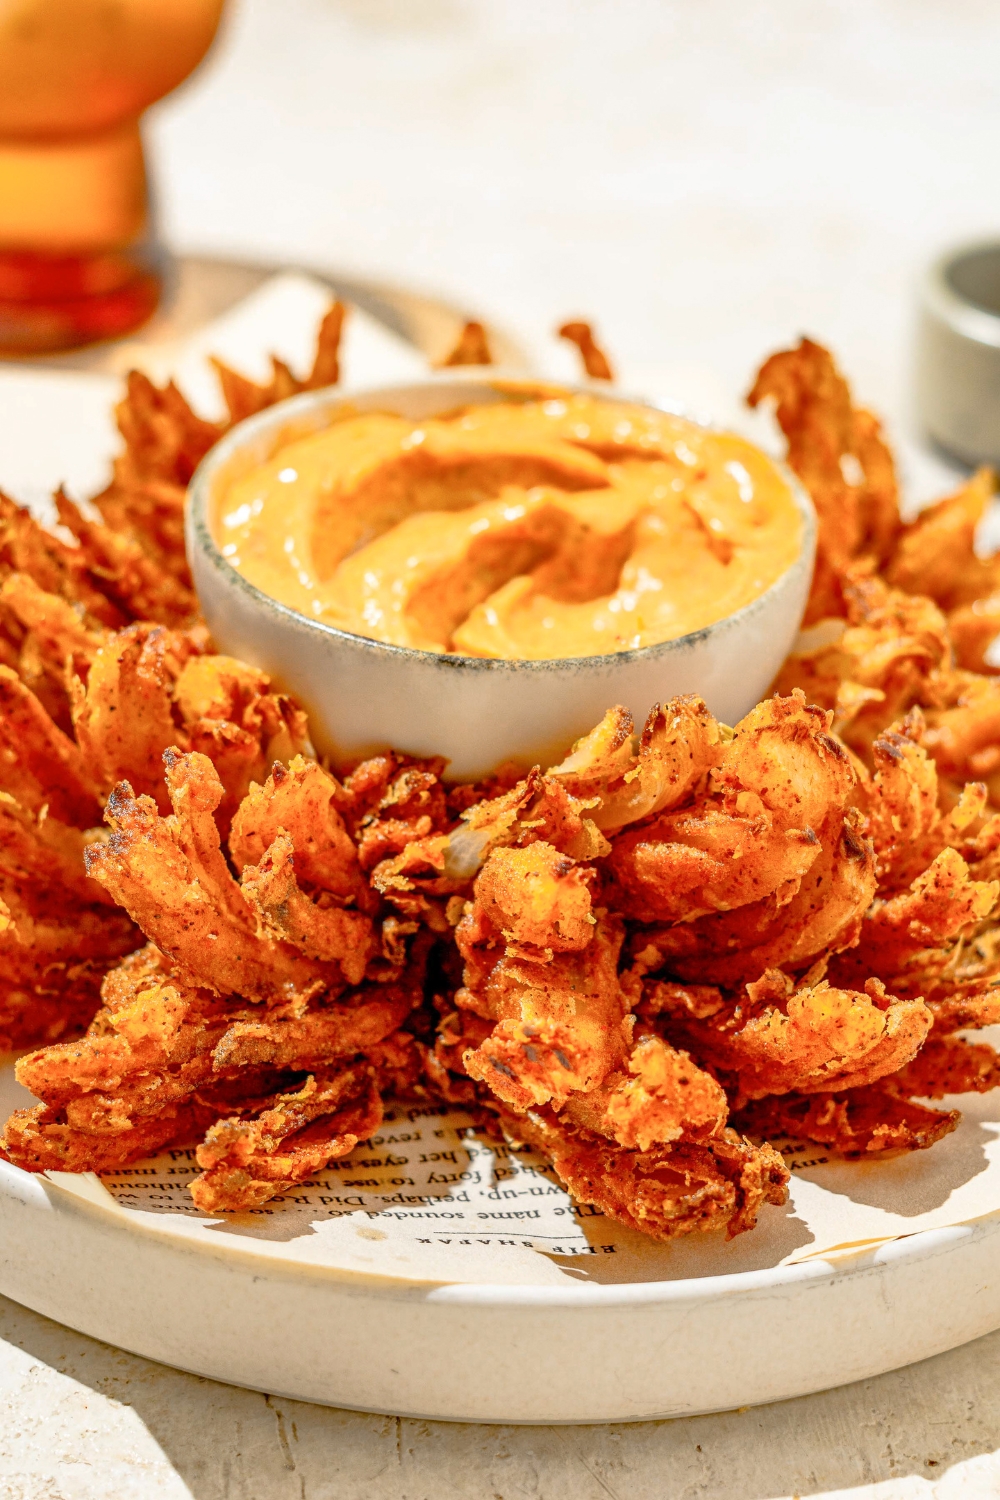
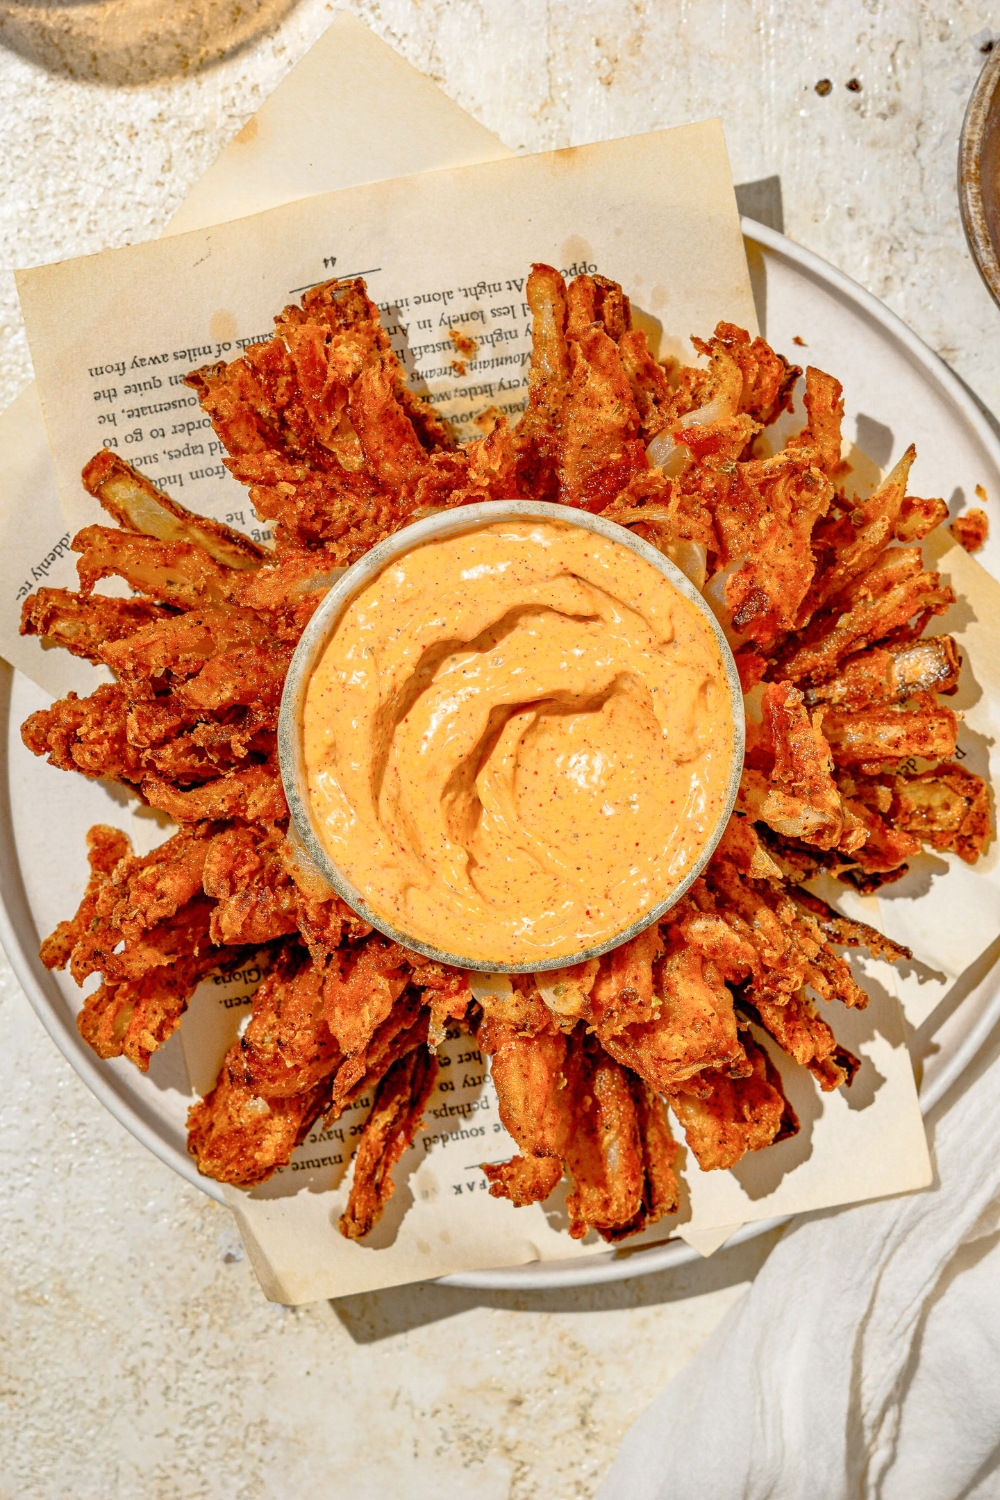
This Outback Bloomin’ Onion copycat gives you the iconic restaurant appetizer at home, extra crispy, pull-apart, and loaded with bold seasoning. A sweet onion gets sliced into “petals,” coated in a seasoned flour mix, and fried until golden and crunchy all the way around. Serve it hot with that classic Bloomin’ Onion sauce, and it’s game-night, party, and “we’re doing appetizers for dinner” perfection.
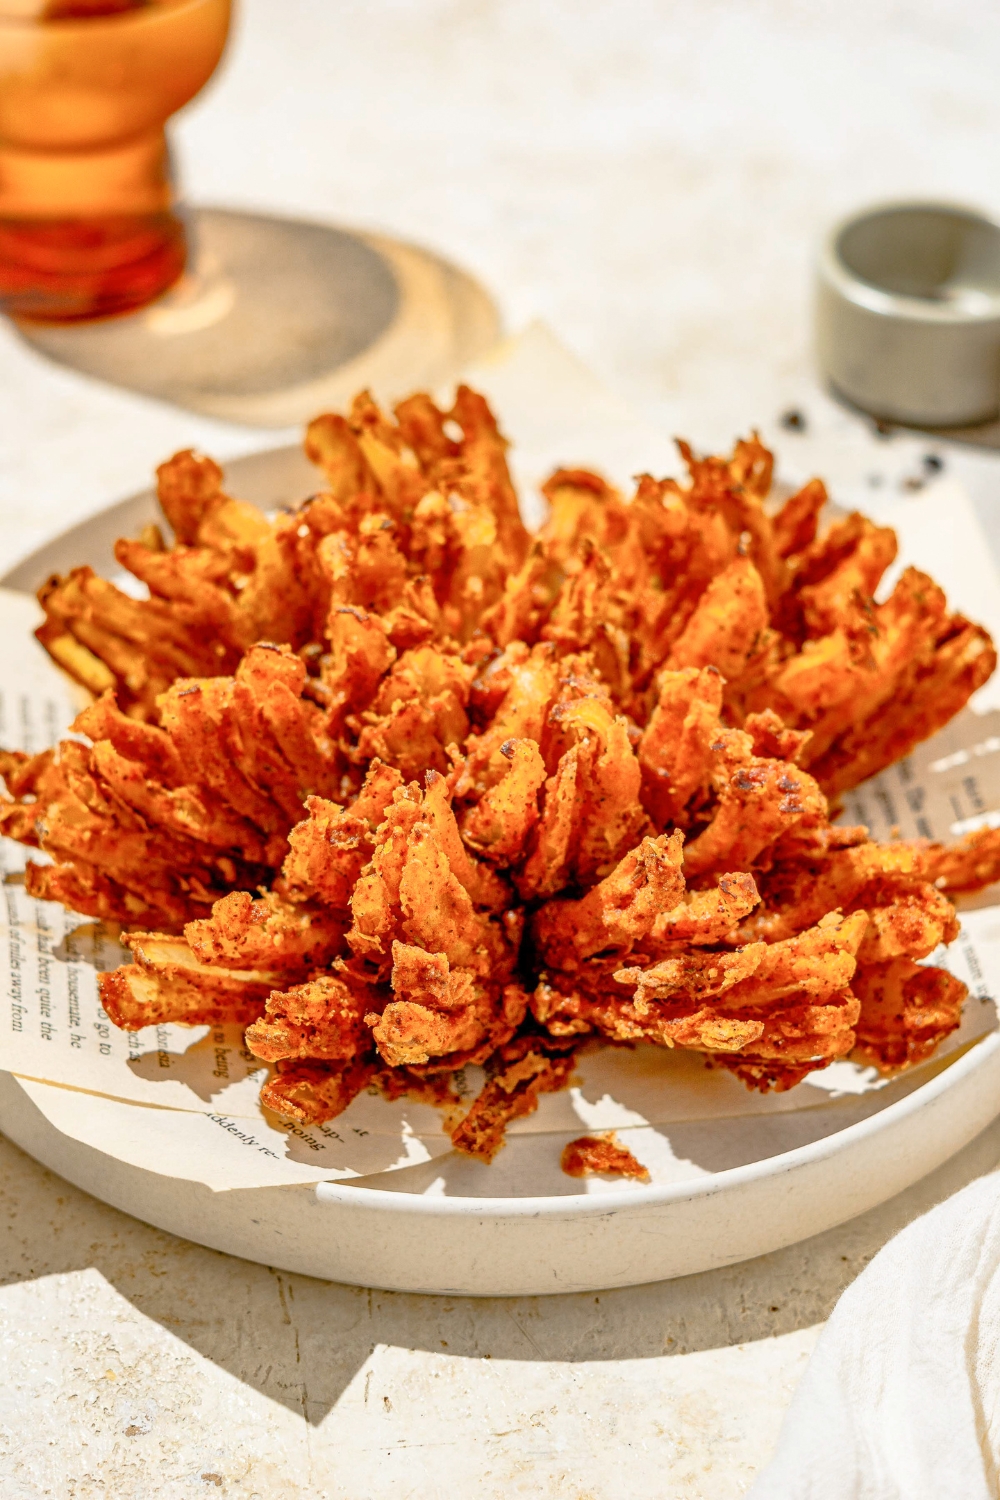
Table of Contents
Why You'll Love This Outback Bloomin Onion
Outback was one of those places I went to a lot as a kid with my grandma. Most of my food memories are tied to her because she loved going out to eat. I was always the boring one, steak and mashed potatoes, while she was all about the Bloomin’ Onion. I never tried it back then, but I finally had one a few weeks ago and immediately understood why she loved it so much.
What I love about making it at home is you get the same dramatic “wow” presentation and that addictively crispy texture, but it’s fresher, and you can season it exactly how you like. The onion stays tender in the middle, the petals turn super crunchy, and every bite has that bold, savory flavor you expect. And when you dip it in the sauce, that’s the moment you remember why it became famous in the first place.
Ingredients You’ll Need
- 2 large sweet onions
- 2½ cups all-purpose flour
- 1 tablespoon cayenne pepper
- 2 tablespoon paprika
- 1 teaspoon dried oregano
- 1 teaspoon cumin
- ½ teaspoon black pepper
- 1 teaspoon kosher salt
- 2 large eggs
- 1 cup whole milk
- Vegetable oil, for frying (enough to submerge the onion)

How To Make a Bloomin’ Onion
Step 1: Prep the Onions
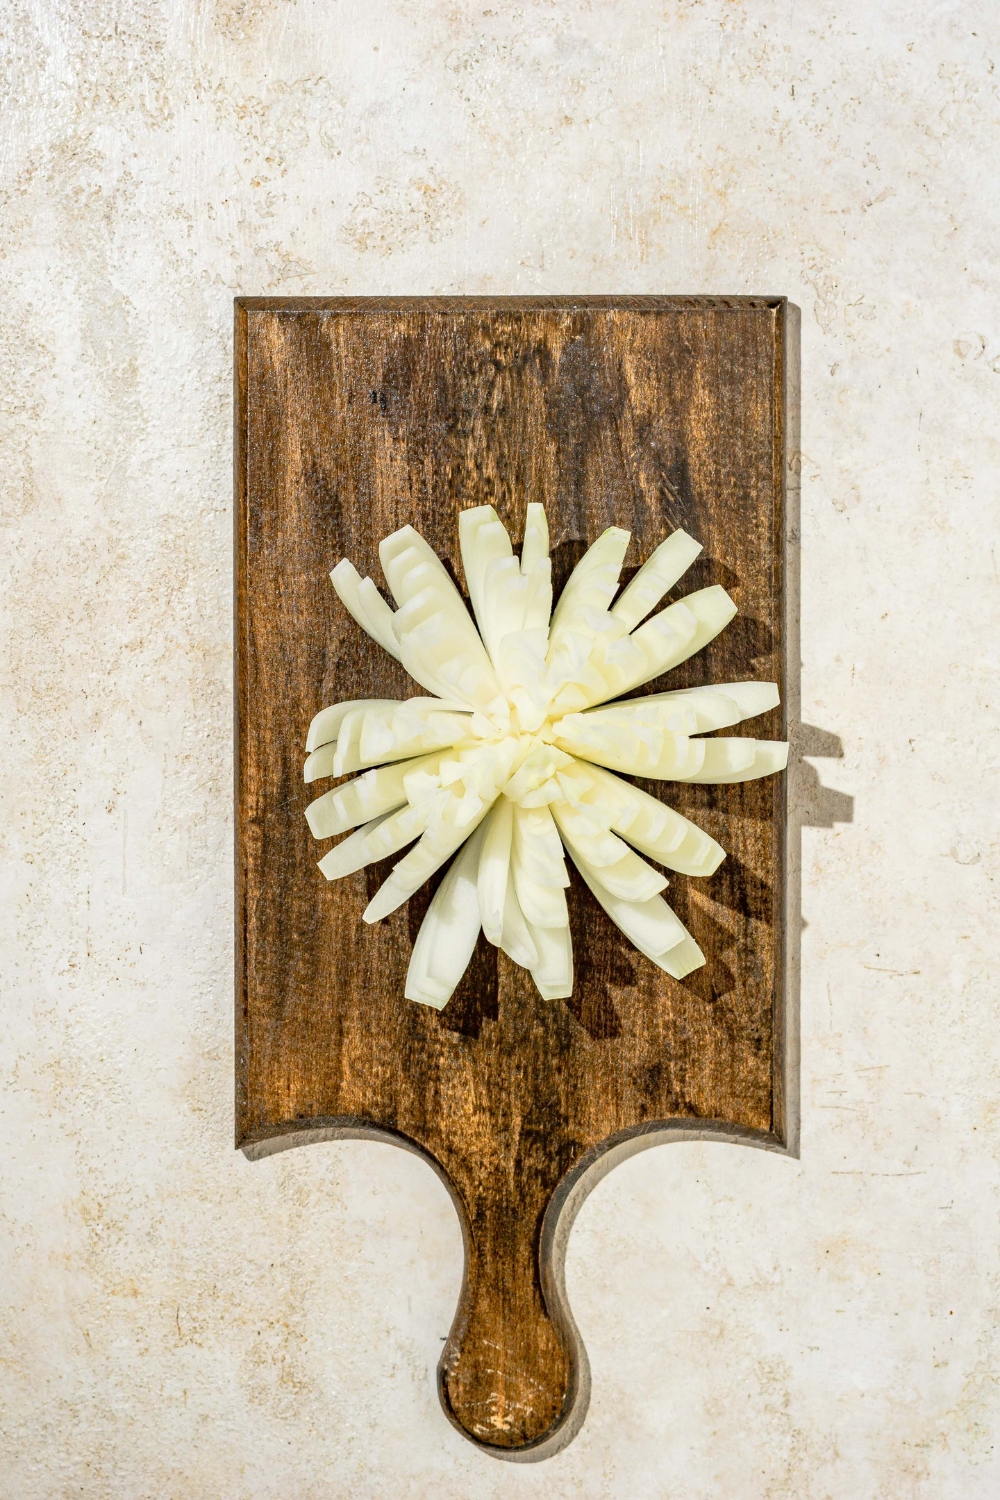
Peel onions and trim the tops. Place each onion cut-side down. Starting ½ inch from the root, slice downward into quarters. Then continue slicing between each section until you have 12–16 petals. Gently flip and separate layers with your fingers to “bloom” the onion.
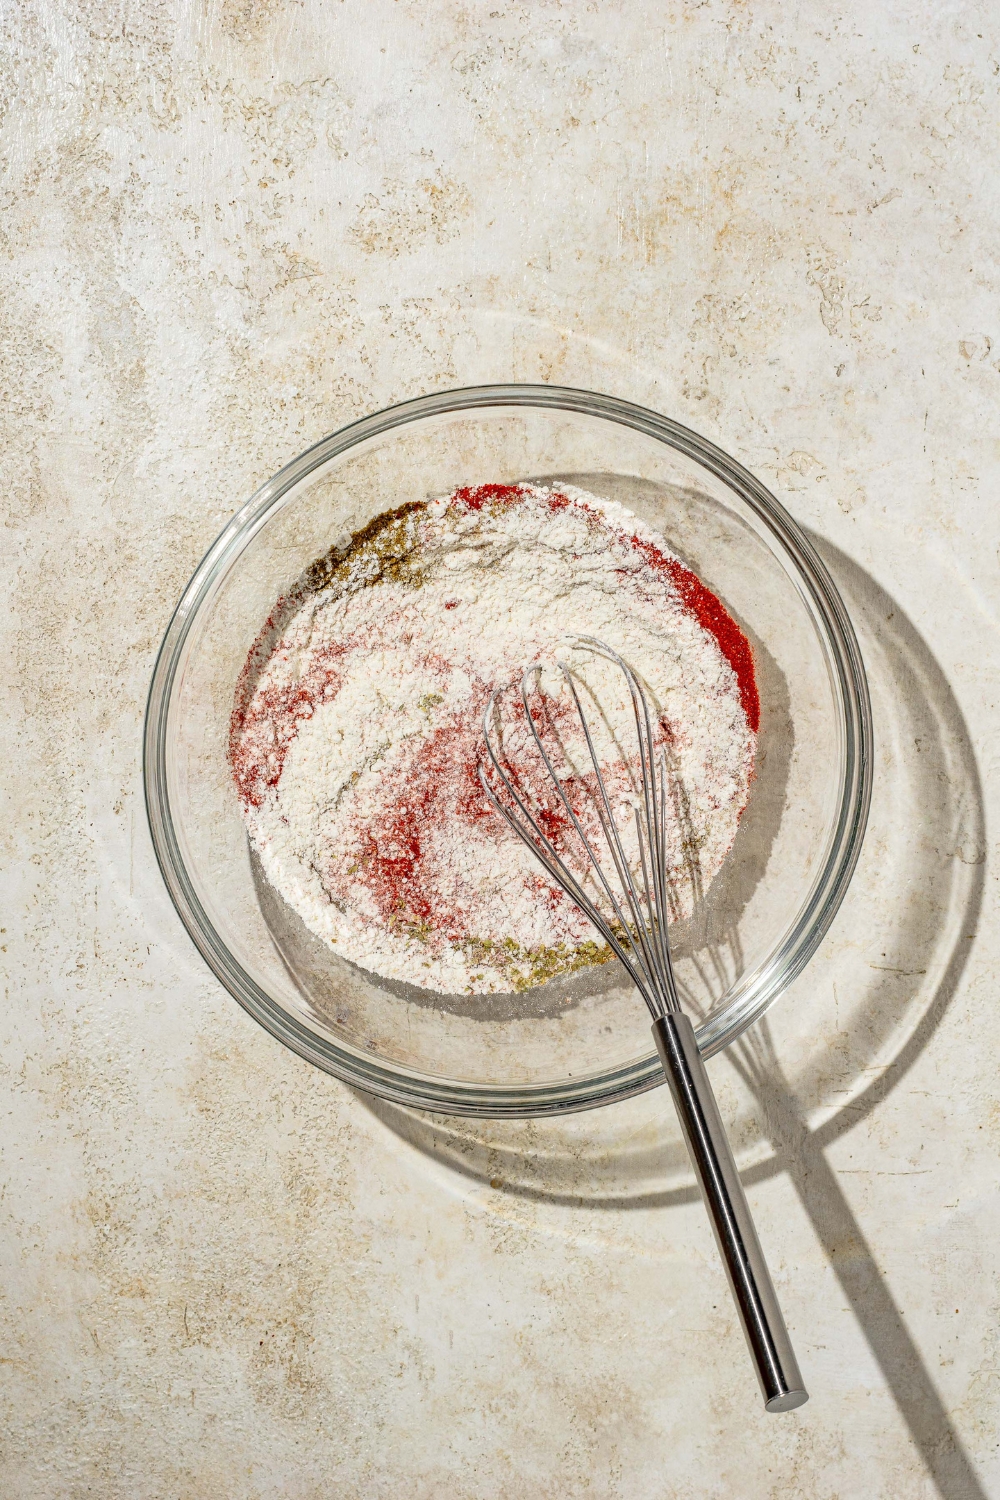
Step 2: Make the Seasoned Flour
In a large bowl, mix flour, cayenne, paprika, oregano, cumin, black pepper, and salt thoroughly.
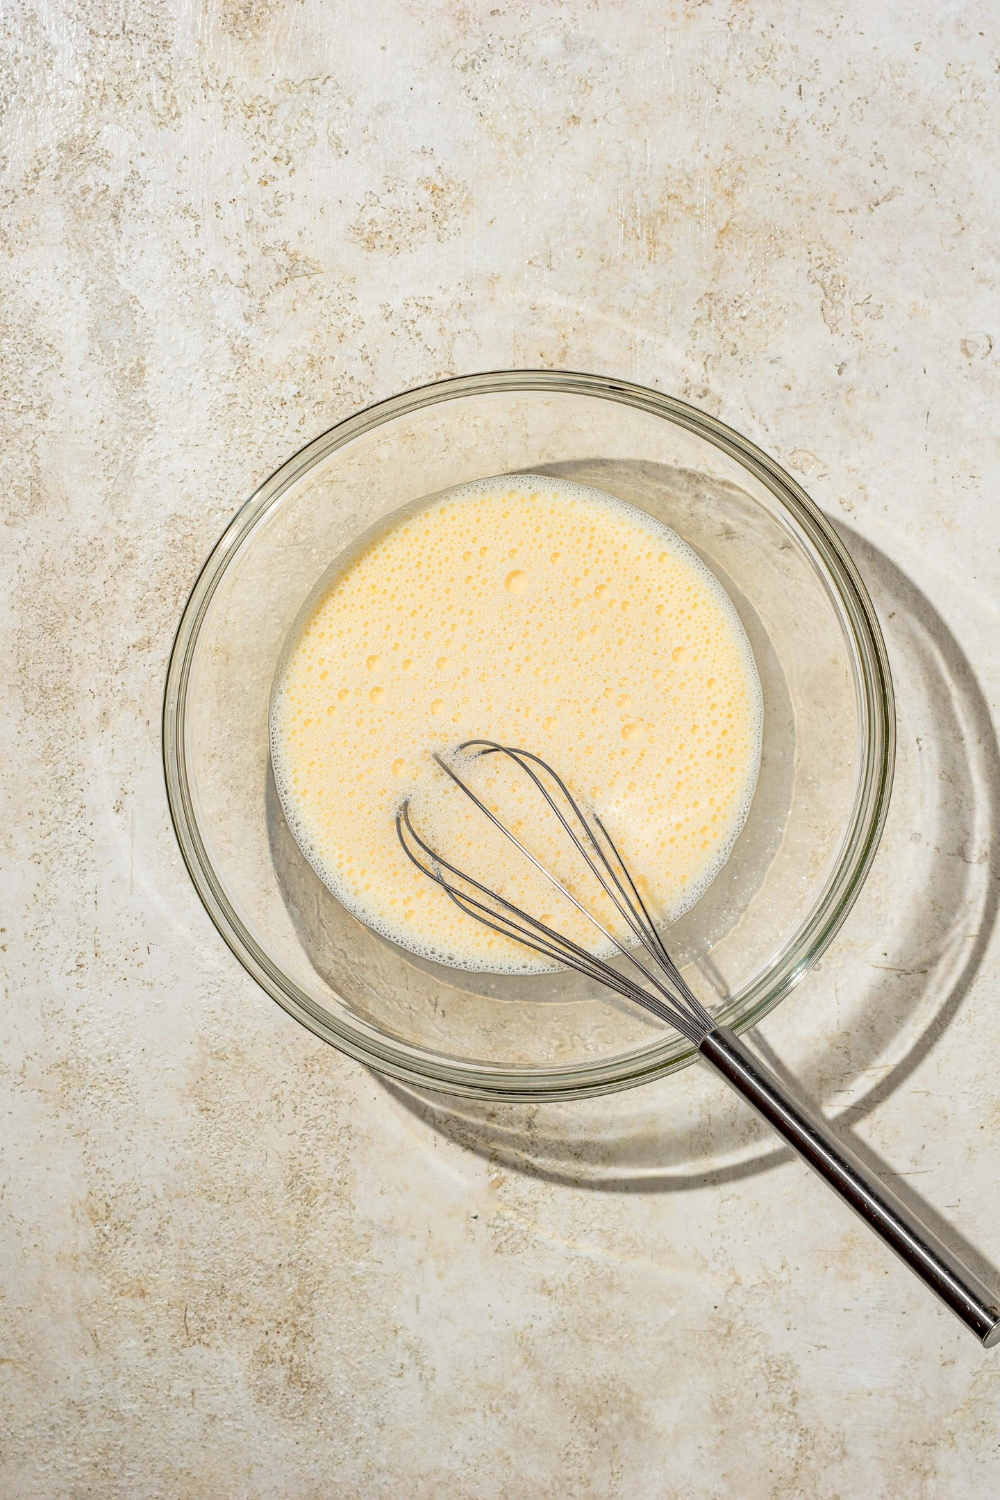
Step 3: Make the Egg Wash
In another bowl, beat eggs and mix in milk until smooth.
Step 4: Dredge the Onions
Coat each onion thoroughly in the seasoned flour—make sure to get flour deep between the petals. Dip into the egg wash to coat completely.
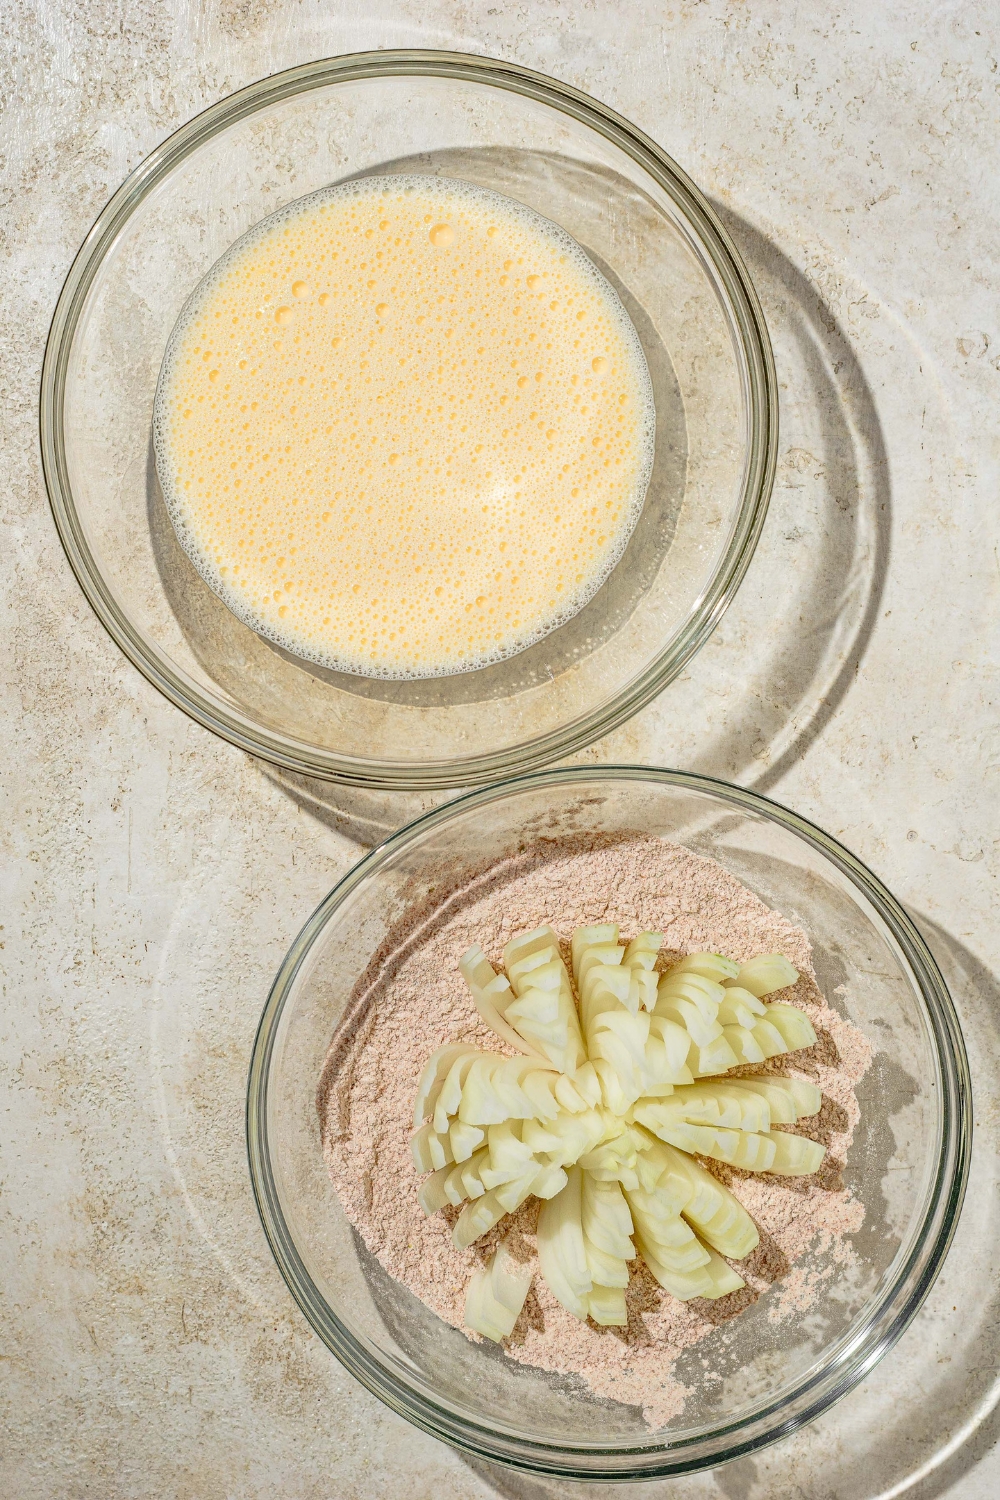
Return to the seasoned flour for a second coating to ensure maximum crispiness.
Repeat with the second onion.

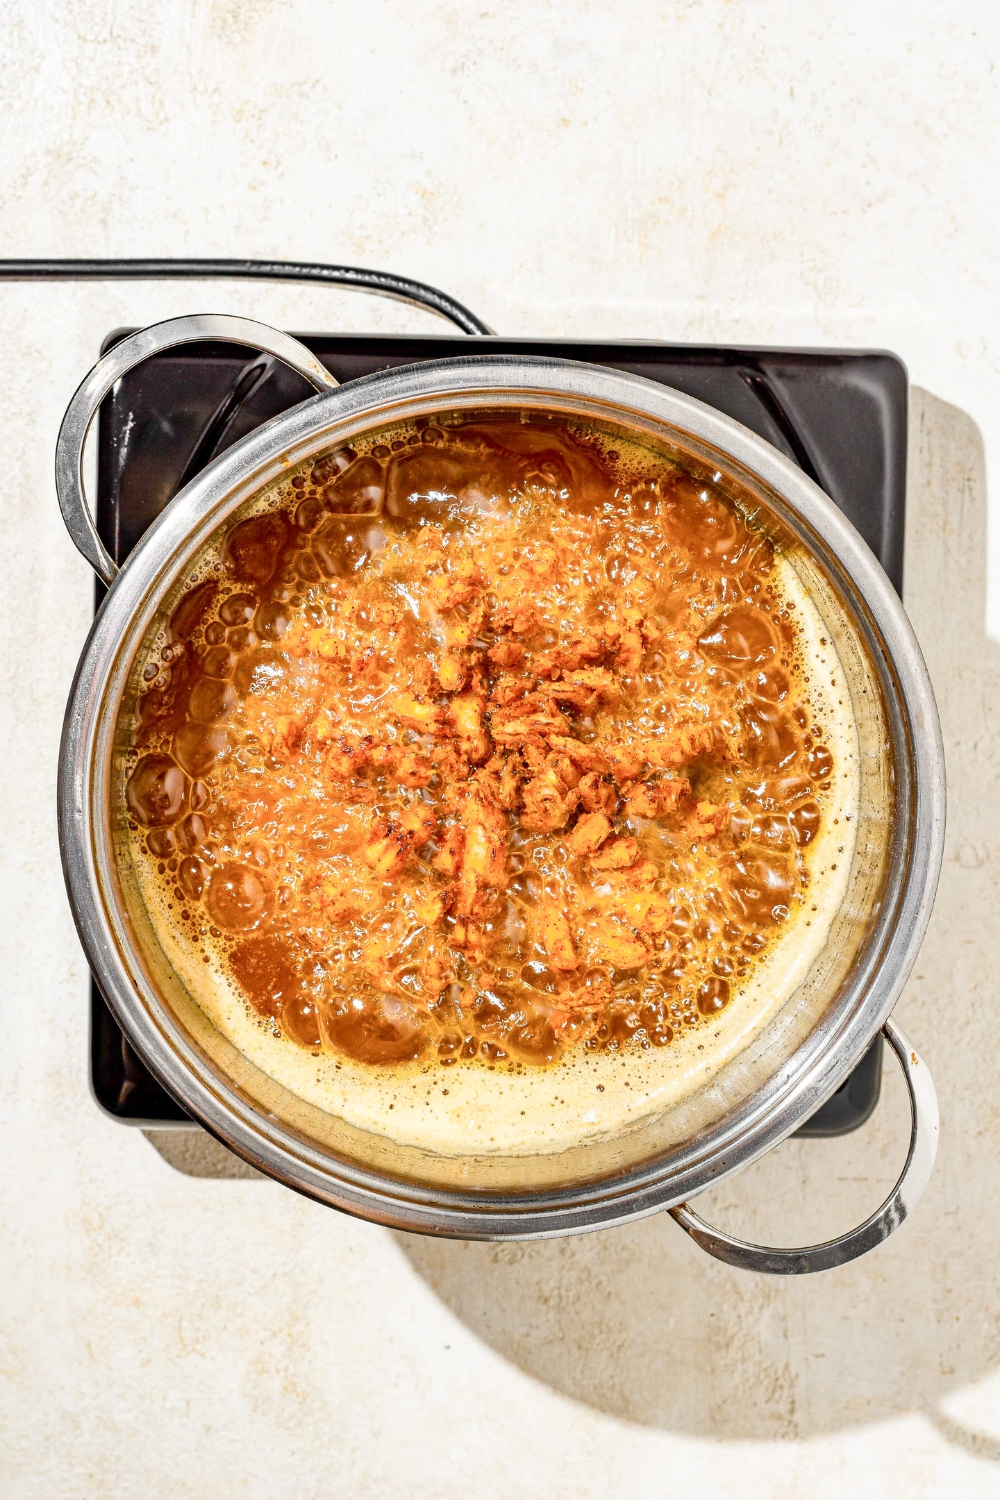
Step 5: Fry
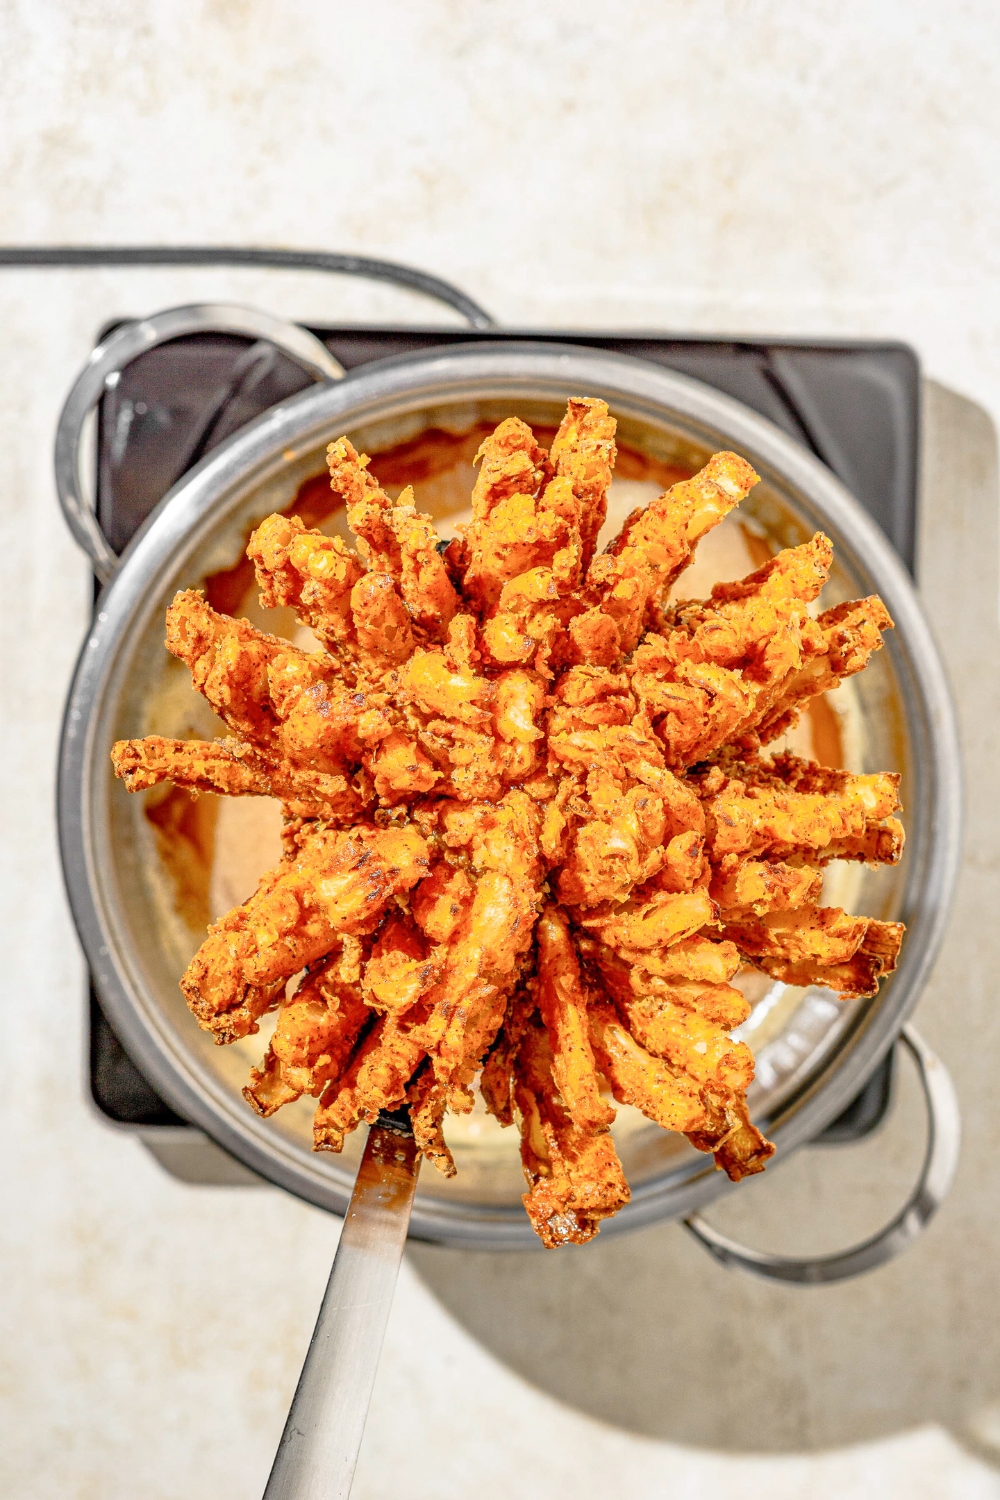
Heat oil to 375°F (190°C) in a deep fryer or heavy pot. Carefully lower one onion, root side down, into the oil. Fry for about 10 minutes, or until deeply golden and crispy.
Remove and drain on paper towels. Repeat with the second onion.
Step 6: Serve
Let cool slightly, then serve warm with your favorite dipping sauce (Bloomin’ Onion sauce, spicy mayo, or ranch).
Expert Tips To Make The Best Bloomin Onion
- Pick the right onion every time: Large sweet onions like Vidalia or Walla Walla are the move because they’re mild, naturally sweet, and they soften nicely in the center while the outside gets crisp. Try to choose a heavy onion with tight layers, it fries better and holds its “bloom” shape.
- Trim and slice like it’s a technique, not a guess: Cut the top off and peel the outer papery layers, then make sure the root stays intact because it’s what holds the onion together. When you slice, keep your cuts evenly spaced and stop before you hit the root so you don’t accidentally separate the petals. Uneven cuts lead to uneven frying, some petals will burn while others stay pale.
- Help the onion “bloom” before breading: After slicing, gently open the petals with your fingers so the coating can get down between layers. If your onion is stubborn, soak it in cold water for 10–15 minutes to relax the layers, then drain and pat it very dry. The drier it is, the better the coating sticks.
- Dry the onion well, moisture kills crunch: If the onion is wet from rinsing or soaking, the flour turns gummy and slides off. Pat it dry thoroughly, including between the layers, before dredging.
- Season every layer of the coating, not just the outside: The bloomin’ onion tastes great because the seasoning is in the flour, not sprinkled on at the end. If the flour is bland, the whole onion tastes bland. Mix your seasonings into the flour well so every petal gets flavor.
- Double dredge for that thick Outback-style crust: The classic crunch comes from flour, egg, then flour. Don’t rush the second flour coating. Press the flour gently into the petals so it clings, and make sure the inside layers get coated too. If you only dust the outside, you’ll miss the best bites.
- Shake off excess flour so it fries clean: Too much loose flour falls into the oil and burns, which can make the onion taste bitter and leave dark specks on the crust. After each dredge, give it a gentle shake, especially underneath.
- Let the breading set before frying: After dredging, let the onion sit for 5–10 minutes on a rack. This helps the coating adhere so it doesn’t slide off in the oil and it creates a crispier crust once it hits the fryer.
- Oil temperature is everything, keep it at 375°F: If the oil is too cool, the coating absorbs oil and turns greasy. If it’s too hot, the outside browns before the onion softens. Use a thermometer if you can, and let the oil return to temperature between batches.
- Use a deep, heavy pot for even frying and less splatter: A Dutch oven or deep pot holds heat better and keeps the onion submerged. If the onion isn’t fully submerged, rotate it gently during frying so every side browns evenly.
- Lower it in carefully and fry “cut side down” first: Lowering the onion slowly prevents oil splash and helps the petals keep their shape. Starting cut side down helps the petals open and sets the crust where it matters most.
- Know what “done” looks like: You want a deep golden brown crust, not pale tan. The petals should be crisp and the center onion should be tender. If the crust is browning too fast, your oil is too hot. If it’s taking forever and looks oily, your oil is too cool.
- Drain properly so it stays crispy: A wire rack is best because air can circulate and steam doesn’t soften the bottom. Paper towels work, but the underside can get steamy and lose crunch faster.
- Rest 3–5 minutes before serving: This helps the crust set and makes it easier to pull apart without burning your fingers. It also keeps the coating from flaking off when you start dipping.
- Sauce pairing makes the whole thing: The Bloomin’ Onion sauce is the classic, but Cajun mayo, remoulade, chipotle ranch, or spicy mayo all work. Serve the sauce cold next to the hot onion for the best contrast.
- Make-ahead tip for parties: You can slice and bloom the onion ahead of time, then keep it covered in the fridge. Bread and fry right before serving for maximum crunch. If you bread too early, the coating can get damp and won’t crisp as well.
Bloomin’ Onion FAQs
My Final Thoughts
This copycat Outback Bloomin’ Onion is a show-stopping appetizer. It's crispy, flavorful, and unbelievably satisfying. With its seasoned flour crust and tender onion petals, it tastes just like the restaurant version but even fresher. Serve with the Outback Bloomin onion dipping sauce and watch it disappear fast!
Copycat Recipes To Try Next
- Outback mac and cheese
- Five Guys French fries
- Garlic parmesan wings
- Chick-Fil-A chicken nuggets
- Louisiana voodoo fries
Outback Bloomin Onion

This Outback Bloomin’ Onion copycat gives you the iconic restaurant appetizer at home, extra crispy, pull-apart, and loaded with bold seasoning. A sweet onion gets sliced into “petals,” coated in a seasoned flour mix, and fried until golden and crunchy all the way around. Serve it hot with that classic Bloomin’ Onion sauce, and it’s game-night, party, and “we’re doing appetizers for dinner” perfection.
Ingredients
- 2 large sweet onions
- 2 ½ cups all-purpose flour
- 1 tablespoon cayenne pepper
- 2 tablespoon paprika
- 1 teaspoon dried oregano
- 1 teaspoon cumin
- ½ teaspoon black pepper
- 1 teaspoon kosher salt
- 2 eggs
- 1 cup whole milk
- vegetable oil, for frying (enough to cover the onion while frying)
Instructions
1. Peel the outer skin off the onions and trim the tops. Place each onion cut side down, then starting about ½ inch from the root, slice downward to create four evenly spaced cuts.
2. Continue slicing between each section until you have 12–16 “petals.” Gently turn the onions over and separate the layers slightly to form the blooming shape.
3. In a large bowl, mix together the flour, cayenne pepper, paprika, oregano, cumin, black pepper, and kosher salt until fully combined.
4. In another bowl, beat the eggs and stir in the milk to make the egg wash.
5. To coat the onions, first dredge each one in the flour mixture, making sure to coat between all the petals. Next, dip the onion into the egg wash, coating evenly, then return it to the flour mixture for a second coating. Repeat the process for the second onion.
6. Heat vegetable oil in a deep fryer or large pot to 375°F (190°C). Using a slotted spoon, carefully lower one onion into the hot oil, root side down. Fry for about 10 minutes, or until golden brown and crispy. Remove and drain on paper towels, then repeat with the second onion.
7. Allow the onions to cool slightly before serving. Enjoy your crispy blooming onions with your favorite dipping sauce!
Nutrition Information:
Yield:
4Serving Size:
1Amount Per Serving: Calories: 696Total Fat: 7gSaturated Fat: 2gUnsaturated Fat: 5gCholesterol: 98mgSodium: 625mgCarbohydrates: 136gFiber: 9gSugar: 4gProtein: 24g
Leave a Reply